In this document:
Introduction
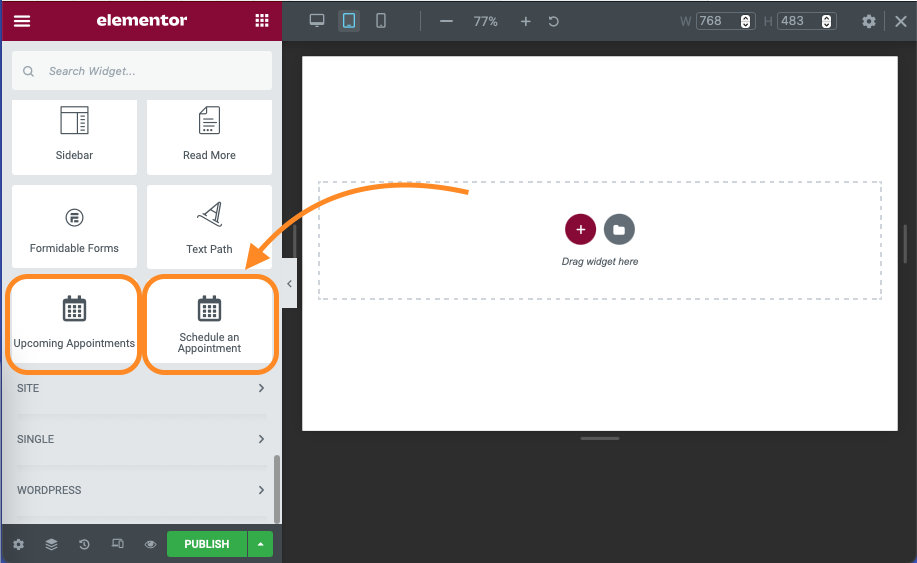
If you have both Simply Schedule Appointments and the Elementor Page Editor installed, when you’re editing a page with the WordPress Block Editor, you’ll see two modules to choose from:
- Schedule an Appointment and
- Upcoming Appointments.
To use Simply Schedule Appointments with Elementor, go through The Setup Wizard in SSA.
Using the Schedule an Appointment Module
This module displays your booking form and lets your users book an appointment:
Content
Under the Content header, you are presented with several options for modifying your booking calendar presentation.
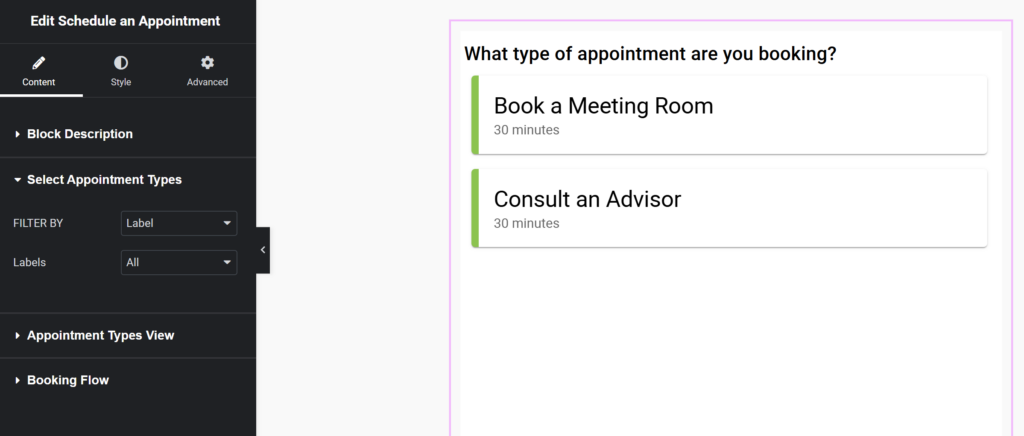
Select Appointment Types
You can choose to filter by Appointment Types or Labels.
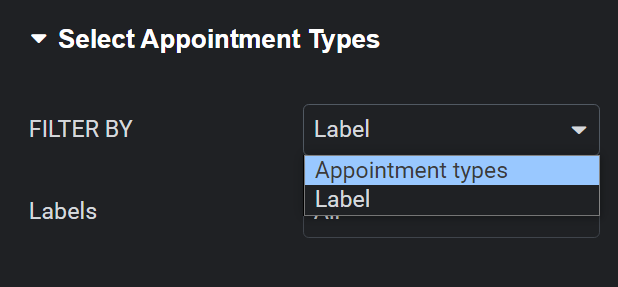
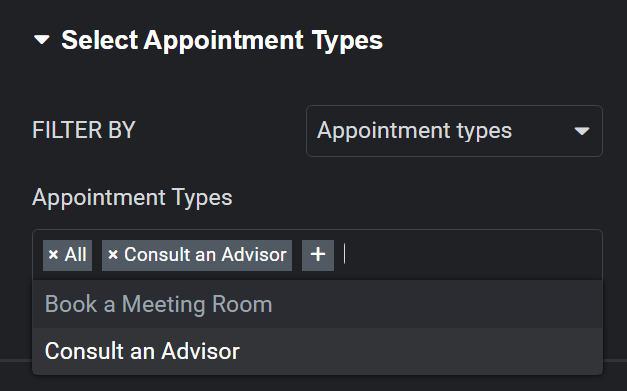
Appointment Types
To display certain Appointment Types, click the little + icon, which will prompt a dropdown presenting all the appointment types in the booking calendar. You can add as many appointment types as you want, giving you the flexibility to display specific ones as necessary.
Labels
If you have created labels for your appointment types, you can choose from the dropdown which group of appointment types you’d like to display.

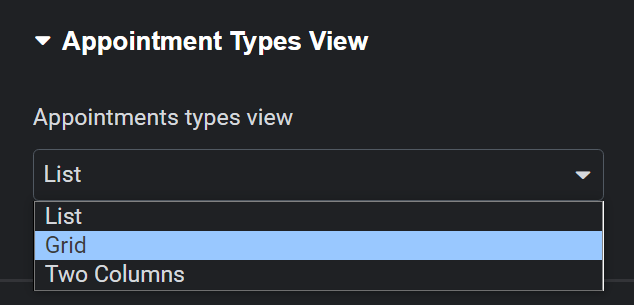
Appointment Types View
You can change how the appointment types listing displays on your page, whether it be in a List view, a Grid view, or a Two-Column View.
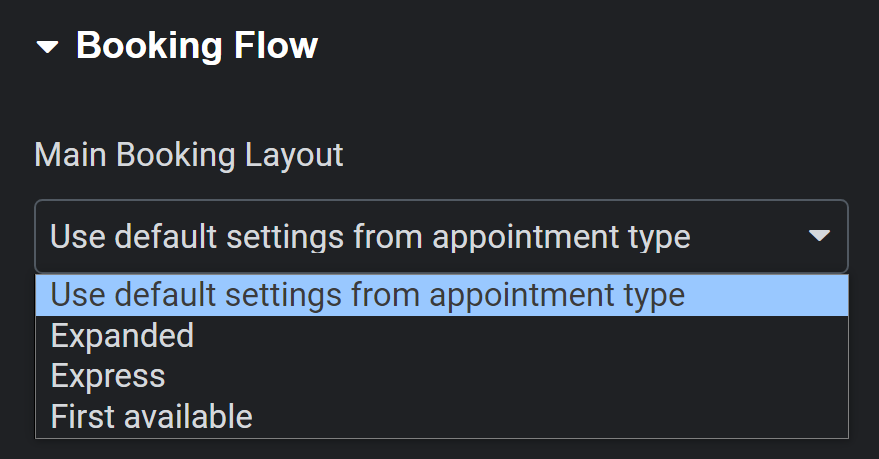
Booking Flow
Just like you can change the Booking Flow of the appointment type in its settings, you can adjust it from here as well. You’re able to change the Main Booking layout to use the default settings, or adjust it to use:
- Expanded
- Express
- First Available
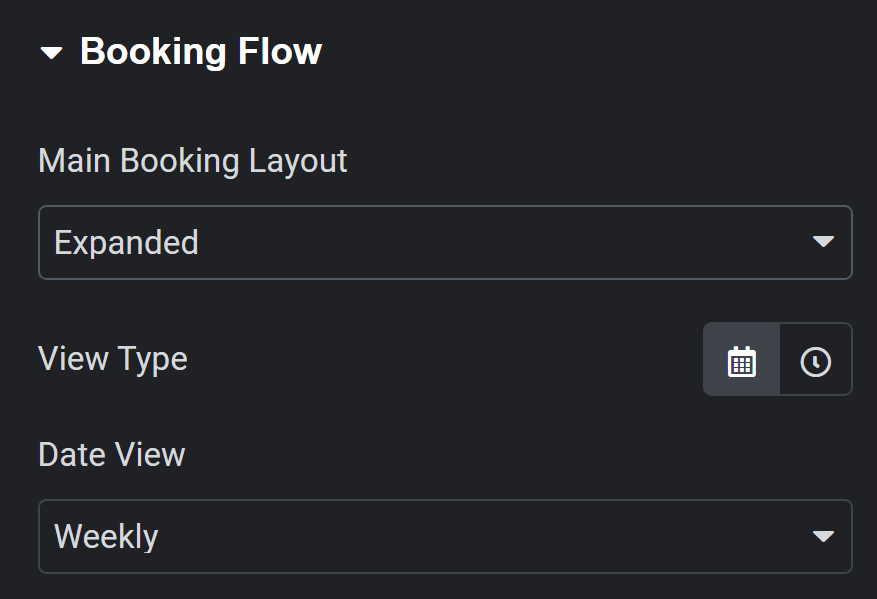
Expanded Booking Flow
The Expanded Booking Flow shows the Date Selection screen along with the Time Selection screen before reaching the final customer information screen in the booking form process.
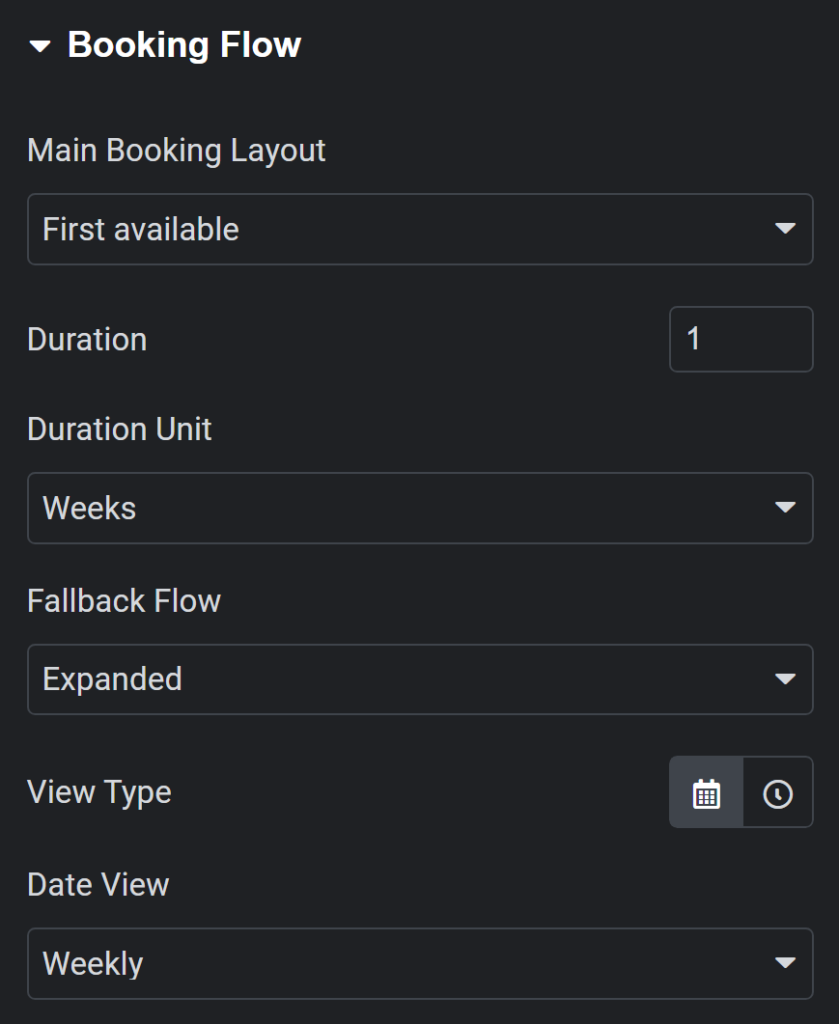
You are presented with a View Type button that allows you to switch between a Date View and Time View.
This lets you adjust the Date View to weekly, monthly, or only available dates. The Time View allows you to switch between the Time of Day columns or a Single Column.
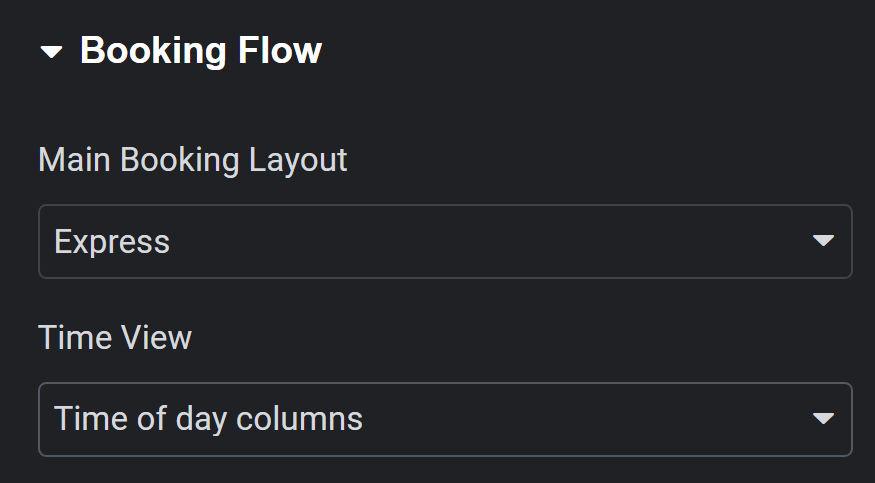
Express Booking Flow
The Express Booking Flow consists of a single view containing the Date and Time selection, all on the same view before reaching the customer information screen.
The Time View dropdown allows you to switch between the Time of Day columns or a Single Column.
First Available Booking Flow
The First Available Booking Flow begins by prompting the user to choose from the first available time slot within the pre-selected duration.
You can enter your duration and the duration unit from the dropdown. You can also provide your fallback flow here in case there are no time slots within the pre-selected duration or if the user decides to choose a different time slot.
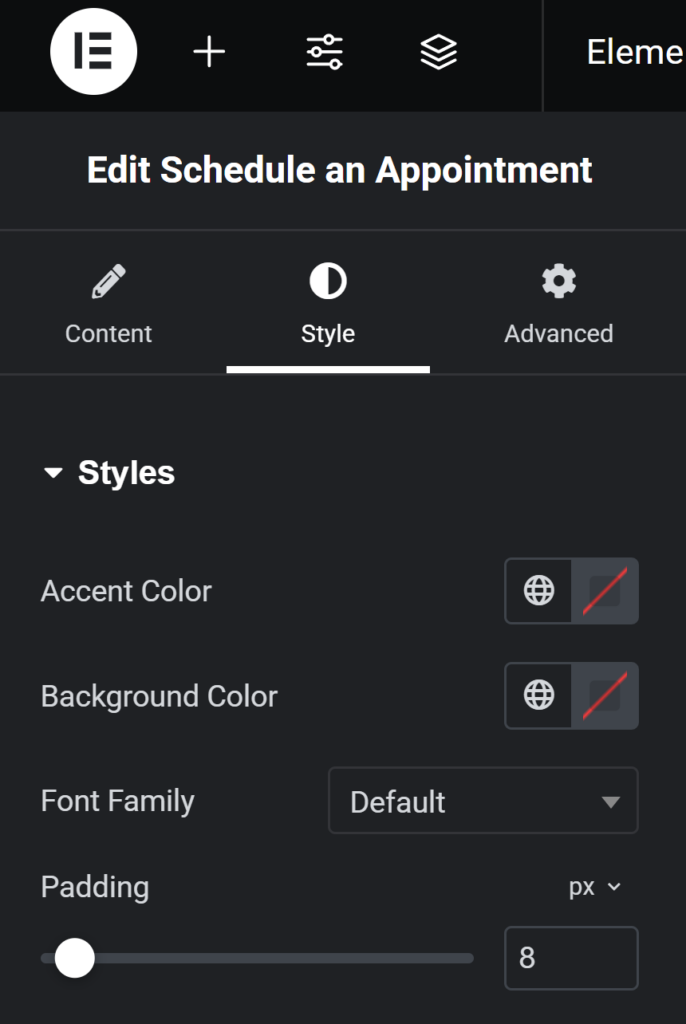
Style
Under the Style tab, you can adjust the Accent Color, Background Color, Font Family, and Padding of the Appointments widget.
Advanced
Under the Advanced tab, you can adjust several advanced design attributes of the widget, such as custom margins and padding, borders, mobile responsiveness, and Custom CSS.
To improve page load performance when the calendar appears below the fold, enable the Defer Loading toggle in the module settings. Learn more!
Using the Upcoming Appointments Module
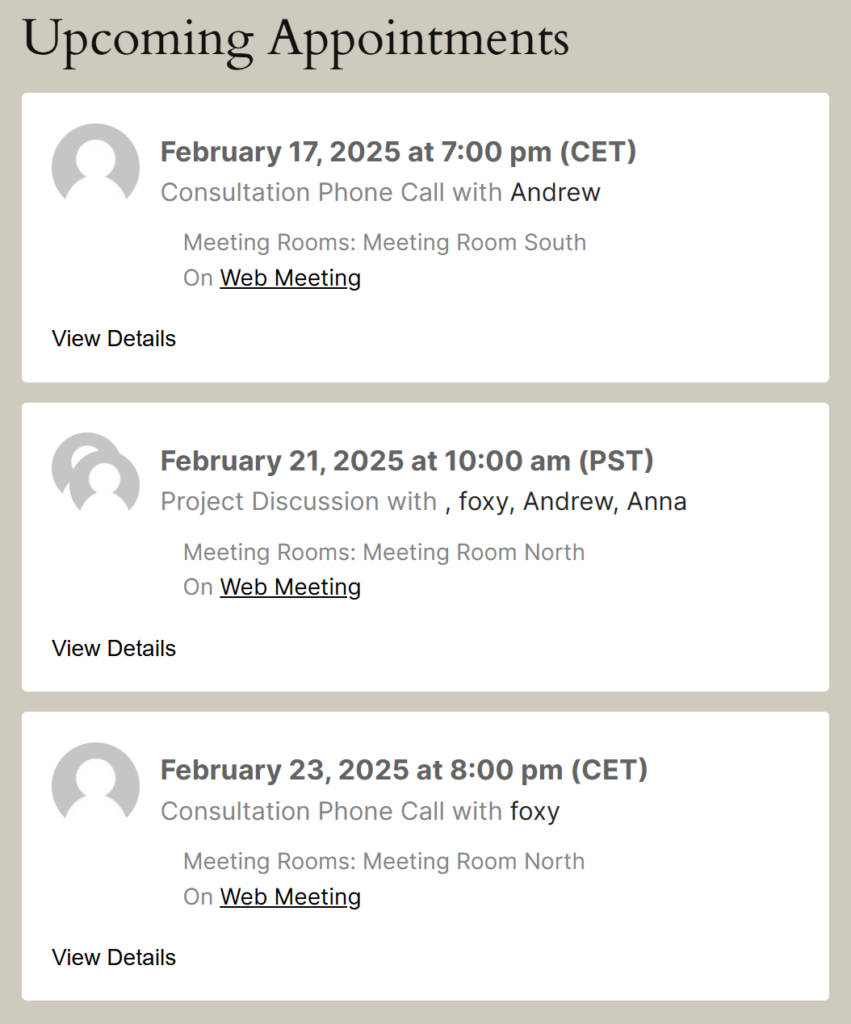
This module will show the logged-in user any appointments they’ve booked.
Content
Within the Content of the Upcoming Appointments module, you are presented with several options to customize this to your liking.
As a result, the Upcoming Appointments module can look pretty nifty.
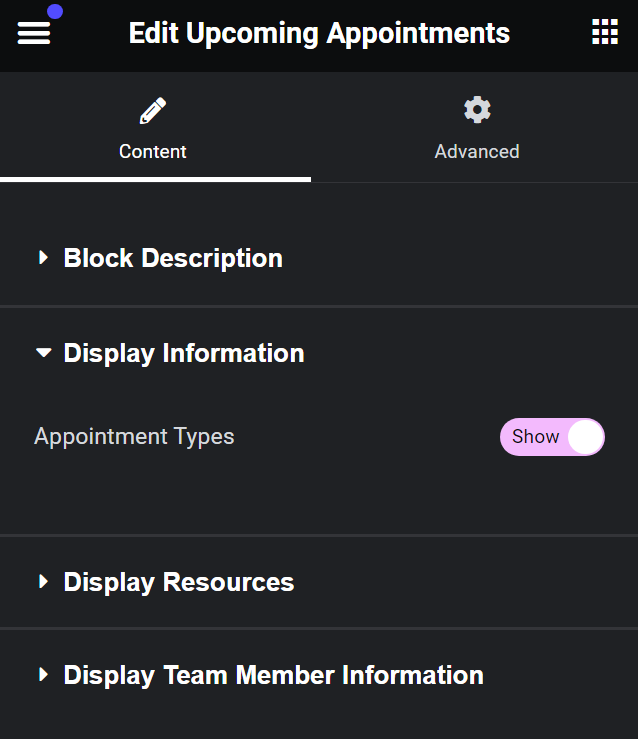
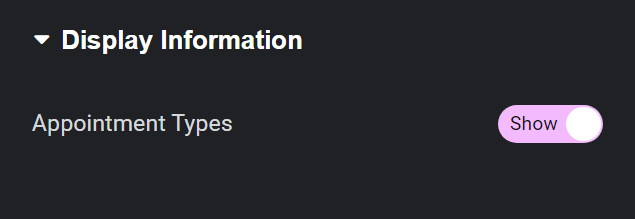
Display Information
You can toggle information about Appointment Types on so that users can see which Appointment Types they have booked for their appointment.
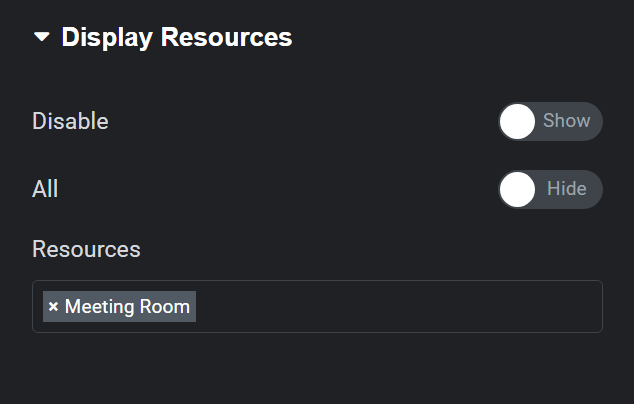
Display Resources
If you have the Resources feature enabled and assigned to appointment types, you can toggle this feature to display information about all resources or only specific resources.
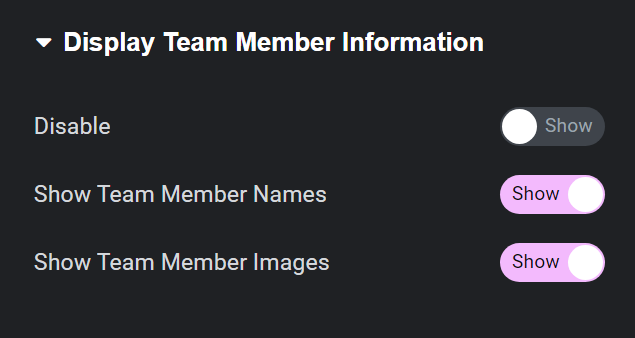
Display Team Member Information
If the Team booking feature is enabled and team members are assigned to an appointment type, you can choose to show which team members are assigned to the appointments. And, if they have a team member image set, this can be displayed as well.
Advanced
Under the Advanced tab, you can adjust several advanced design attributes of the widget, such as custom margins and padding, borders, mobile responsiveness, and Custom CSS.
Related Guides
-

Cancel, Reschedule, Edit or Delete Bookings
-
Searching, Filtering, and Viewing Bookings
-
Booking Appointments
-
Upcoming Appointments Module