In this document:
Introduction
Hello there! Glad to have you as a part of the Simply Schedule Appointments community ☺️ After installing and activating the SSA plugin, you will encounter the Setup Wizard. This handy tool gives you an introduction to two areas of the plugin:
- Add your License Key (premium edition users only)
- The General Settings
- Set up Google Calendar integration (premium edition users only)
- Creating an Appointment Type
If you need help installing and activating the SSA plugin, visit our installation and activation guide.
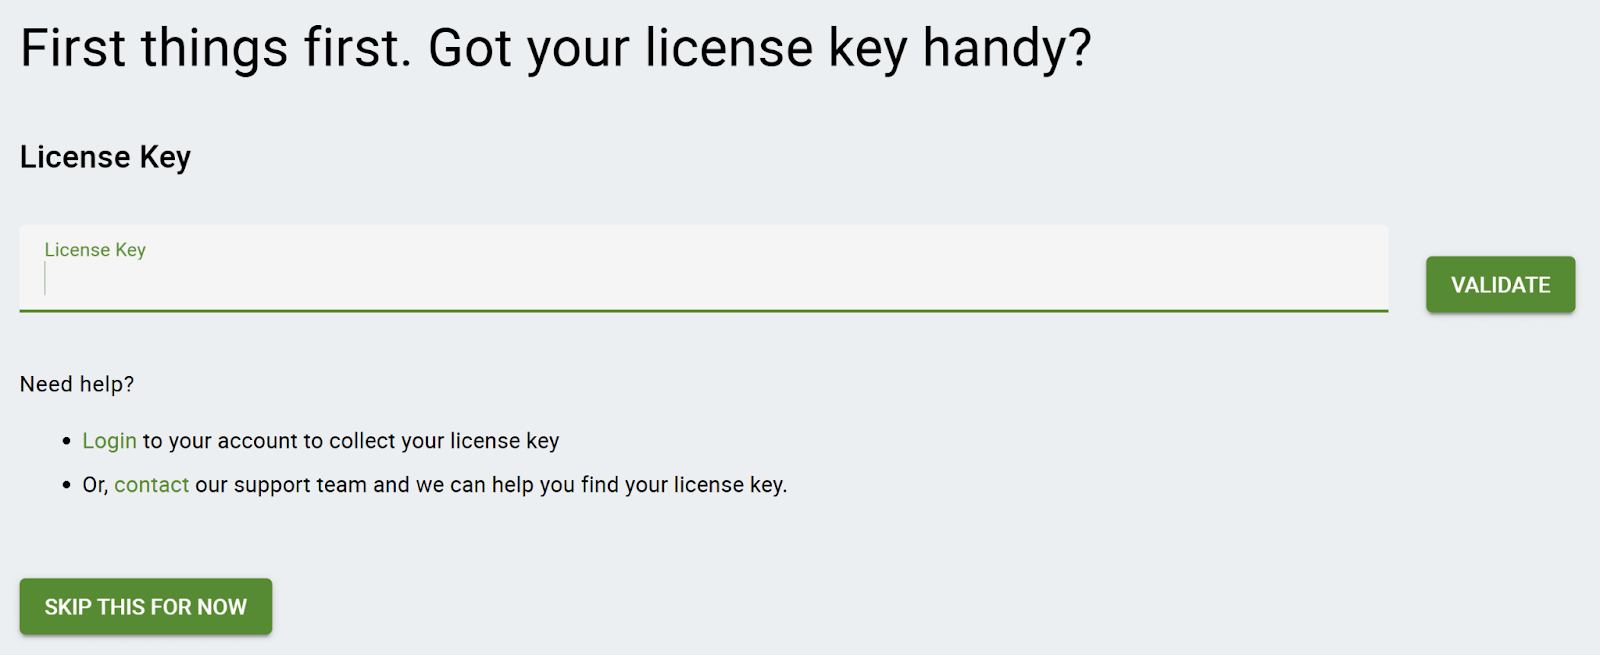
Add your License Key
This step will be displayed only for Premium edition activations.
If you have activated any of the premium edition zips on your site (such as the Plus, Professional, or Business editions), you will be prompted to enter your license key.
You can collect your license key in one of the following ways:
- The same purchase email you received with the plugin zip file.
- Log in to your account to copy your license key.
- Or, contact our support team, and we can help you find your license key.
Once done, you can fill in your license within the input field and validate it.
Or you can skip this step in order to add your license later under the Manage License option in the Settings.
The General Settings
In the setup wizard, you start by customizing the most basic settings for the plugin.
These settings include:
- Timezone
- Date Format
- Time Format
- When the week starts
- Contact Name and Business Name
- Admin Email
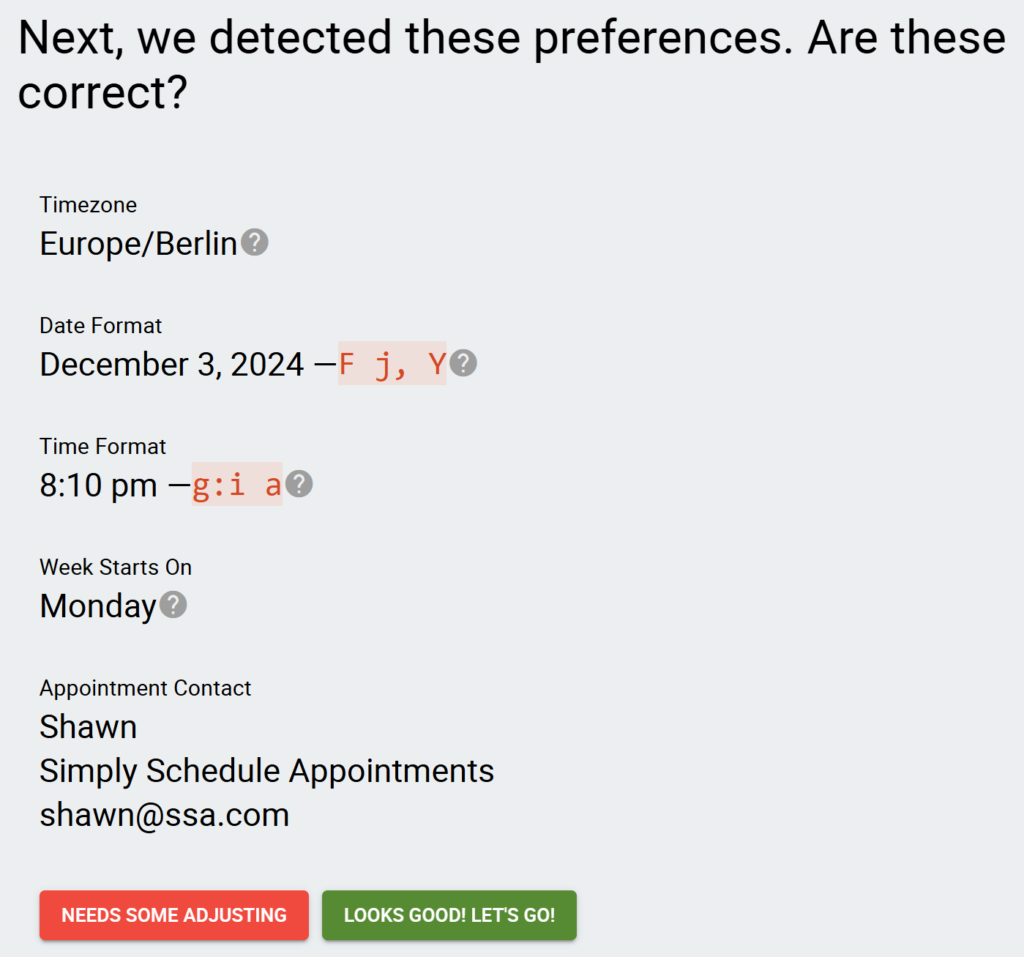
You can change these settings again later in the General Settings in the Settings tab.
Our General Settings guide will provide you with more in-depth information on what each setting does.
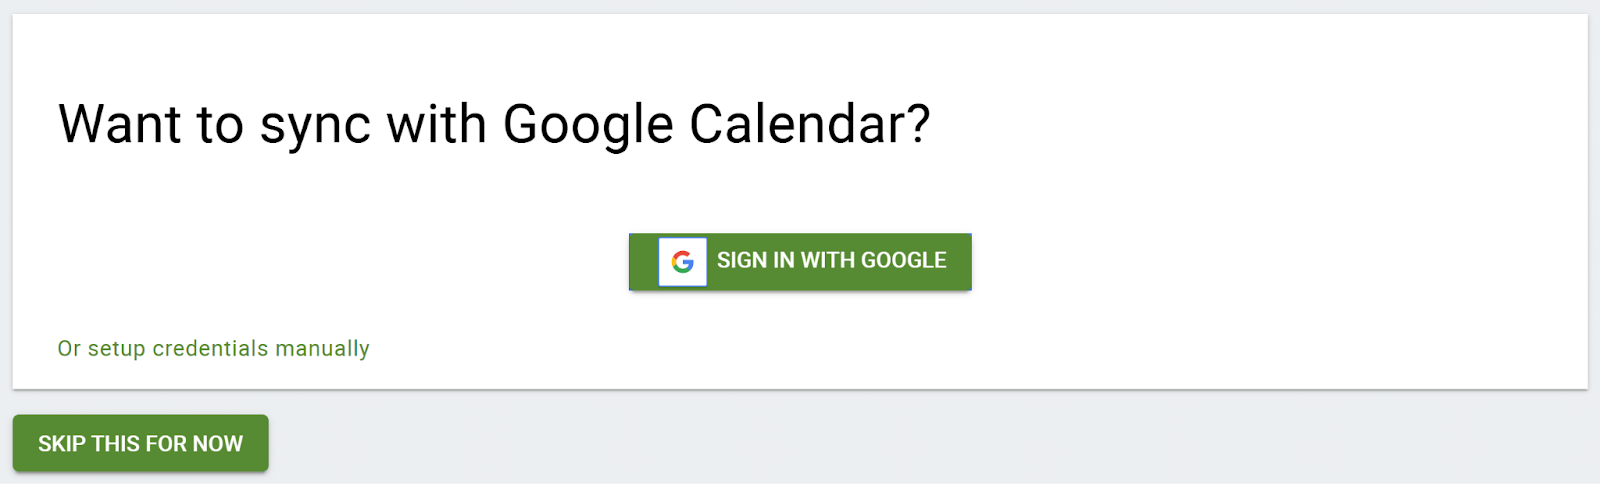
Set up Google Calendar integration
This step will be displayed only for Premium edition activations.
If the license was validated in the first step, you can sync Google Calendar with SSA via Quick Connect by selecting the Sign In with Google button.
Or you can also choose to set up Google Calendar sync with SSA via the API method by selecting the “or set up credentials manually” option in the bottom right.
Creating an Appointment Type
An Appointment Type is what you’ll use, to sum up your availability and rules for scheduling on your new Booking Calendar. So, an appointment type technically represents a single booking calendar.
You could create one Appointment Type for each service you offer. For example, a hairstylist will set up one for women’s haircuts and another for men’s – since one will have a longer duration.
By default, all the Appointment Types are dependent on each other. You don’t have to worry about double-booking – when a time slot is booked in one type, that same time slot is blocked off in all the other types.
If you’d like to make them independent of each other, read our guide – Let Multiple Appointment Types Book the Same Time Slot.
In the setup wizard, you create your first Appointment Type. You can always go back and change the settings for this Appointment Type, and you can add more Appointment Types later under the Appointment Types tab.
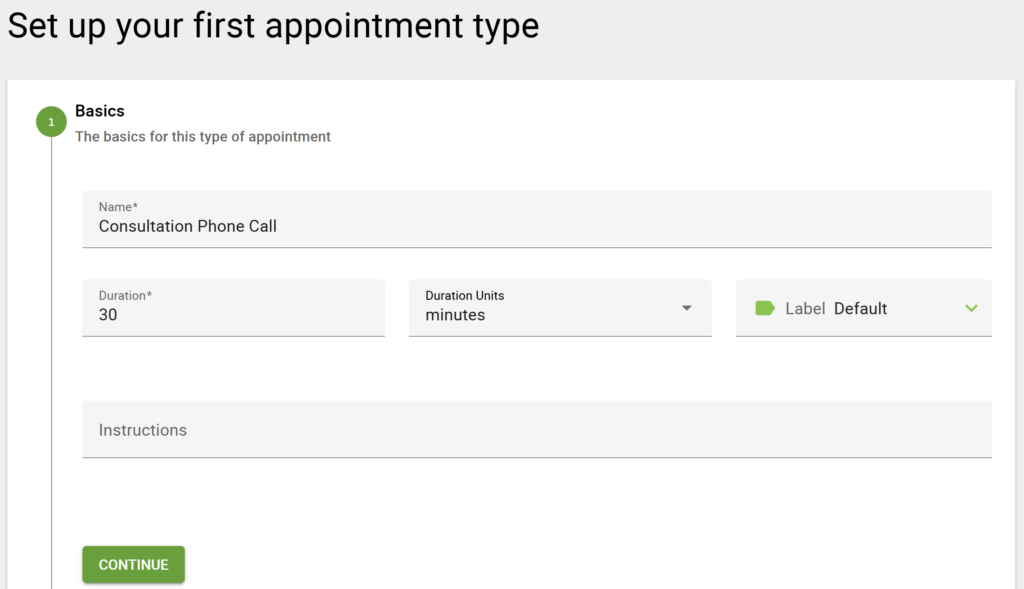
Our Appointment Type Settings guide can help you understand all the basic settings found inside the Appointment Types.
Finish Setting Up After the Setup Wizard
Finishing the setup for the SSA plugin for each website will be different. Whatever you choose to do, we’ve put together a couple of in-depth guides to walk you through each Editions’ features:

Related Guides
-

Display the Booking Calendars
-
Admin Dashboard Walkthrough
-
Appointment Type Settings
-
Email Notifications