In this document:
Introduction
The Appointment Type Labels allow admins to color-coordinate and group their Appointment Types. The labels currently support filtering and bulk editing. In this guide, we’ll review how to add, edit, and further use the labels.
Labels are for admin use only – the colors and label titles are not visible to customers. To apply colors to the user-facing Appointment Type listings, visit our styling guide.
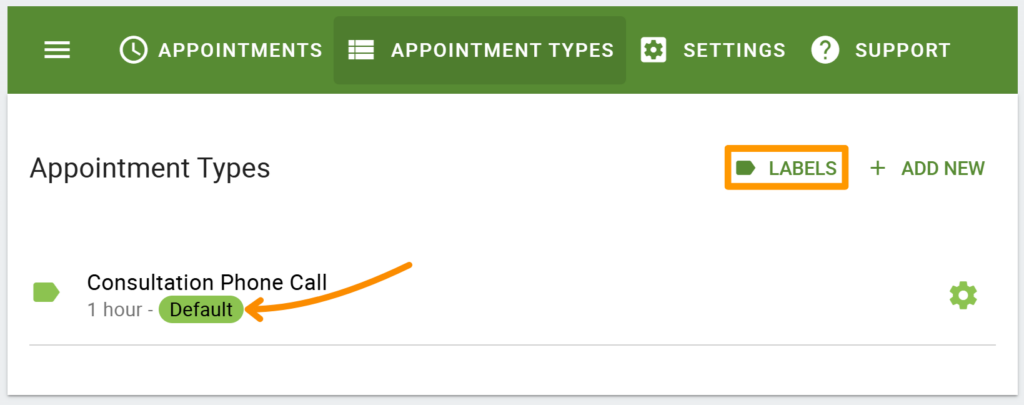
Managing Appointment Type Labels
If this is your first time using Appointment Type labels, you will see the green Default label attached to each of your Appointment Types.
Adding a New Label
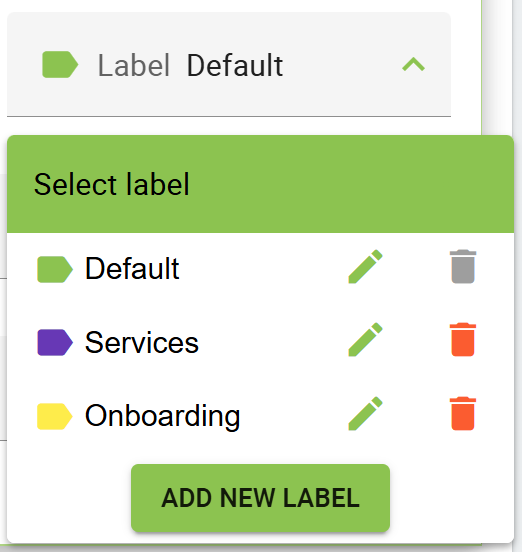
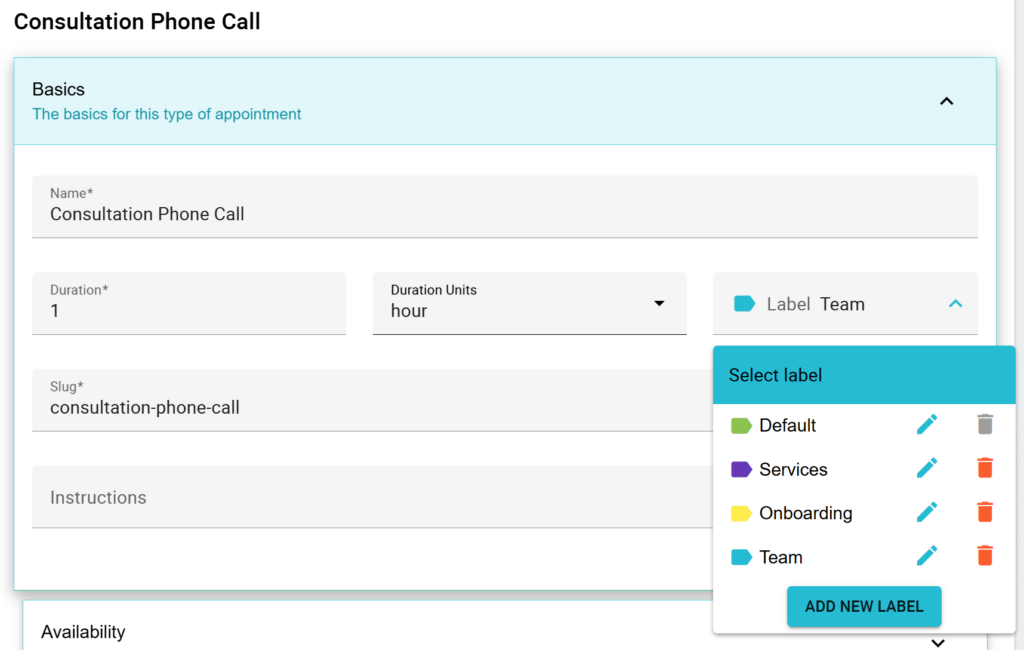
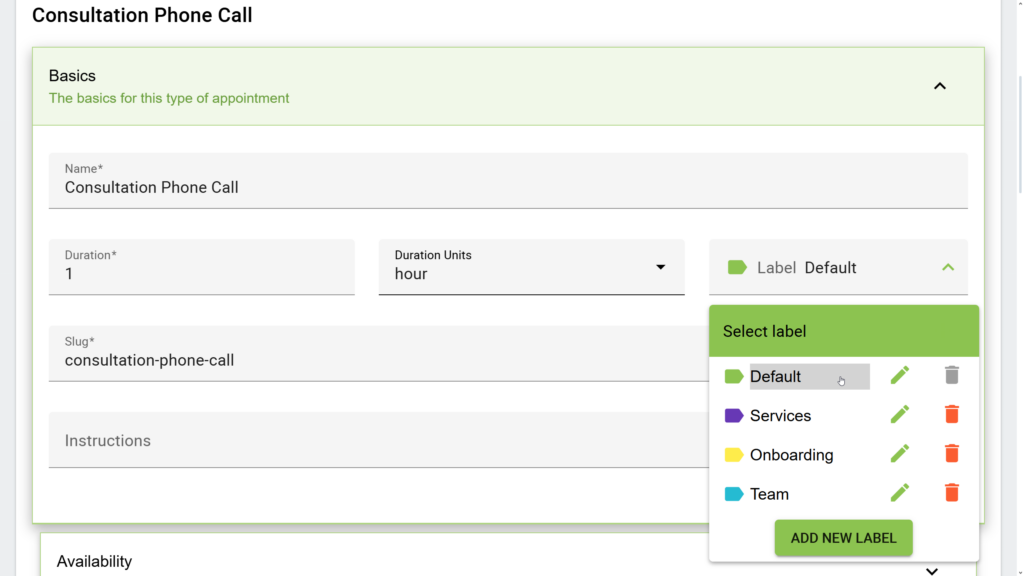
You can create unlimited amounts of labels to help you categorize the Appointment Types. To create a new label, open up one of the Appointment Type editors > select the Basics tab > select the Label field.
This should open up a dropdown menu, where you can select the Add New Label button to add a new label.
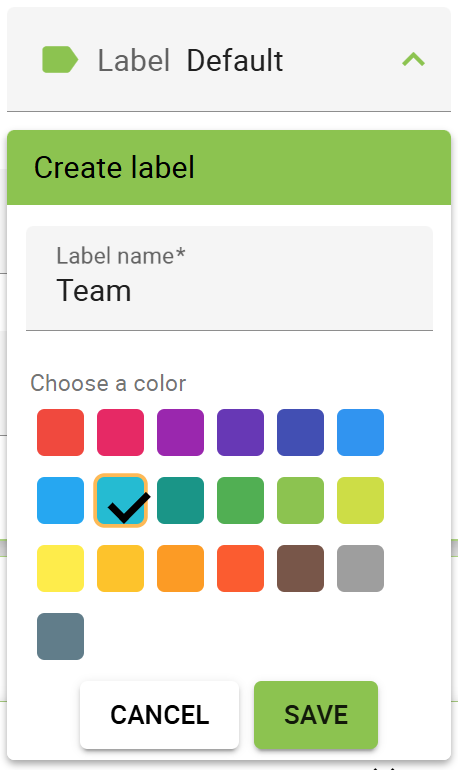
You should now see the heading within the pop-up change to Create label. Enter a Label name and Choose a color. When you’re done, click Save.
Label names must be unique and cannot contain commas or double quotations.
After creating your label, your Appointment Type will automatically select the new label, and you should see the editor change colors to match your new label.
Editing an Existing Label
To edit a label, open one of the Appointment Type editors > select the Basics tab > select the Label field. Select the pencil icon next to the label that you want to edit.
You should now see the heading within the pop-up change to the Update label. Continue with your changes to the Name and Color. When you’re done, click Update.
You do not need to save the overall Appointment Type settings after editing a label’s color or title – only when choosing a different label for the Appointment Type.
Deleting a Label
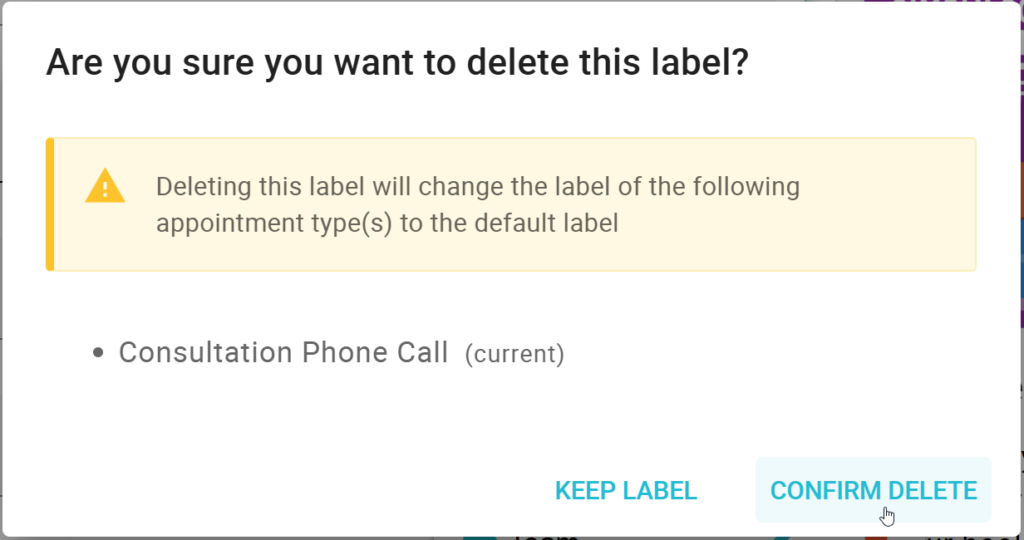
To delete a label, open up one of the Appointment Type editors > select the Basics tab > select the Label field. Select the red trash can icon next to the label you want to delete.
You’ll be prompted with a pop-up to either Confirm, Delete, or Keep Label. If you confirm the deletion, the label will be removed from your label collection, and any Appointment Types currently assigned that label will revert to the Default label.
This pop-up also allows you to edit the Appointment Types affected by this deletion before you delete them. There is an Edit link next to each Appointment Type name; clicking this will cancel the deletion and take you to the editor of that Appointment Type.
Bulk Editing Labels
Apply label changes to Appointment Types in bulk using our Bulk Editing tool. Simply select the label icons from the Appointment Types admin listing and select the Bulk Edit menu. Choose the Basics option to edit the labels across the selected Appointment Types..
Using Appointment Type Labels
Now that you’ve learned how to manage your labels and have added a few to your collection. To apply a label to an Appointment Type, open up one of the Appointment Type editors > select the Basics tab > select the Label field. Choose one label for your Appointment Type, and the editor will immediately change to your selected label color. Finally, click Save.
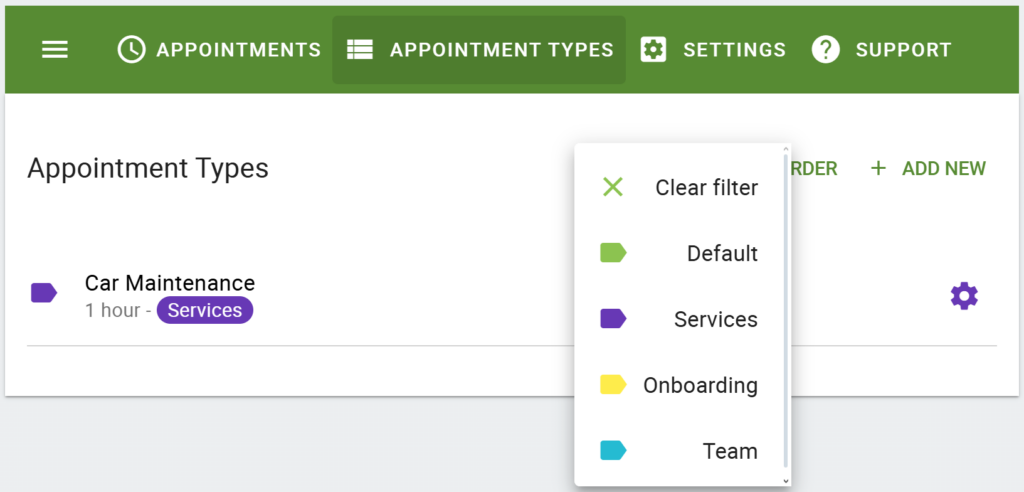
Filtering Appointment Types
Use the Labels button within the Appointment Types tab to display only the Appointment Types with a specific label.
Colorize Appointment Listings
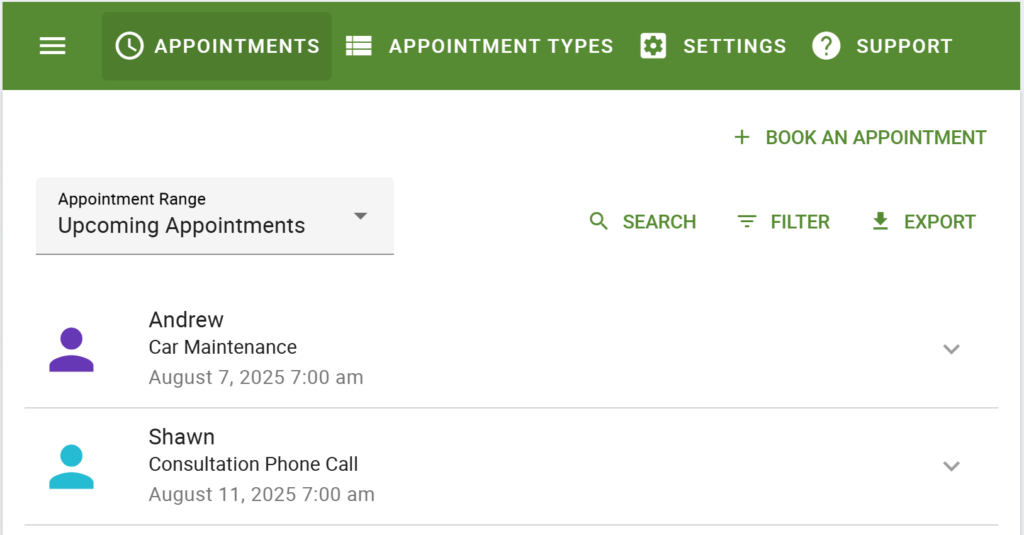
The Appointments listing for admins will display people icons based on the labels.
If you’re accepting bookings for logged-in users, their profile pictures will be used in place of the people icon.
Label Shortcode Attribute
Similar to our types attribute, which allows you to display a subset of booking calendars in a list view, we also have a label attribute that lets you list out all of the Appointment Type booking calendars associated with that label.
[ssa_booking label="Default"]Only one label can be included with this attribute.
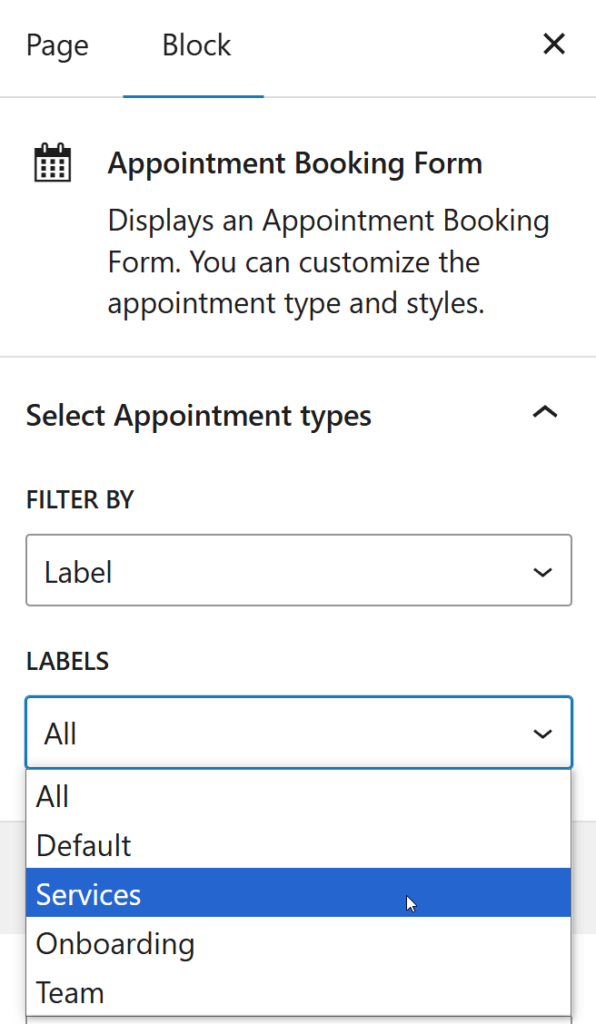
WordPress Block Setting
This label attribute is also compatible with our Appointment Booking Form block. You have the option to filter by Label or by Appointment Type. When Label is selected, you can choose one from the new Labels dropdown.
Twig Templates for Label Information
Add the following Twig Templates to include the appointment’s associated Appointment Type Label information in the notifications.
Appointment Type Label Name
{{ Appointment.AppointmentType.label_name }}Appointment Type Label Color
{{ Appointment.AppointmentType.label_color }}Related Guides
-

Recurring Appointments and Booking Multiple Appointment Types
-
How to Fix “There Are No Available Appointments”
-
Reschedule/Cancel Link 404 Error
-
Admin App or Booking App Never Loads