Availability Calendar plugins let visitors view the available booking slots for appointment-based businesses like salons, yoga sessions, classes, and courses. There are booking plugins designed to help professionals block specific days or weeks in advance to take time off and relax.
Then you’ll also find plugins capable of doing both – like Simply Schedule Appointments.
This guide will tell you how to set up a WordPress availability calendar using the Simply Schedule Appointments plugin for your website.
What Is an Availability Calendar, and Why Do You Need One for Your Website?
Customer interactions greatly influence your business’s success.
Typically, all customer interactions start directly from the website. You have to make a good impression right off the bat to improve your chances of converting your website visitors into paying customers and boosting your revenue.
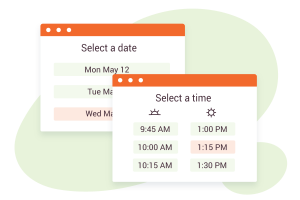
You can add a ‘Contact Form’ tab on your site, where your visitors can submit their information, after which you can reach out to them to schedule a call. Or you can opt for the more convenient automated appointment scheduling facility that lets interested visitors schedule appointments on a specific date and time.
Sounds great either way, right? Simple, fast, and convenient.
For this to work, though, you have to create an availability calendar that indicates all the days you are available to talk to the prospect or customer.
In other words, you highlight the days you’re free and block the days when you’re not. Visitors can then book appointments based on days that coincide with their availability.
The most significant advantage of having an availability calendar is that you save a lot of time while simultaneously cutting down any extra hassle when scheduling appointments – for you and your customer.
WordPress Availability Calendar and Simply Schedule Appointments: Understanding the Different Steps
Simply Schedule Appointments (SSA) is flexible and powerful enough to handle anything you throw at it.
It’s designed to support several appointment types, customers, and schedules, regardless of the edition you select, which makes it an excellent booking plugin for anyone who wants fine-tuned customization.
In addition to customizing scheduling widget styles to match your branding, you can also set up various scheduling options like business hours, calendar syncing, and vacation dates—something we’ll discuss in this section.
But before we proceed, you need to consider a few factors:
- First, you will need a WordPress website. The good news is multiple hosting services offer one-click installation with WordPress. So you can have a website up and running in under an hour or two max. If you don’t have one already, you can check out this guide to learn how to get set up with WordPress.
- Second, you need the SSA plugin. We have a Basic Edition for free, and three paid editions – Plus, Pro, and Business – to choose from, depending on which features you might need.
- Third, you must know how to install and activate a plugin on your website. We have detailed guides in our documentation teaching you how to install the Basic Edition or how to install and activate one of the premium editions.
With the details ironed out, let’s learn how to use Simply Schedule Appointment to manage your availability calendar.
There’s a straightforward way to set up an availability calendar that involves the following three steps:
- Set up your standard business hours for when you are available
- Create blackout dates for when you’re on vacation
- Set up a Google Calendar sync to organize your calendar and streamline your schedule
Note: While you can set your standard availability and create blackout dates to take time off from work in all editions of SSA, you must upgrade to a premium edition to sync your Google Calendar.
Let’s discuss them in more detail below.
1. Up Your Standard Business Hours According to Your Availability
To set standard hours, you can define your regular hours for every week with SSA.
- Go to Appointments, and click on Appointment Types.
- From there, you can either click on Select one from the list or Add New.
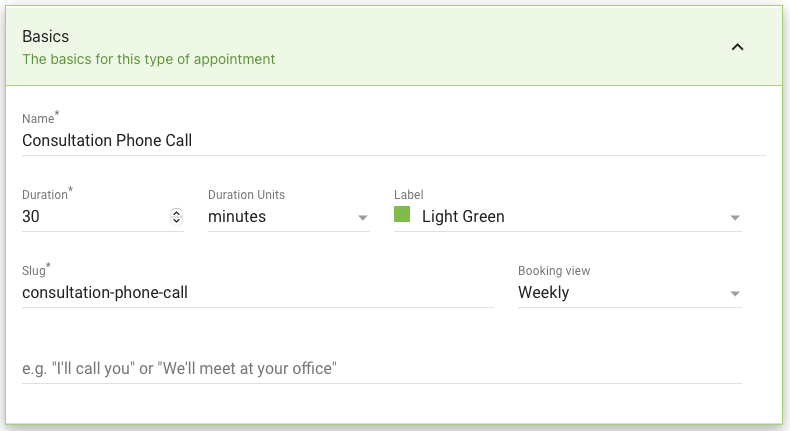
Under the Appointment Types field, fill in your basic information, such as your name, duration, and booking view. You can also label the meeting to color coordinate all your appointment types.
Set Your Availability
At this stage, you should see this availability calendar on your screen:
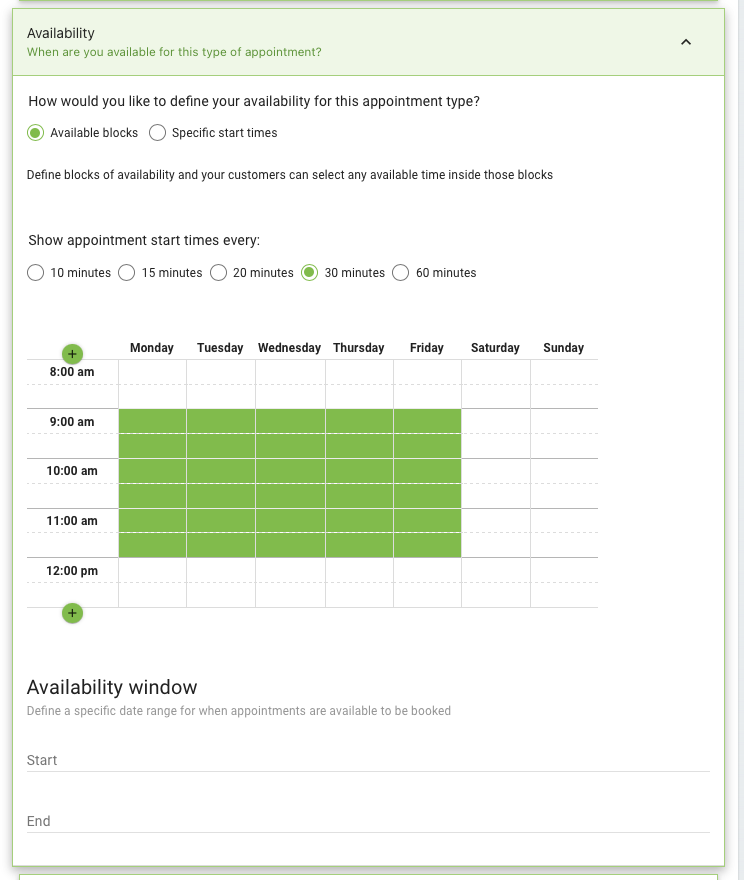
Mark your availability for the week. With SSA, we’ve tried to make the booking process as easy as possible.
- You can choose the exact time you want the bookings to start—something that can be particularly useful when offering classes, tours, or appointments.
- The other option is to have bookings fit within specific blocks of time you want. For instance, if your office hours are between 9 AM to 5 PM, you can set the whole eight-hour slot as available for booking.
Using our optional Advanced Scheduling Options, you can define an Availability Window limit appointments to a specific time range. This way, a prospect or customer will only see your chosen time slots on your specified dates when looking at your booking calendar.
Note: When anyone books a particular time slot for an appointment type, the same time slot gets blocked off for the other appointment types. It’s a default SSA setting to avoid double bookings. Learn more about this and enabling independent availability.
There are several other customizations available. You can take a detailed look by visiting our Appointment Type Settings resource.
2. Create Blackout Dates for When You’re on Vacation
SSA has a unique blackout dates feature that allows you to completely block off specific days in your booking calendar for all appointment types.
This feature is helpful when you plan on taking a vacation, national holidays, or any other day you want to be unavailable for appointments.
Below, we’ve detailed a step-by-step rundown of how to use this feature:
- Go to the Settings tab, and click on Edit Settings.
- You’ll see the option to change the settings of Blackout Dates. Place your cursor on the toggle to enable it.

- Click on Edit to add or remove your blackout dates. Select any day in the displayed calendar to add a blackout date.
As you do this, you’ll see it appear under the Selected Dates list. You can add as many dates as you want based on your schedule.
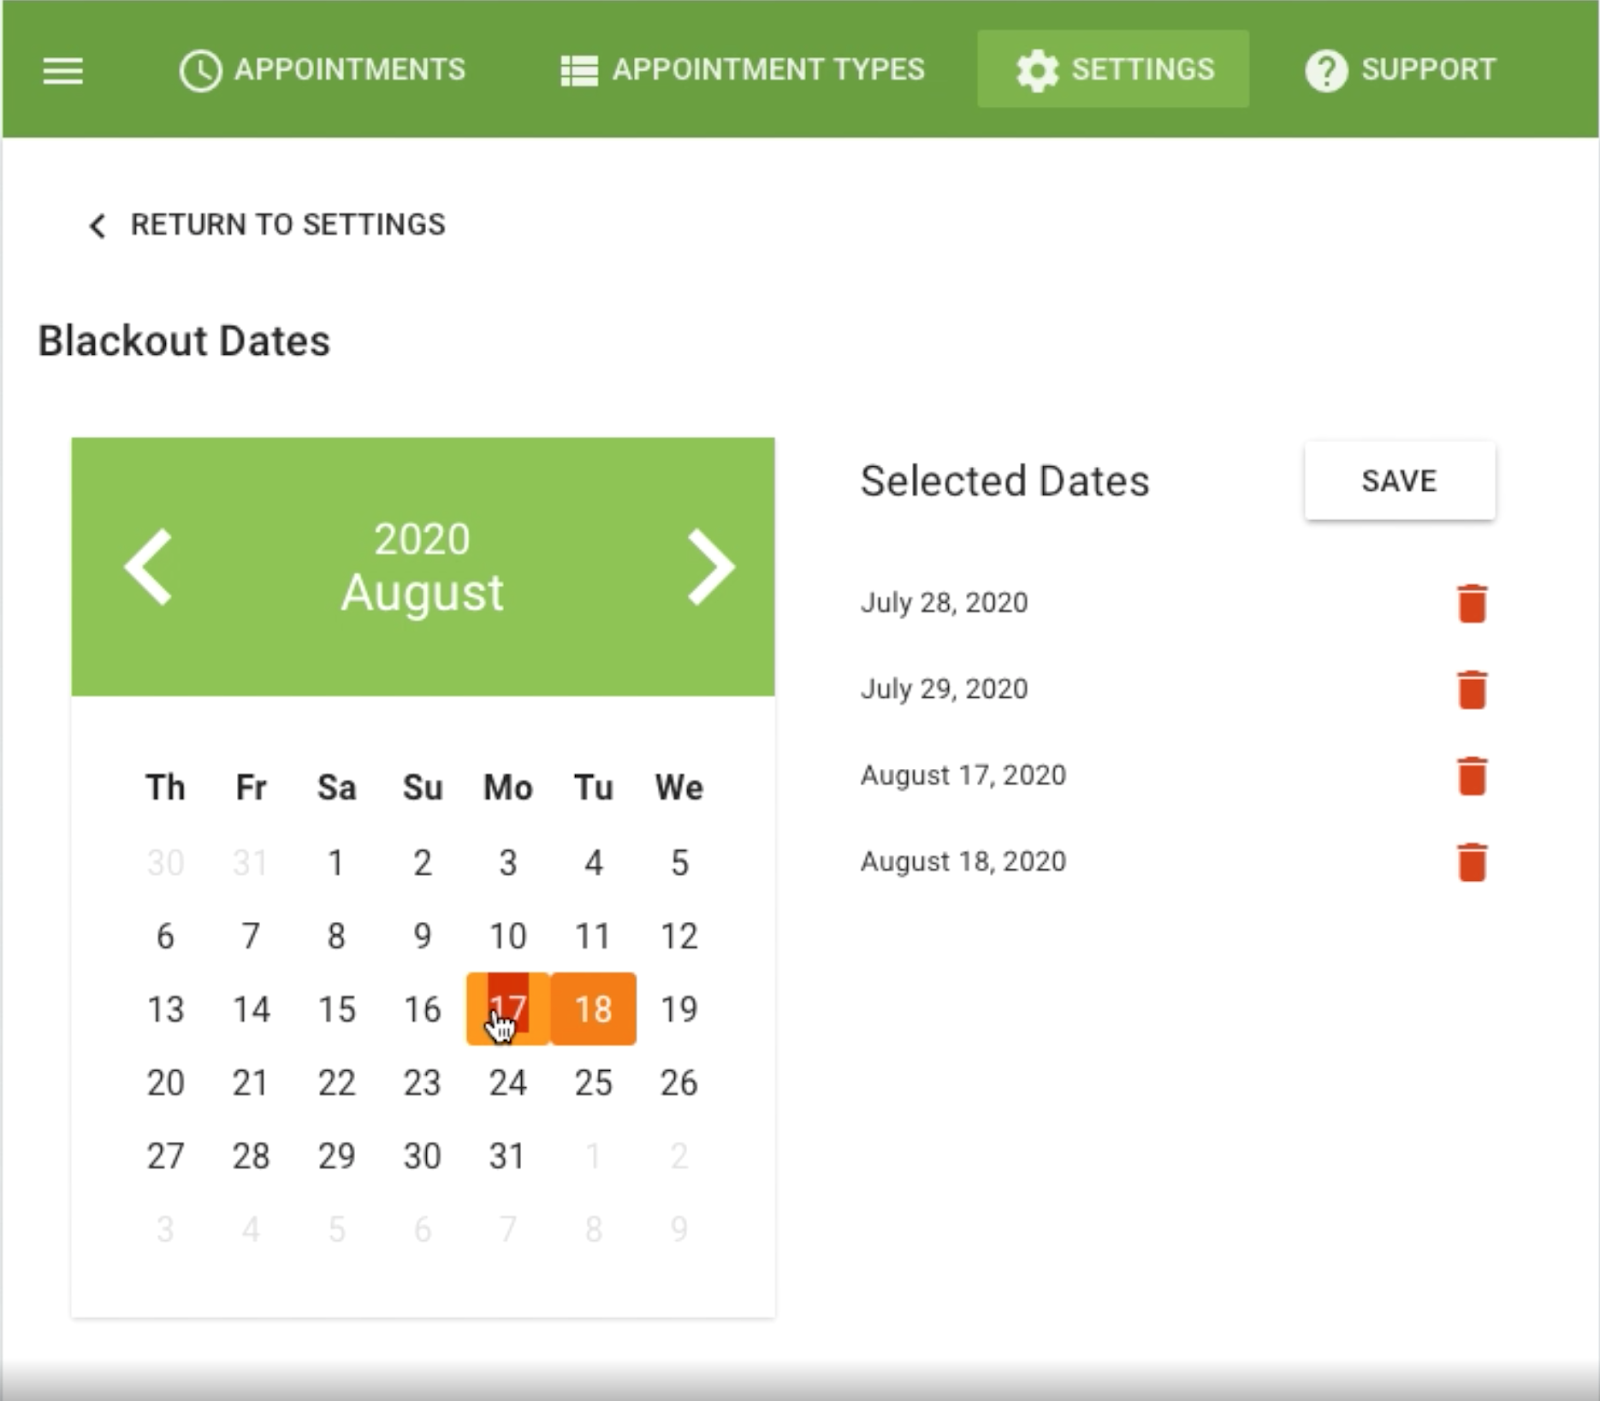
- On the other hand, if you want to remove a date, click on the trash can icon on the extreme right-hand side of the date. Alternatively, you can also click on the orange box on the calendar of the date you want to remove.
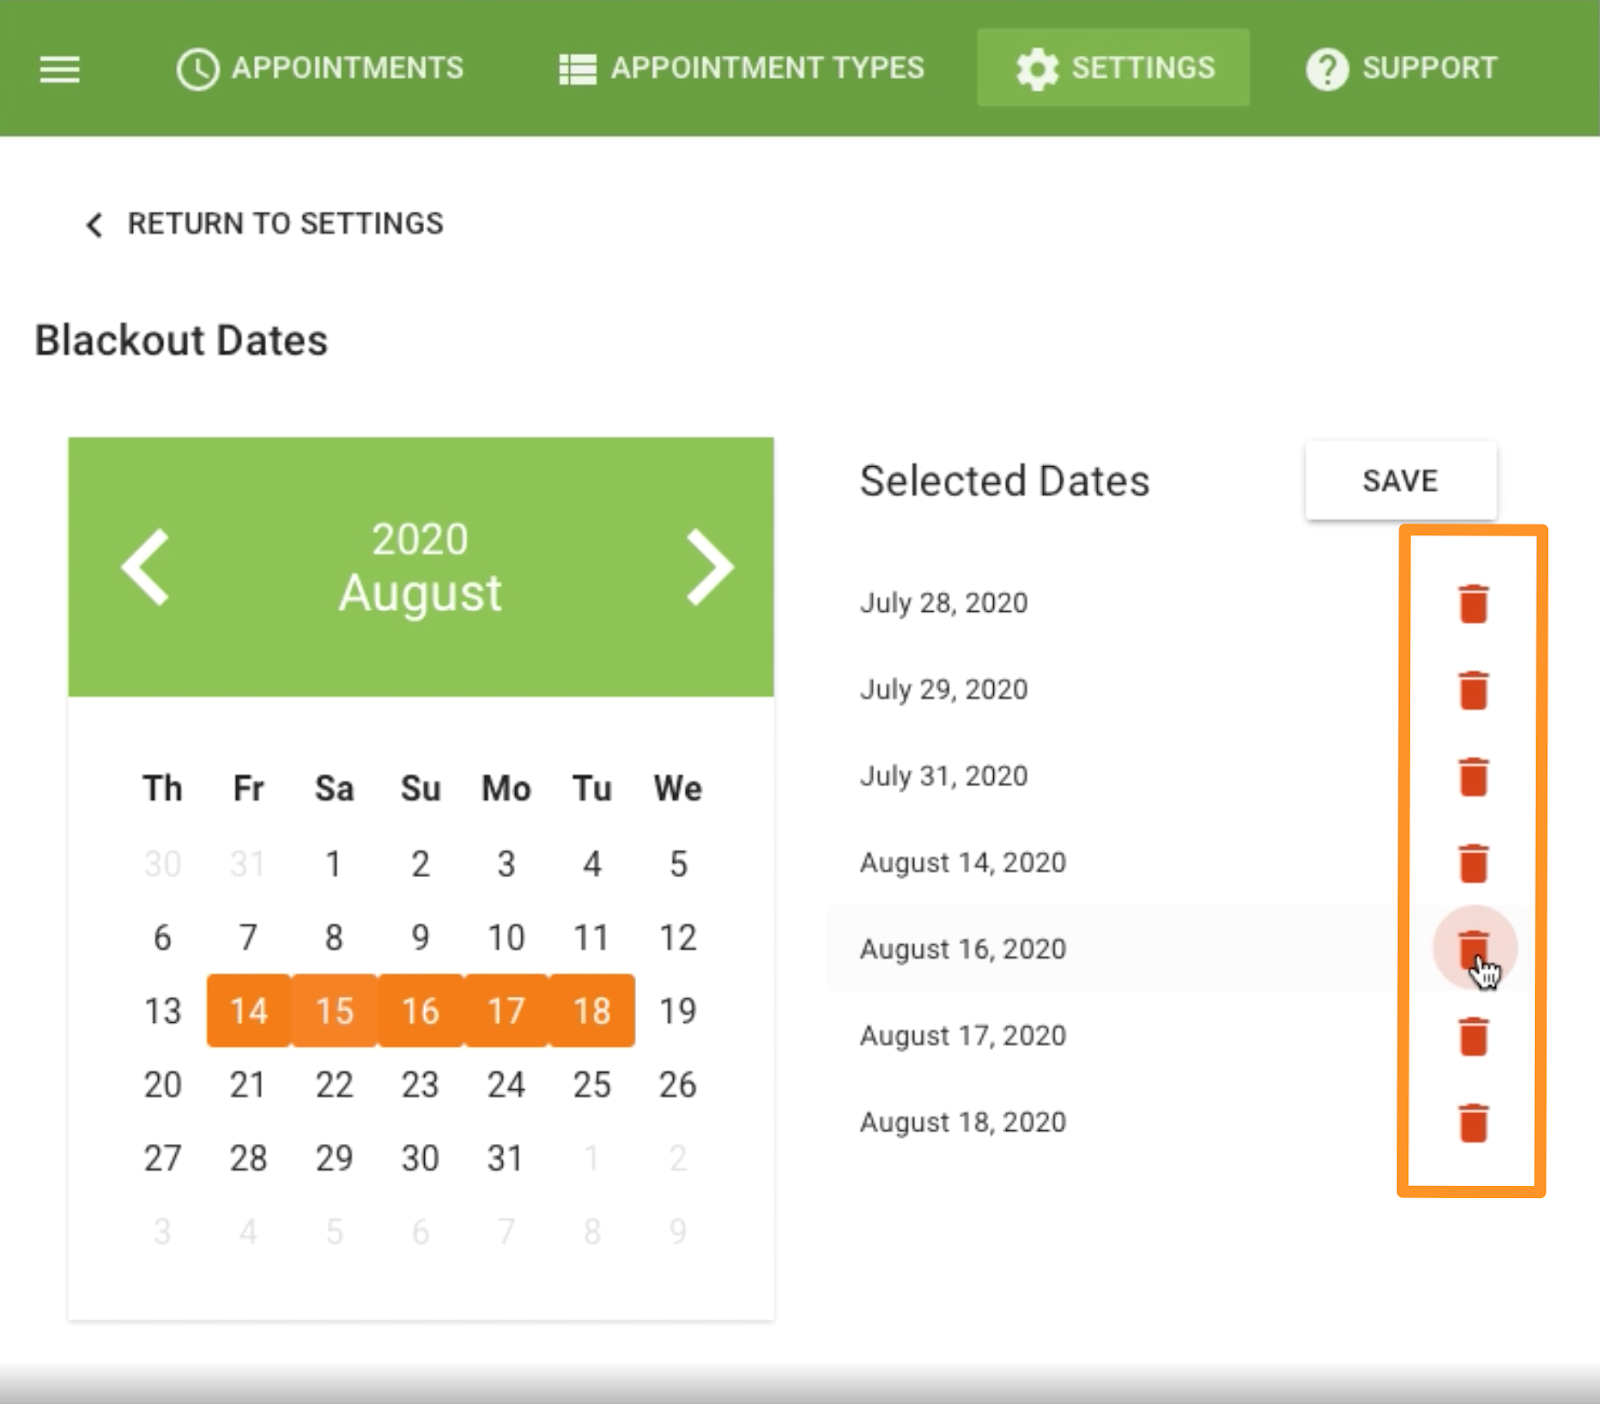
Once you’re satisfied with how your blackout days are set, hit the Save button to save the dates.
- Selecting Future Blackout Months or Years
You want to blackout dates in September, but it’s only January. So do you wait for August or September to adjust your WordPress availability calendar? Absolutely not.
You can use the left and right arrows to jump to a different month or year. You can also go directly to a particular month or year by clicking on the month or year in the calendar header to open a collection menu.

If you need to block partial days, please see our documentation for different ways of blocking off partial days.
3. Set Up a Google Calendar Sync to Organize Your Calendar and Streamline Your Schedule
This step will give you a detailed outline of how to automatically sync your SSA plugin with Google Calendar to block your availability based on your Google Calendar appointments.
Grant Google Calendar Access to SSA
To start the setup process, you must first open your WordPress dashboard. Click on Appointments, followed by the Settings tab or the side menu bar.
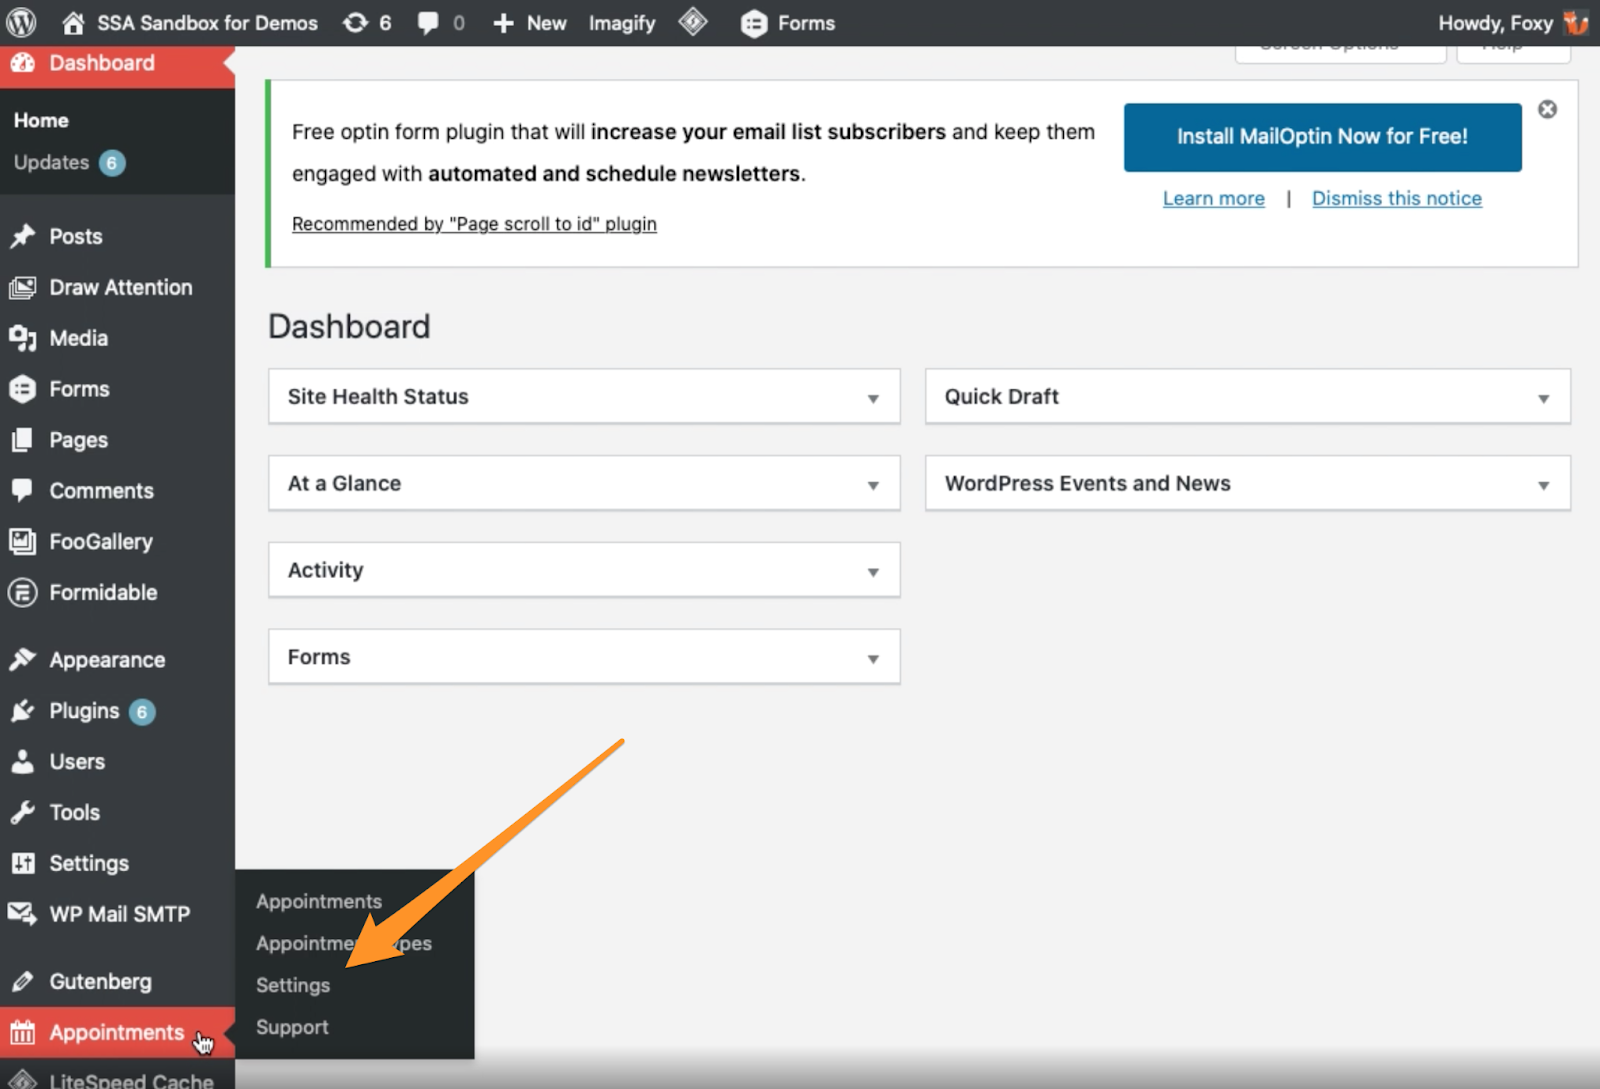
Roll your cursor below until you see the Google Calendar Sync tab. Click on the toggle to enable it.
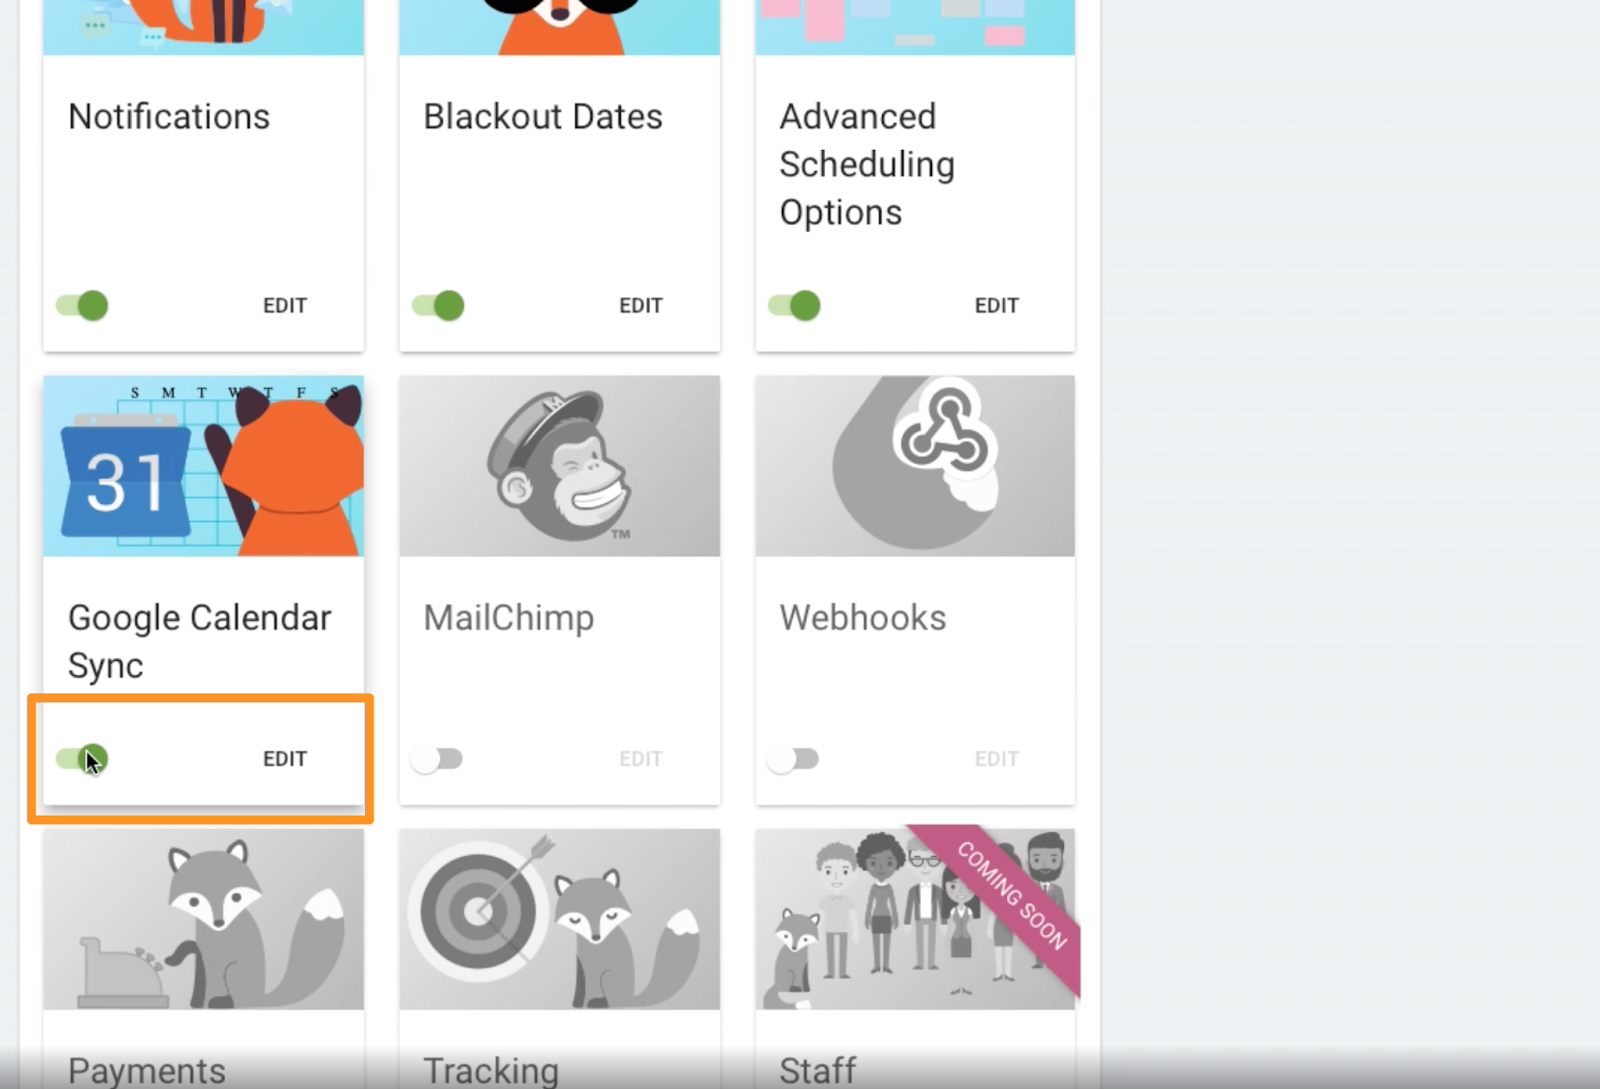
Select Edit to set up your Google API credentials. This is the only way to allow Google to communicate with Simply Schedule Appointments.
Make sure you check out our Google Client ID and Client Secret guides for a more detailed rundown to set up the connection between the Google calendar and SSA.
Adjust the Different Google Calendar Settings
After connecting your Google Calendar to SSA, you’ll see two extra settings you can update for better results.
- Google Web Meetings
The Google Web Meetings setting permits Google Meet links to auto-generate for every scheduled appointment. If you use Google Meet for online meetings, we highly recommend enabling this for its sheer convenience.
Here’s a detailed guide on Google Meet to get started on the right track.
- Refresh Google Calendars
The Refresh Google Calendars settings allow you to choose how often you want SSA to check for new events.
Five minutes is the recommended refresh rate and also the default setting. But if your Google Calendar is particularly busy and active, you may want or need to adjust this setting.
Update Your Appointment Type
To connect with Google Calendar, you’ll have to update the setting for each appointment type. Go to Appointment Types, click on Pick One, and then the Google Calendar tab.
Under the Google Calendar settings tab, you’ll see the option to sync appointments made in SSA to your Google Calendar and to check your Google Calendar(s) for any conflicts.

- Sync Appointments to Google Calendar
Select a calendar from the list to add newly booked appointments to it. When someone books an appointment in SSA, it will automatically appear on the Google Calendar you select here.
Remember, you can only choose one calendar for syncing newly booked appointments.
Note that any previously booked appointments for this appointment type will not automatically sync after changing this setting. Only appointments booked after the setting is changed will sync to your Google Calendar.
- Check Google Calendar for Any Conflicts
All the existing busy events in your chosen Google calendar will block off time in your Booking Calendar to check for conflicts. So if you have a dentist appointment or a haircut on your Google Calendar, your customers won’t be able to book appointments during those times.
Once you’re done, save the new settings.
And that’s it! Once everything is set, your website visitors and customers can book an appointment with you based on your availability in just a few minutes.
SSA Simplifies WordPress Availability Calendar Setup
So that’s how you set up WordPress calendar availability with Simply Schedule Appointments for your website.
Just specify your regular business hours, set any vacation days and holidays, sync to Google Calendar, and let SSA will take it from there.
Streamlining your processes to eliminate double-booking possibilities or setting correct appointments can help you deliver the best possible customer experience to all your clients all year round.
While we’ve tried providing detailed information for every option to help ensure this, you can always file a support ticket with SSA’s five-star support team if you are stuck somewhere.
Want to set up a system where all your website visitors can book appointments from your website within minutes? Sign up with Simply Schedule Appointments to simplify appointment scheduling right away.