In this document:
Introduction
The basic Scheduling Options (Buffers, Per Day Limit, and Notice Required) can take care of most scheduling needs. However, there are many special situations where you want to use the Advanced Scheduling Options for your Booking Calendar.
The Advanced Scheduling Options are useful when you want to limit:
- When time slots are bookable using the Availability Window
- When visitors can access your calendar using Booking Window
- How far into the future can visitors book time slots using Advance
Or, when you need to allow your Appointment Types to have Independent Availability.
Potential Use Cases for Advanced Scheduling Options
- Take interview appointments during a three-day job fair using the Availability Window
- Offer a limited-time offer for a free consultation session using Booking Window
- Schedule only seven days into the future to avoid making long-term commitments
Find Advanced Scheduling Options
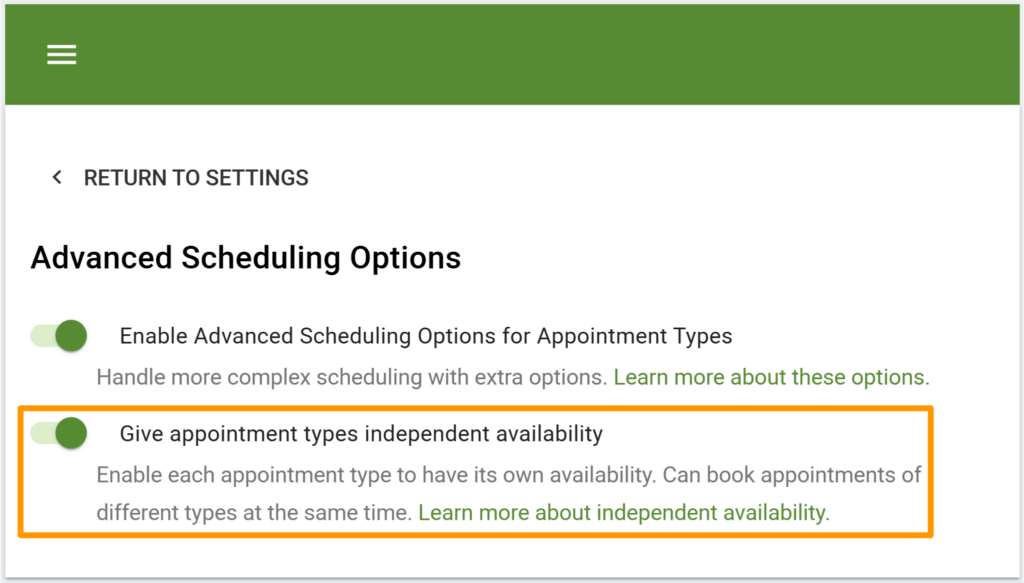
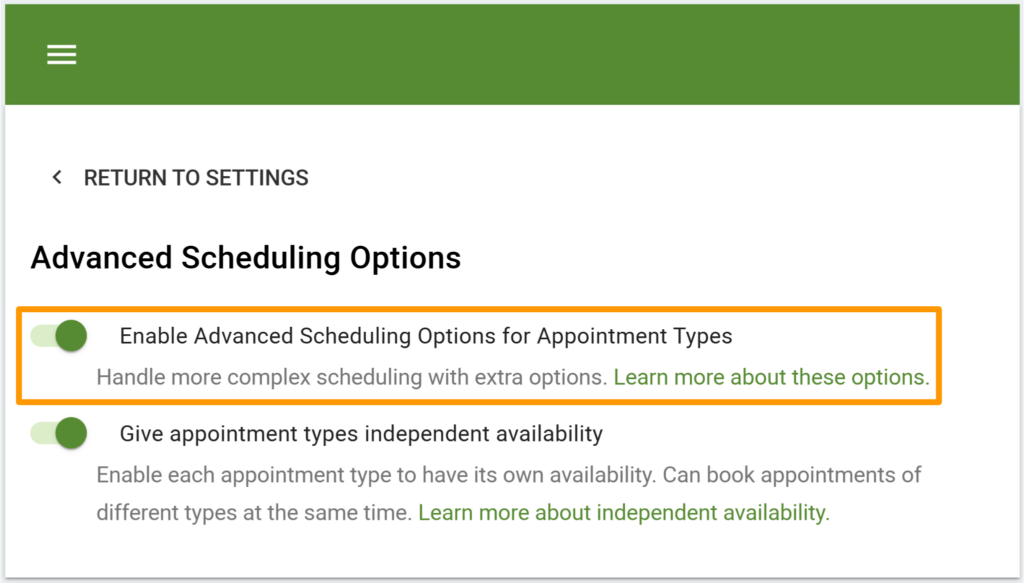
Go to SSA Settings and click the Edit link on the Advanced Scheduling Options card. Within the Advanced Scheduling Options page, you’ll see two toggles:
- Enable Advanced Scheduling Options for Appointment Types
- Give appointment types independent availability
We’ll go over each of these options below.
Give appointment types independent availability
By default, when someone books a time slot for an Appointment Type, all your other Appointment Types block off that same time slot. Turn this on if you’d like to allow your Appointment Types to book appointments during the same time slots.
Learn more about Independent Availability.
Enabling Advanced Scheduling Options for Appointment Types
Turning this on will allow you to use three more settings within the Appointment Type settings.
- Availability Window – Availability Tab
- Advance – Scheduling Options Tab
- Booking Window – Scheduling Options Tab
Adjust these new settings in your Appointment Type settings under the Scheduling Options tab and the Availability Tab.
Availability Window
Under the Availability tab in the Appointment Type Settings, you’ll see a start and end date setting for the Availability Window.
This will let you choose a date range for when to show time slots. A customer looking at your Booking Calendar can only see time slots within these chosen dates.
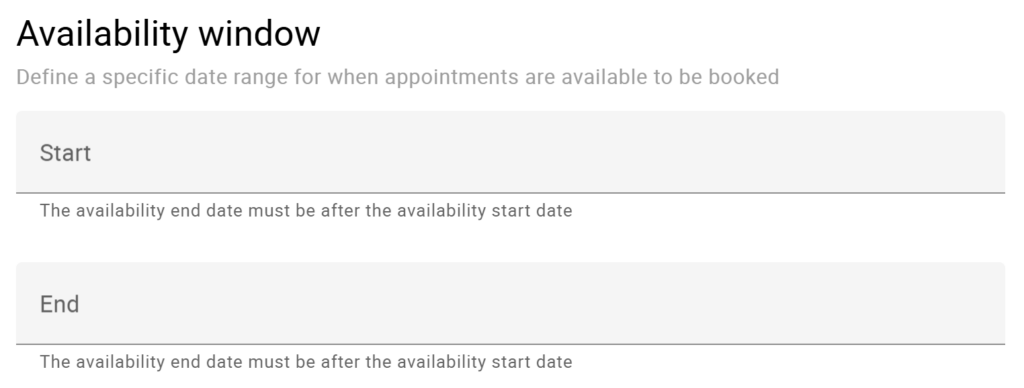
You could also just use one of the fields.
Only use the Start Date to show time slots starting at a specific date and time.
Only use the End Date to show time slots up until a specific date and time.
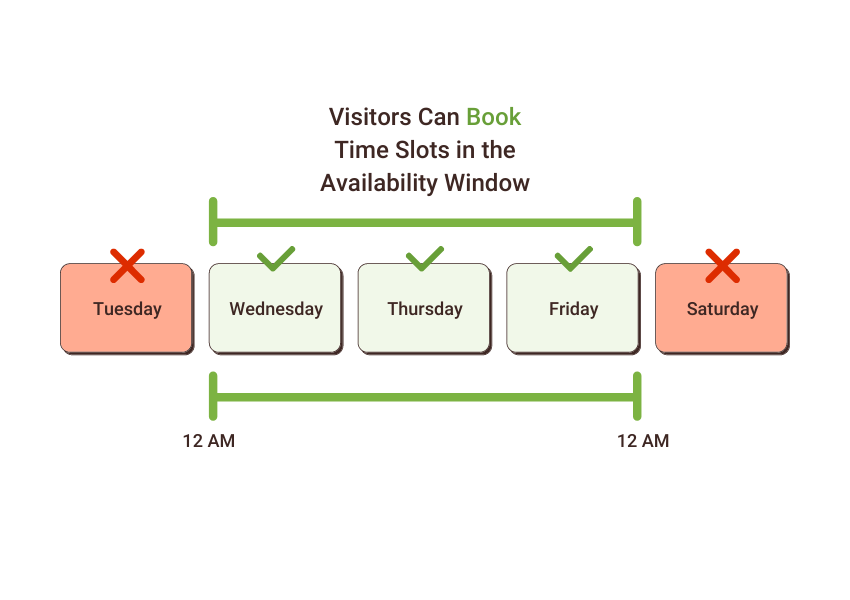
Example
Let’s say that you’ve set the Availability Window between:
- Start: Wednesday, July 16th @ 12 AM
- End: Saturday, July 19th @ 12 AM
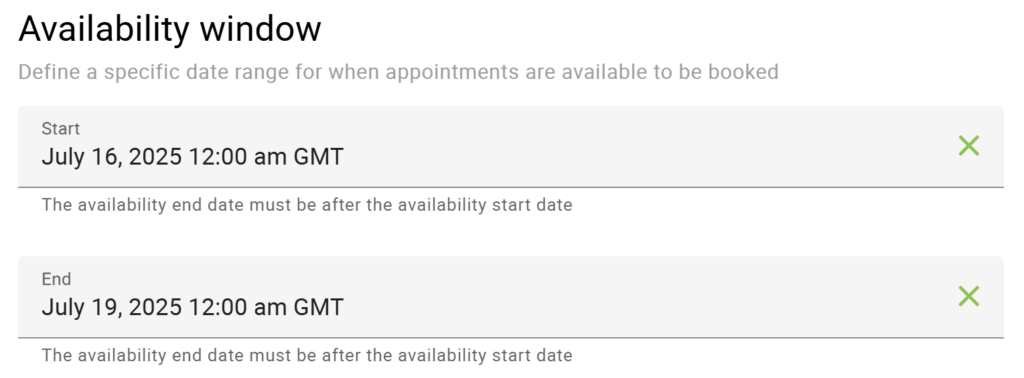
This would mean any availability you set on Wednesday, Thursday, and Friday will be bookable.

Even though we’ve selected availability on Monday and Tuesday, since we’ve added the Availability Window, these time slots will not be available to book.
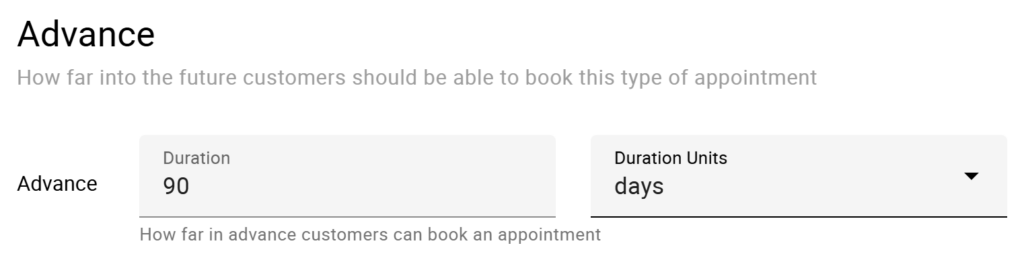
Advance
In the Scheduling Options tab in the Appointment Type Settings, you’ll see a setting called Advance.
This limits how far into the future customers can book appointments. A customer looking at your Booking Calendar can’t see time slots beyond the chosen time.
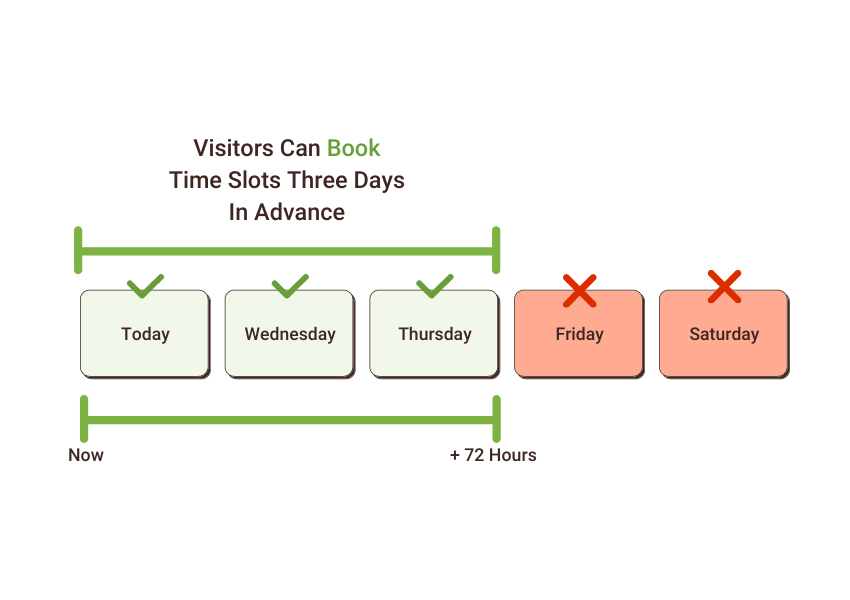
Example
Let’s say you’ve set the Advance setting to 3 days (or 72 hours).
This means that any time slots beyond 3 days will not be bookable. The end-user will only be able to see time slots between now and 72 hours from now.
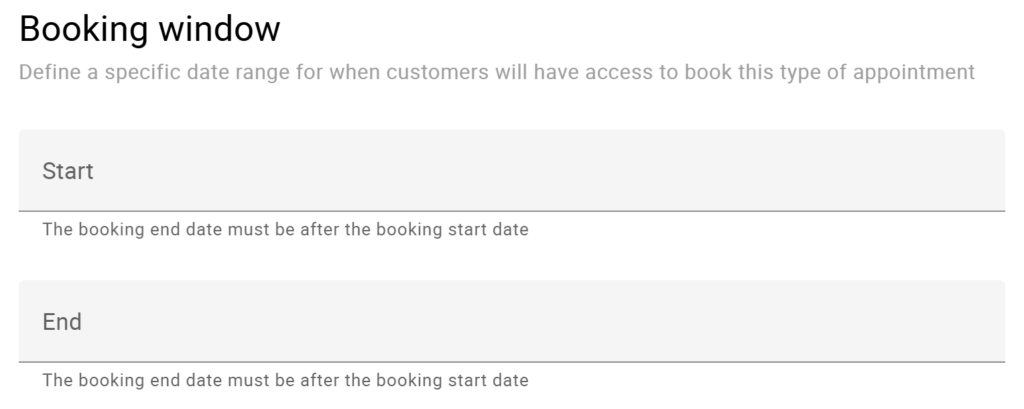
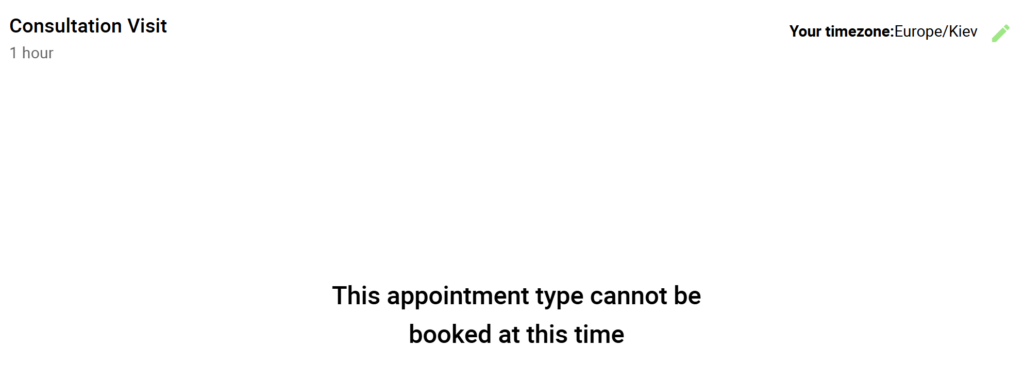
Booking Window
Finally, in the Scheduling Options tab, you’ll see a start and end date setting for a Booking Window.
This limits when customers can access your calendar to book any time slot.
A customer visiting your Booking Calendar outside this date range can’t book any time slots. A message says, “This appointment type cannot be booked at this time”.
You could also just use one of the fields.
Only use the Start Date to give access to all the time slots starting at a specific date and time.
Only use the End Date to give access to all the time slots up until a specific date and time.
Example
Let’s say you’ve set the Booking Window between:
- Start: Thursday, April 15th @ 12 AM
- End: Saturday, April 17th @ 12 AM
This means customers can access all of your available time slots on Thursday, the 15th, and Friday, the 16th.
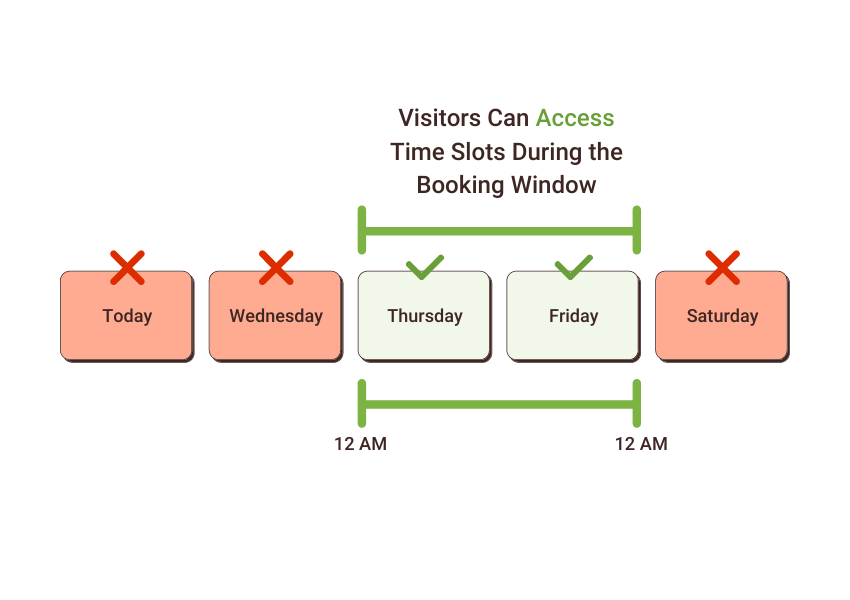
If they visit the booking calendar any day other than that specific Thursday and Friday, they won’t see any time slots at all.
Booking Window vs Availability Window
The Booking Window limits when customers can access the Booking Calendar to book any time slot. The Availability Window limits when the time slots take place.
Example
You want to do 20-minute photography sessions during a company holiday party.
The holiday party is happening on Saturday, December 14, from 4 PM to 8 PM.
Employees of the company can start booking at noon on Wednesday, December 4.
Here’s how you’d set that up:
- Define a new Appointment Type and name it Company Photo Sessions
- Then set up the following settings on your Appointment Type:
- Duration to 20 minutes
- Availability from 4 PM – 8 PM on Saturdays
- Availability Window to start on December 14 at midnight and end at midnight on December 15.
- Booking Window to start on December 4th at noon.
Video Overview

Related Guides
-

Appointment Type Settings
-

Styling the Booking Calendar
-
Blackout Dates
-
Independent Availability for Appointment Types