In this document:
Introduction
This guide will review how to add the Simply Schedule Appointments widget to your WP Admin Dashboard and all of the information it will include.
This is a great way to quickly overview your upcoming appointments without heading over to the SSA Appointments dashboard.
Adding the SSA Dashboard Widget
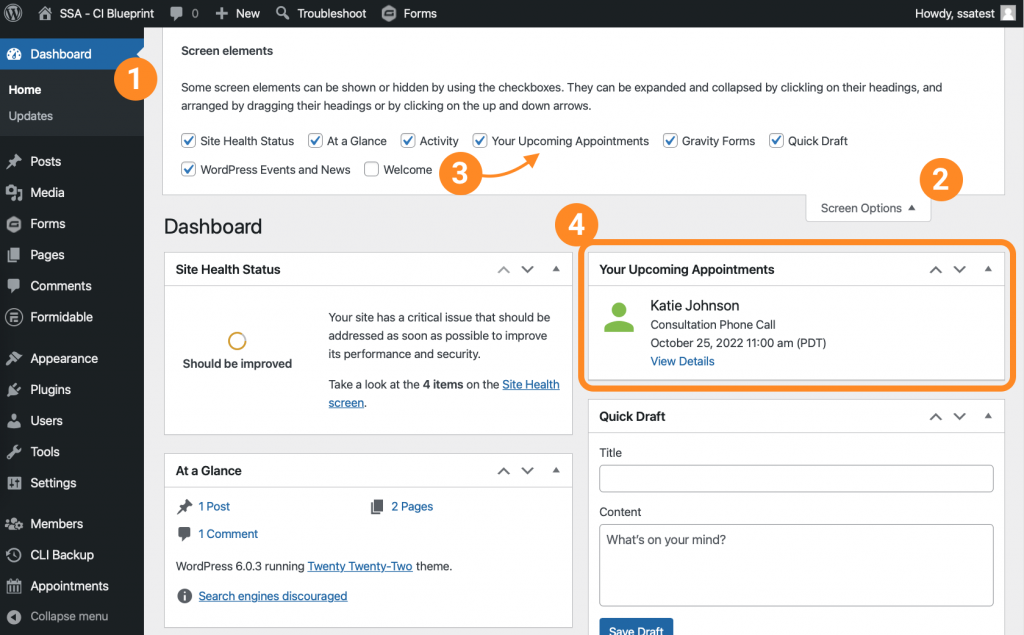
After installing Simply Schedule Appointments on your website, the Upcoming Appointments widget should automatically appear in your WordPress Dashboard.
But, if it doesn’t appear immediately, you can manually add it by clicking on the Screen Options tab > checking the box next to Your Upcoming Appointments.

Adjusting the SSA Dashboard Widget
Now that you’ve added the widget to the WP Dashboard, you’re welcome to move it around by dragging and dropping it into place. To drag it, hover your mouse over the top bar portion of the widget until you see the dragging symbol, click it, and drop it into your preferred location.
Upcoming Appointments Dashboard Widget Overview
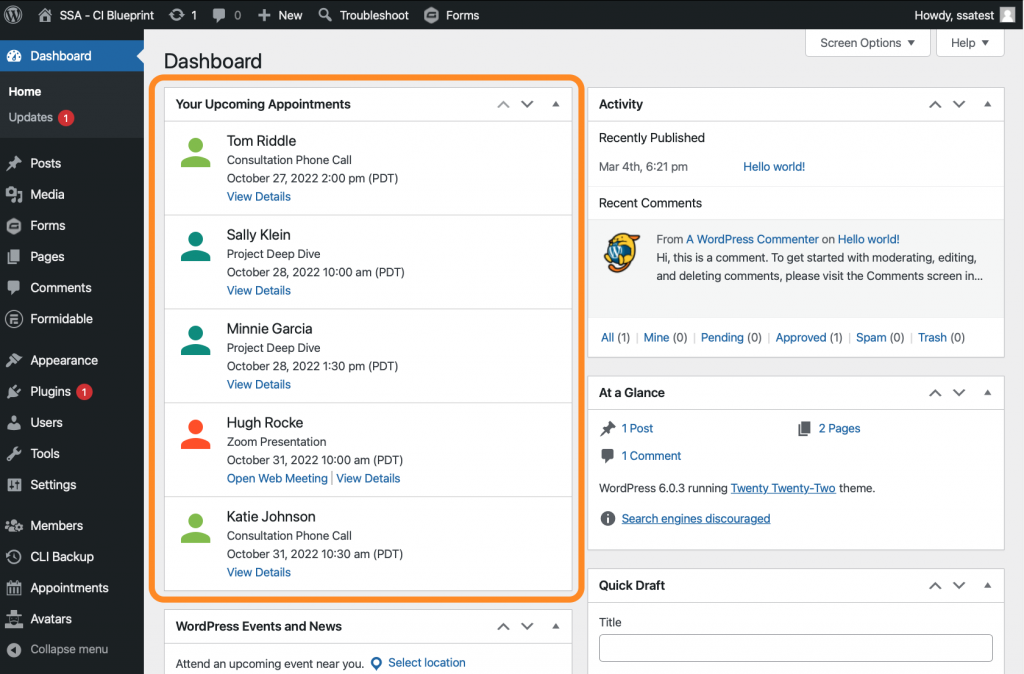
The Dashboard Widget should mirror the Simply Schedule Appointments Upcoming Appointments view from the Appointments Dashboard. Each booking listed here will include the following information:
- Name
- Appointment Type
- Start date and time for the booking
- Link to the full Appointment Details Page
- Web Meeting link (Optional)
The Upcoming Appointments widget will display up to five of the soonest appointments.
Each listing will also include an icon, which will display the default person icon in the color that matches the Appointment Type Label.
Team Member View
Logged-in Team Members can also benefit from the Upcoming Appointments widget, allowing them to review only their five soonest assigned bookings.

Related Guides
-

Installing the Free Basic Edition
-

Installing a Paid Premium Edition
-

Start Here – After the Setup Wizard
-

Display the Booking Calendars
