In this document:
Introduction
In this guide, we’re going to cover how your WordPress Team Members can sync with Google Calendar.
If you have the Plus or Professional edition, please see our other guide on how to Sync Multiple People’s Google Calendar Into One.
Start Here!
- Setup Google Calendar Sync using the Admin Google Account
- Setup Team Booking
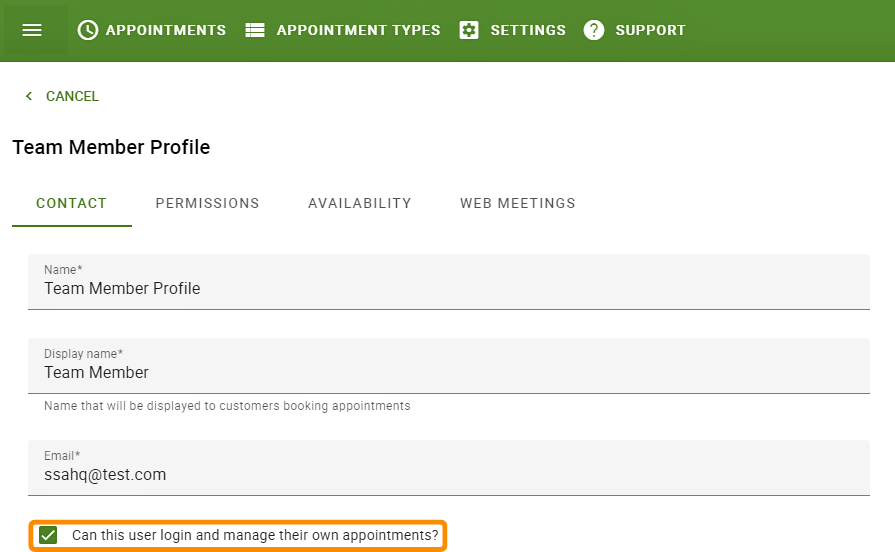
- Make sure to register each Team Member as a WordPress User
- Give the Team Members permission to manage their own Google Calendar Sync
- Make sure to turn on Google Invites!
How Team Member Syncing Works
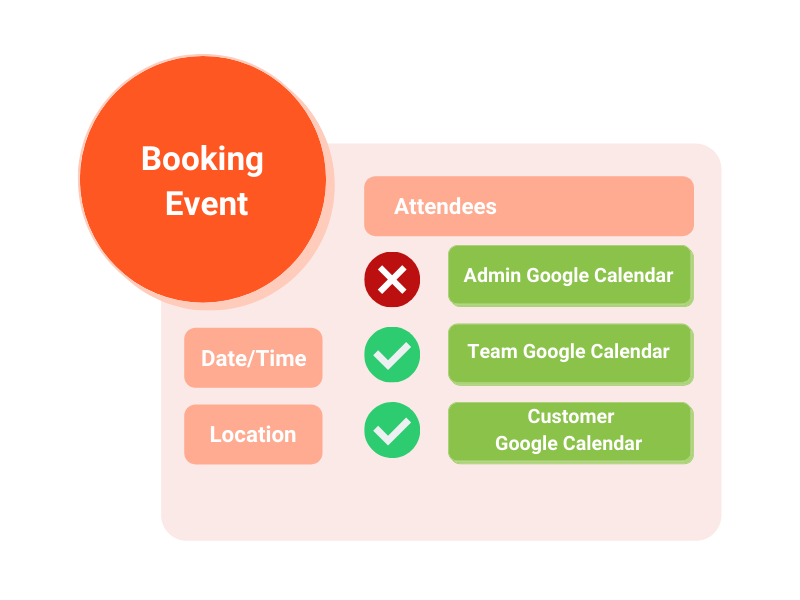
Team member syncing does not work the same way as the admin Google Sync. The main difference is that we use Google Invites to add events to the team’s calendars. And we connect the Team member’s Google Accounts only to check for conflicts.

The main admin Google Account is the event owner when an appointment is booked. The customer and team members are invited to this main event.
When using Team Booking, the team member is invited to the admin’s Google Events by default. To invite the customer, you’ll have to use our Google Invite toggle located within the Appointment Type settings.
The reason it’s built this way is to offer the benefits of having a single event where everyone can see who’s attending, as opposed to two disconnected events living in separate accounts.
Learn more about how Google Calendar Invites work.
Google Meet with Team Members
Please note that the host has to be the primary Google Account for the event, and the host must be present to admit people to Google Meet.
Allowing attendees to open the Google Meet video call is only available in Google Workspace for Education. We would love to add this functionality to our integration, but at the moment, this isn’t compatible.
Invite Team Members to Booking Events
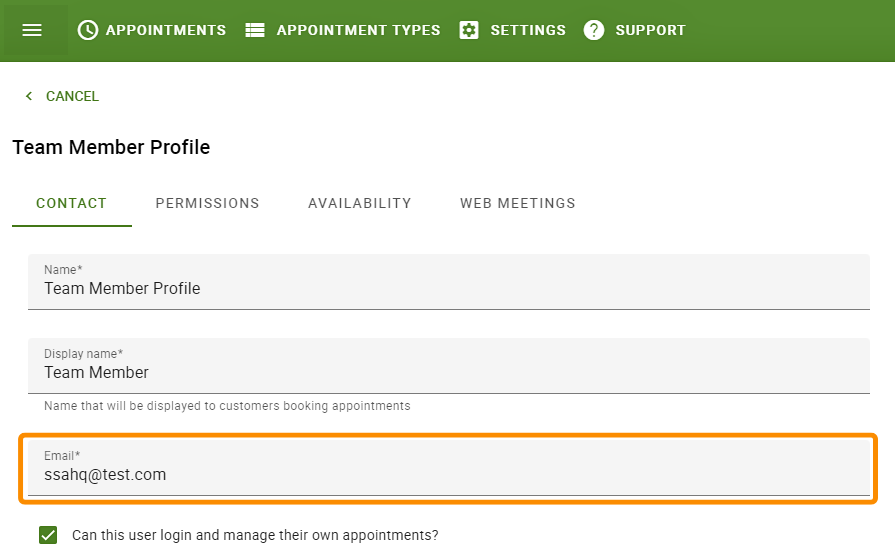
To invite a Team Member to the Booking Events, you must create their team profile with their preferred email address. That’s it!
The excellent part is that if your Team member doesn’t have Google Calendar, they’ll still get invites through their email and can add it to their calendar. Regardless of whether they’re using Outlook, iCal, etc.
The Team members’ profile email address is the one invited to the booking events, NOT the one that gets checked for conflicts. To avoid confusion, use the same email address for the profile and for connecting to Google Calendar.
Check For Conflicts on Team Members’ Google Calendar
As an admin, you’re in charge of ensuring everything is correctly set up so that your Teammates can easily connect to Google Calendar. This is why we outlined the steps above for you to complete.
After you’ve completed step 5, the rest is up to your teammates to complete.
Help your Team Member Log In
First, they’ll need to log in to their accounts on your website. As long as you register the Team Member as a WordPress user and they have the Team Member role assigned to them, this part should be easy.
Resetting Team Member’s Password
Ensure they have their username and password to log in to your site’s admin login page.
And if they don’t have their password, go to Users > All Users > click on the teammate’s username > in the Edit Users screen, scroll down to the New Password section and Generate a password.
Copy the generated password and send it to your teammate.

Connect to Google Calendar
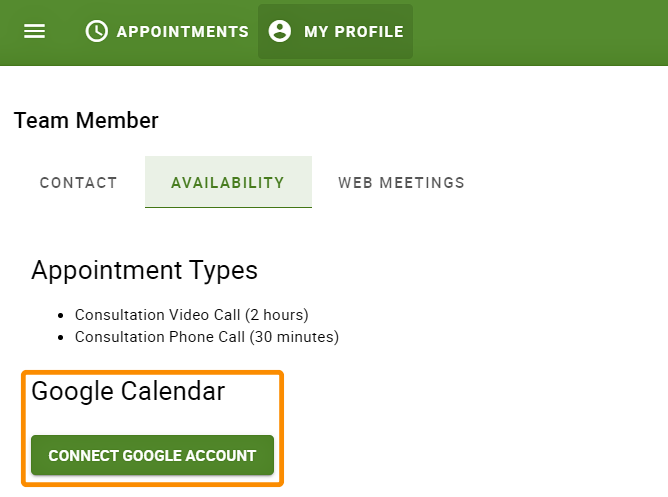
After logging in, they’ll need to go to the SSA Appointments page > Availability tab > Google Calendar section.
This should have a button that directs them to a page where they can log in to their Google Account.
Google will now ask permission for the Simply Schedule Appointments to access your calendar. Go through those prompts to accept the permissions.

You may see a screen that says This app isn’t verified. To bypass this, click on the Advanced link and then the link that says Go to yoursite.com (unsafe). That should allow you to see the permission prompts.

Google Calendar Disconnection from the Team Booking listing
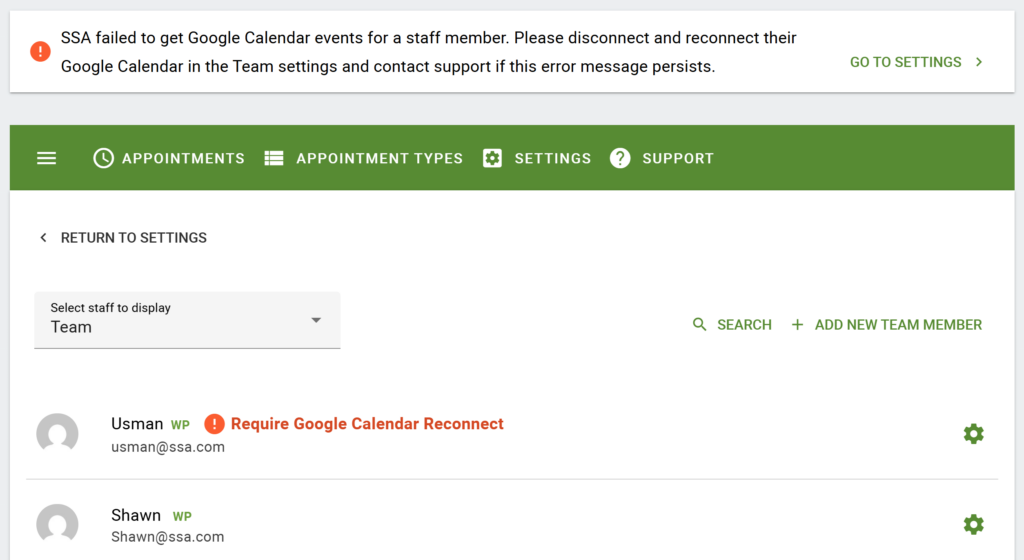
If a team member’s Google Calendar gets disconnected, the error message will be displayed on the SSA Admin Dashboard, and the admin will receive an email notification regarding the disconnected Google Calendar.
Also, the Admin can check from the Team Booking option regarding which team member’s Google Calendar got disconnected.
Check Calendars for Conflicts
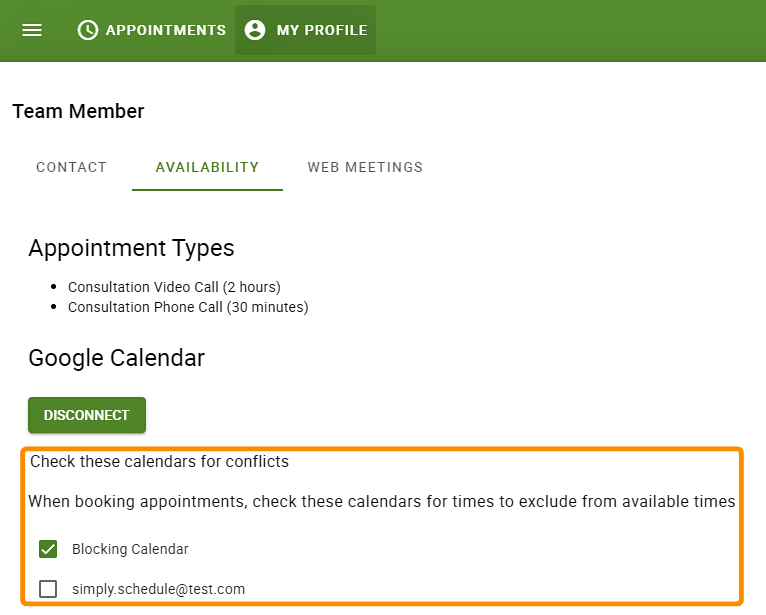
Lastly, you’ll land back on the Profile tab in the SSA Settings. You should now see a list of calendars under the Google Calendar section.
Use the checkboxes to select the calendars you’d like to scan for conflicts.
Disconnect Team Google Calendars
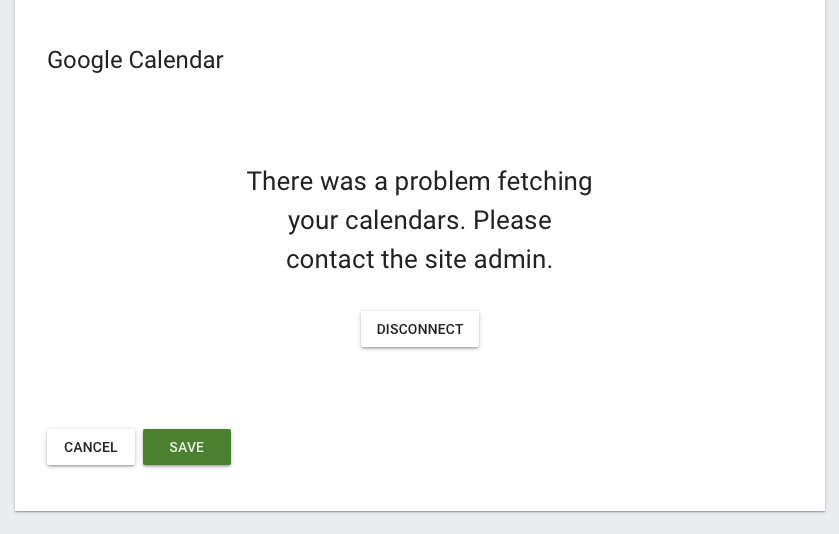
If the team member needs to disconnect or an admin needs to do so, both admin and team interfaces include a Disconnect button that allows you to re-do the connection. This is also helpful if an issue arises with the Google Calendar Sync feature and the team member needs to retry the connection.
Errors with the Team Google Calendar connection come up: “There was a problem fetching your calendars. Please contact the site admin”.
The Disconnect button can be found by going to the SSA Team profile (for both Admins and Team Members) > Availability tab > under the Google Calendar section, click on Disconnect, and the screen should reload.
