In this document:
Introduction
An overview of how to manage payments made for booked appointments through PayPal or Stripe, view whether they’ve been successful, and learn how to make refunds.
For information on adding payments to appointment types, please take a look at our article on payments for appointment types.
Viewing Payment Information
To view the payment details for a booked appointment, click an Appointment > click the View appointment details link.
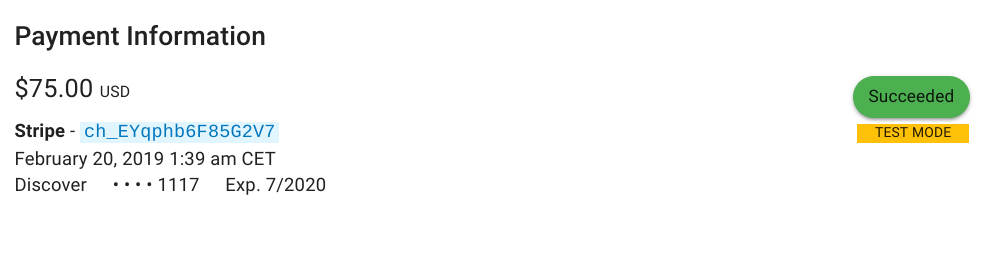
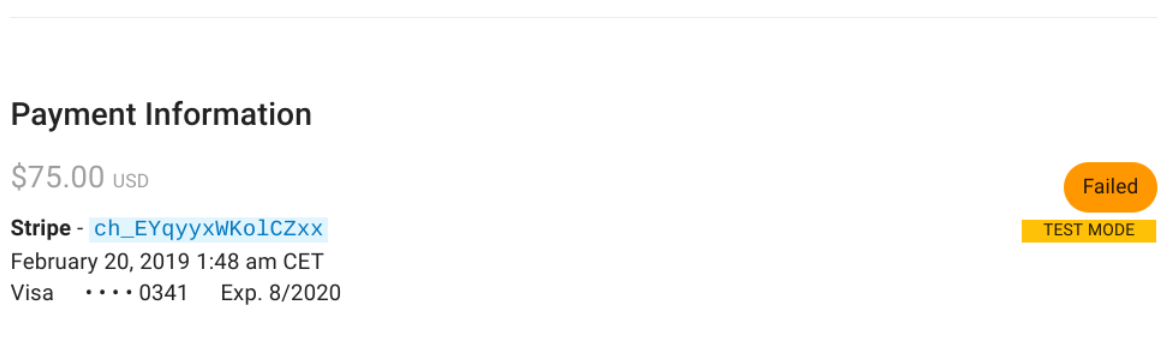
The Appointment Details page displays a Payment Information section at the bottom of the screen. The details included in the list are:
- Payment ID
- Date and time of payment
- Card information
- and status bubble
Successful Payments
When a payment goes through, a green Succeeded bubble appears in the Payment Information. This also confirms the booking.
Failed Payments
Connection errors, processing issues, insufficient funds, declined cards, security reasons, or restricted accounts can all cause failed payments.
When payment doesn’t go through, an orange Failed bubble appears in the Payment Information. This tells us the booking has Failed.
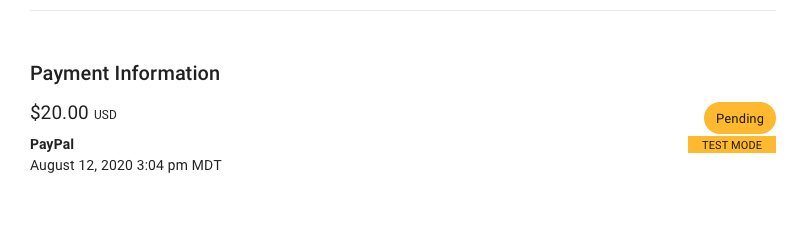
Pending Payments
Bookings can enter a pending state where the time slot is still reserved but not fully booked. A pending payment occurs when:
- The plugin is waiting for payment confirmation from Stripe or PayPal – sometimes, the payment process takes longer than usual
- A customer is still filling in their payment details
- The customer has abandoned the payment process
This time can be specified by adjusting the pending_payment status duration.
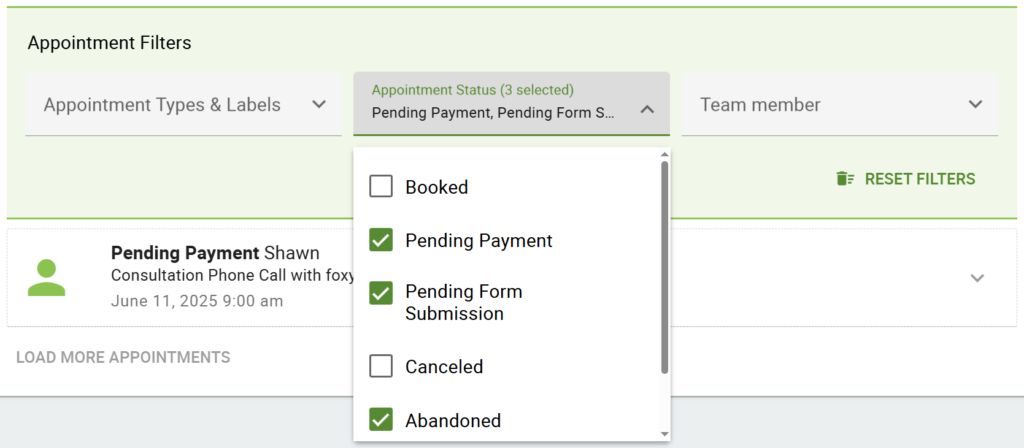
You’ll find the appointments with the Pending Status using the Pending Payment or Pending Form Submission filter.
After the hold passes, the pending appointments enter the Abandoned state.
If you click to view the appointment details page, you’ll see the payment status listed as Pending Payment.
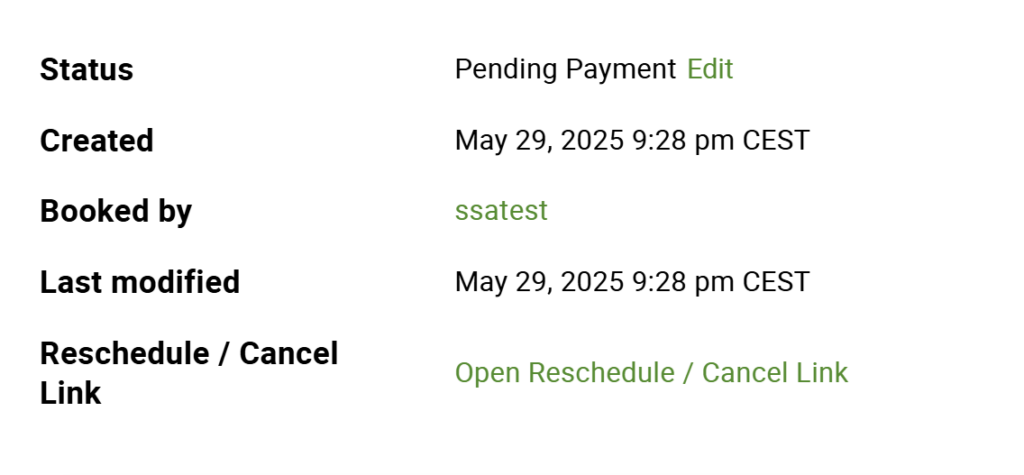
Marking as Booked or Abandoned
When you select a listing with the Pending Payment status, you will see that you can mark the appointment as Booked or Abandoned.
Selecting either option will prompt you with a small pop-up to confirm the action:
- Using the Mark as Abandoned to abandon the appointment
- Or use the Mark as Booked option to allow the appointment to enter the Booked status.
However, please be aware that this booking is still waiting on payment confirmation. You are responsible for tracking the payment if you override the Pending payment status.
Learn more about Booking Status for Payments and how to manage pending bookings.
Canceling and Refunds for Paid Appointments
Canceled appointments don’t automatically issue refunds to customers. You’ll have to issue the refund for the customer manually.
Stripe Refunds
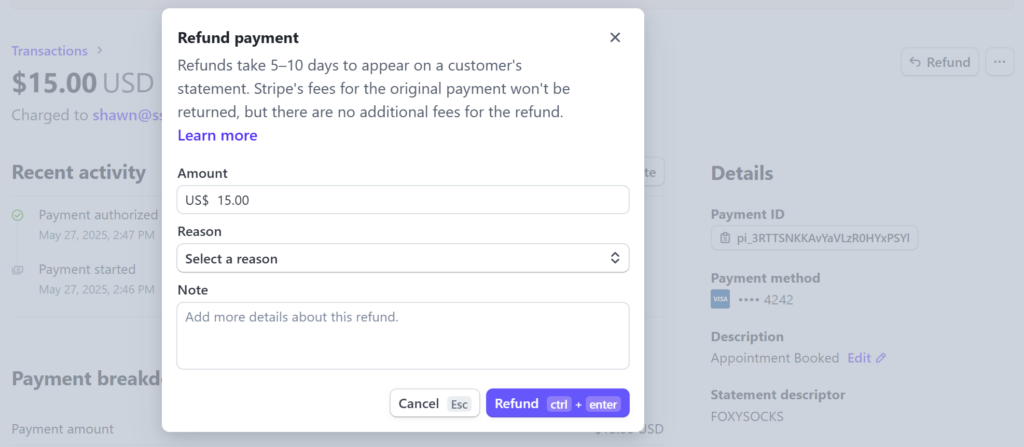
From the Home screen, go to the Transactions tab, and select the payment you’d like to refund.
This should re-direct you to the transaction details page on Stripe. You can find the refund button in the top-right corner. You can either be refunded in full or choose the amount.
Refunds take 5-10 days to appear in the customer’s account.
PayPal Refunds
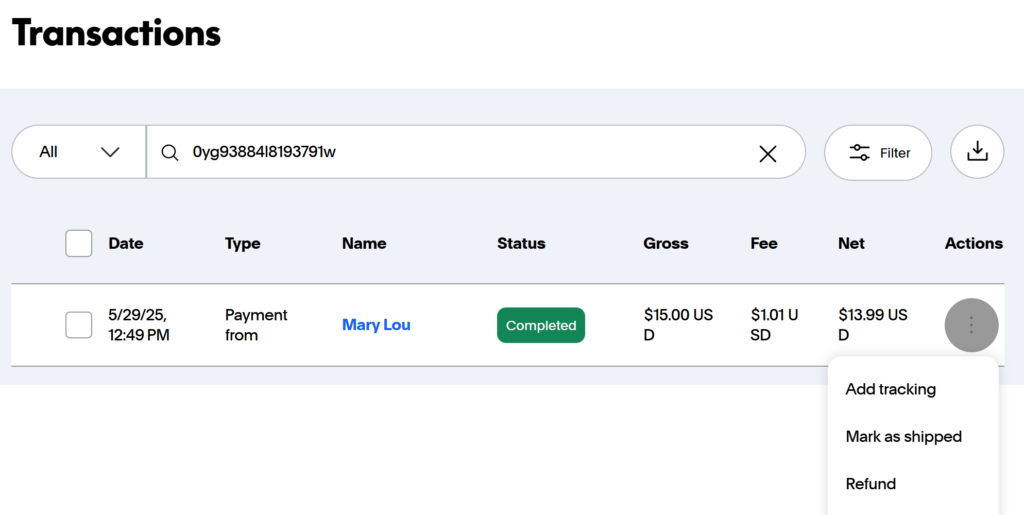
Go to the Appointment Details page, and under the Payment Information section, copy the payment ID. From here, you’ll need to go to your PayPal account.
In your Activity tab, under All Transactions, search for the transaction using the payment ID. Open up the transaction details, and you’ll find the refund button in the Payment Details section.
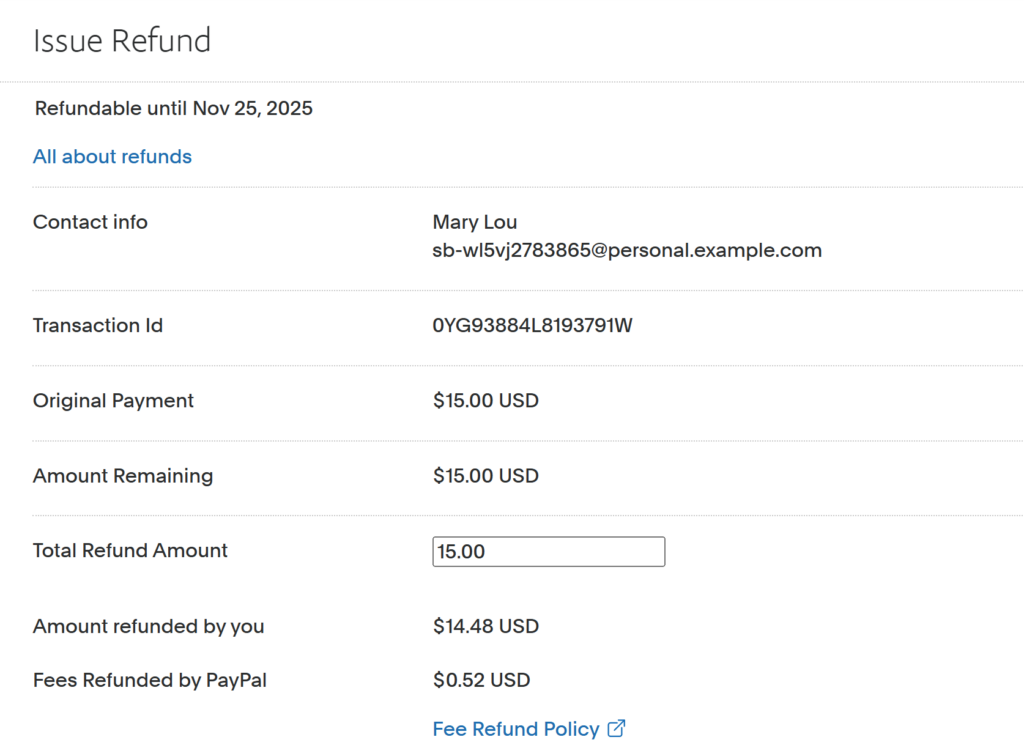
The issue refund page should load, where you can choose how much you want to refund.
Related Guides
-

Payments Setup
-
Custom Subject and Message
-
Cancel, Reschedule, Edit or Delete Bookings
-
Payments, Stripe and PayPal FAQ