In this document:
Introduction
Before setting up payments in your Appointment Types, make sure to set up either the Stripe and/or PayPal integration(s) first.
This guide will walk you through adding the payment amount to each Appointment Type and how that’ll look on your Booking Calendar.
Supported Currencies
- Australian Dollar (AUD)
- Brazilian Real (BRL)
- Canadian Dollar (CAD)
- Czech Koruna (CZK)
- Danish Krone (DKK)
- Euro (EUR)
- Hong Kong Dollar (HKD)
- Japanese Yen (JPY)
- New Taiwan Dollar (TWD)
- Malaysian Ringgit (MYR)
- Mexican Peso (MXN)
- Norwegian Krone (NOK)
- New Zealand Dollar (NZD)
- Philippine Piso (PHP)
- Zloty (PLN)
- Pound Sterling (GBP)
- Singapore Dollar (SGD)
- Swedish Krona (SEK)
- Swiss Franc (CHF)
- Baht (THB)
- US Dollar (USD)
- Hungarian Forint (HUF)
Editing Appointment Types to Accept Payments
With Stripe and/or PayPal set up, you’ll see a new section called Payments inside each Appointment Type:
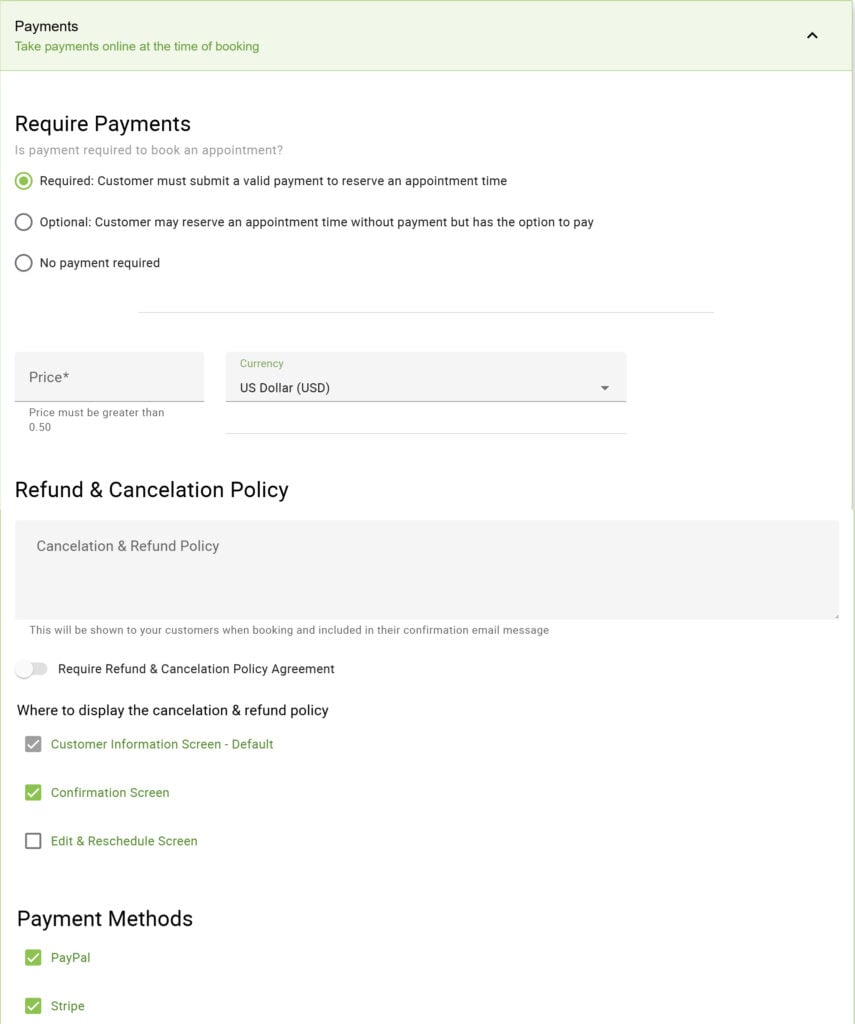
Select a Payment Setting
You can choose to have payments as required or optional for booking that appointment type.
If you mark the payment as required, customers will have to make a successful payment to book their appointment.
For optional payments, customers can choose to pay later (likely in person at the time of the appointment) and will be able to book the appointment without paying.

Set a Price for Your Appointment Type
Next, set the price of the appointment and the currency. By default, the currency is set to the US dollar (USD).
You can change the default currency inside Settings > Payments > Default Currency.
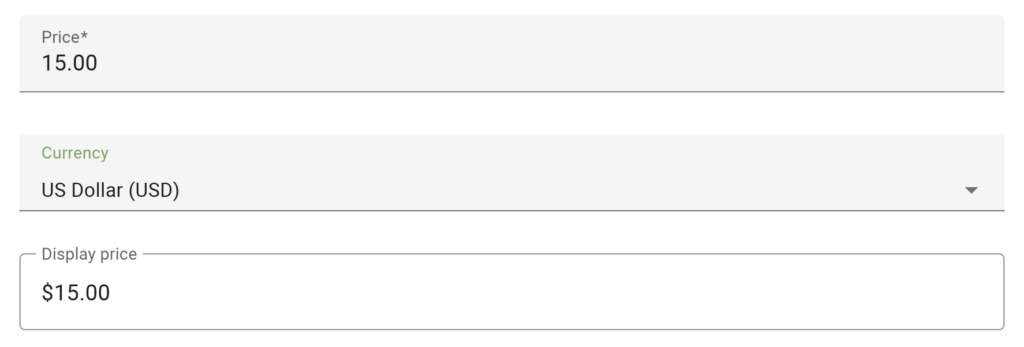
Refund & Cancelation Policy
For the refund and cancellation policy, you can set the following fields
- Policy Details: You can cover the refund and cancellation policy rules and regulations, and other important details your clients need to know.
- Agreement: You can toggle on the Require Refund & Cancelation Policy Agreement to ensure that your clients agree to the refund policy before proceeding with the payment. You can add a custom label for the agreement checkbox.
- Display options: The Refund policy is displayed on the Customer Information Screen by default. You can also select to display it on the Confirmation Screen and/or Edit & Reschedule Screen.
Simply Schedule Appointments does not enforce the refund policy for you. This is informational for your customers so they’re aware of how you’ll handle refunds if they cancel or are a no-show for their appointment.
Payment Methods
This lists the payment methods that you’ve set up. You could include both PayPal and Stripe or choose your preferred method.

Booking Appointments with Payments
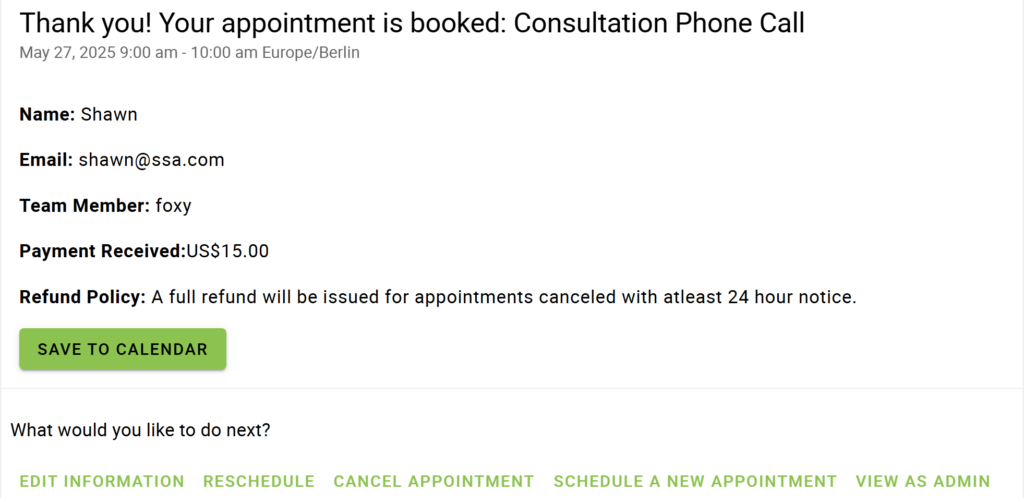
The price you set in the Appointment Type is visible on every screen of the Booking Calendar. Also, all the payment information is visible at the bottom of the booking form, including the price, payment options, and refund policy.

When a customer finishes booking their appointment, the payment amount and refund policy will be displayed in the confirmation details as well.
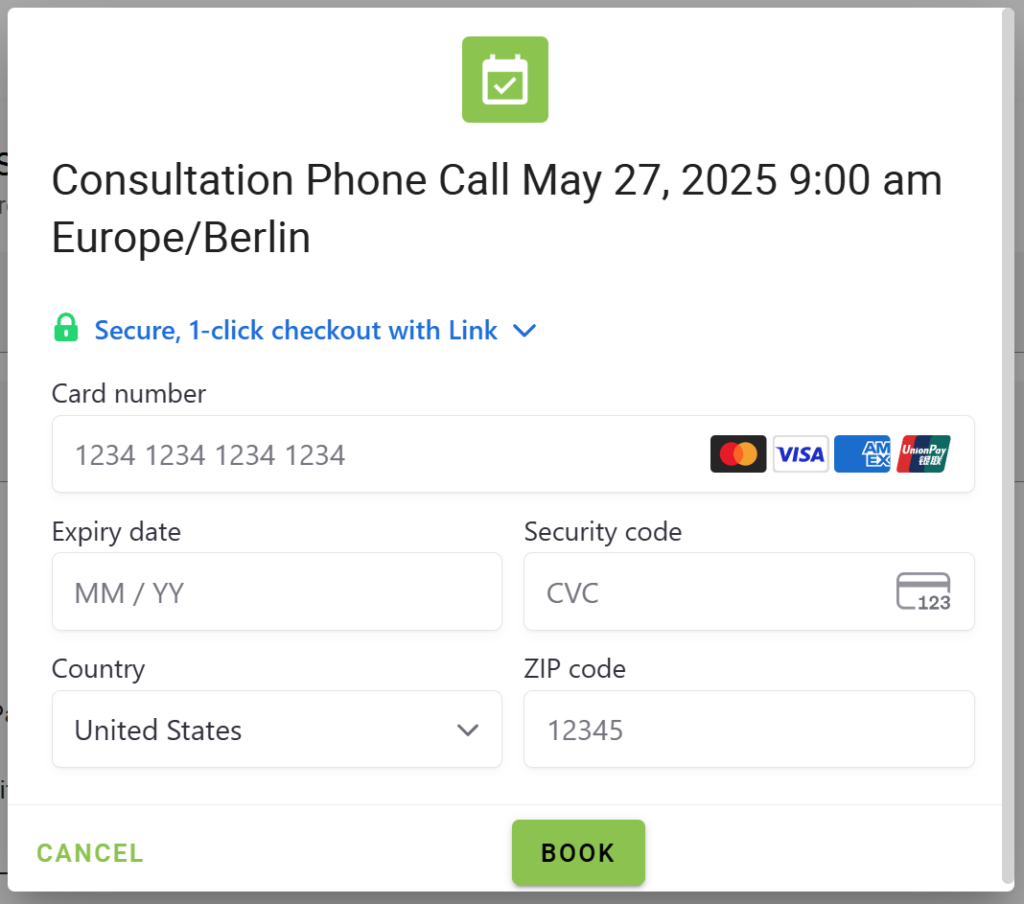
Stripe Payment Process
If the customer chooses to pay through Stripe, a payment modal will pop up. The modal includes:
- Appointment Type Name, Time, and Date details
- Fields to enter the
- Credit card number
- Expiration date
- CVC
- Country
- Zip
- Book and Cancel buttons
A successful payment will show a green checkmark and take the customer to the confirmation screen. If the payment fails for any reason, the customer can edit the credit card info or try a different credit card.
The payment flow may differ depending on the user’s browser and location. Our Stripe integration is SCA-compliant, meaning that Stripe will detect whether authentication is required for European customers.
PayPal Payment Process
If the customer chooses to pay through PayPal, they redirect to the PayPal portal after clicking the Confirm and Pay button.
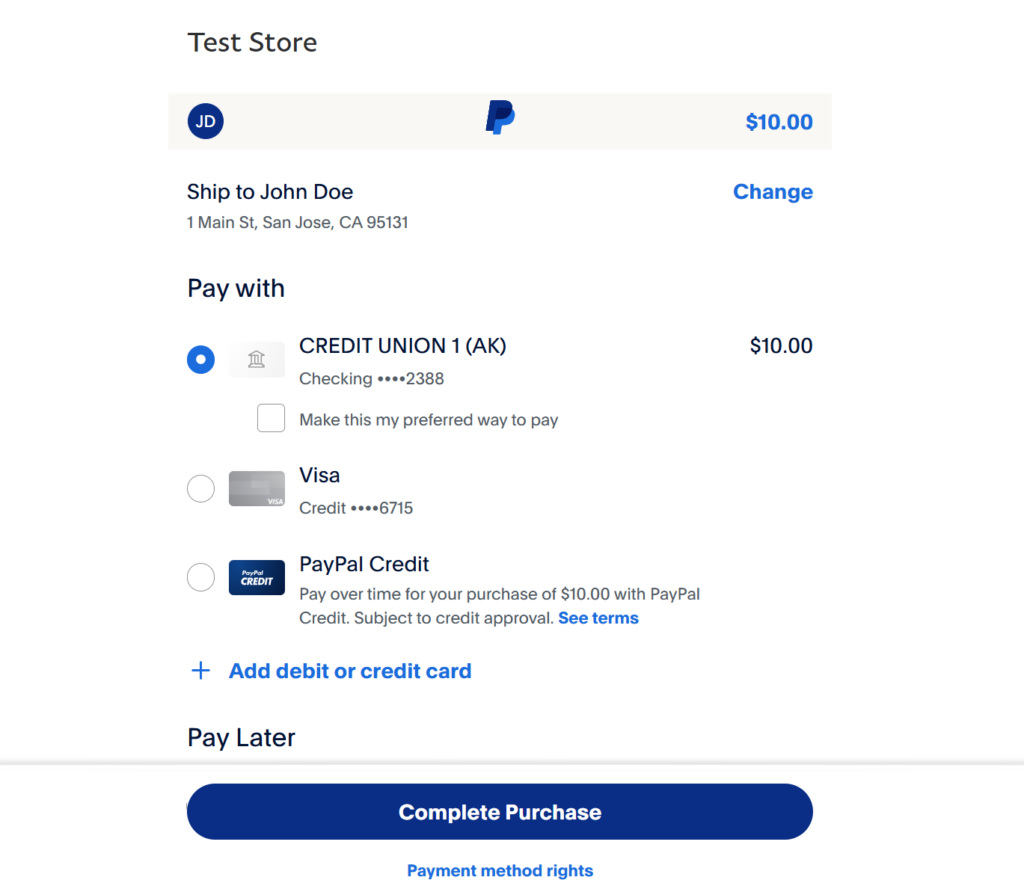
We hold the appointment through a Pending Period to give them time to finish logging in and confirming their payment.
Once the payment is complete, they return to the confirmation screen of the original page they were on. Or, you can use our Redirect to Confirmation Screen feature to take them to a new page.
Pending Payment Status
When a user pays through Stripe or PayPal, SSA does not immediately know if the payment is successful because the plugin is waiting for payment confirmation from Stripe or PayPal. Every appointment that uses the Payment feature is initially marked as Pending Payment.
While SSA is waiting to hear back from Stripe or PayPal, SSA will start a timer. If the plugin doesn’t hear back from the payment gateway in a set amount of time, the appointment is marked as Abandoned.
But, if Stripe or PayPal lets SSA know the payment is complete and that it was successful, SSA will mark the appointment as Booked.
Learn more about the Booking Status and how to change the pending_payment duration.
Managing Payments
Visit our other guide on how to Manage Payments for Bookings to learn more about how an admin will see payment information in the appointment details page and how to best handle refunds.