In this document:
Introduction
Simply Schedule Appointments uses the Twilio API for handling SMS Notifications.
Twilio is a service that lets you send SMS messages (at a very low price per message). This means you’re 100% in control of your customers’ data & privacy. Your SMS reminders won’t pass through our servers, and you can keep your site independent.
Set up your Twilio account and phone number
You’ll need to first set up an account with Twilio so that you can send SMS through SSA.
Create an account on Twilio. Head over to their site and click the Sign-Up button. (If you’ve already got an account, skip this and just log in).
You’ll want to be sure to purchase a phone number from Twilio under Phone Numbers > Manage > Buy a Number. You’ll use this number to send SMS reminders to yourself or your customers.
A2P 10DLC Registration for US Numbers
Then, if you’re sending messages from a US 10-digit long code number to people in the US, you’ll need to finish the A2P 10DLC Registration.
This is to ensure the verification and consent of all A2P 10DLC traffic to US phone numbers. This involves two primary registration components:
- Create a Brand
- You share sender information to establish legitimacy with carriers.
- Create a Campaign
- You provide details on opt-in, opt-out, and user support procedures.
- You describe the purpose of your messages.
Make sure to check Twilio’s A2P 10DLC registration guide to dive deeper into the full setup.
Enable and Set Up SMS Notifications
Video Walkthrough

SMS Notification Setup
Now, we’ll need to enable the SMS feature. Go to Settings > Notifications and click the toggle in the SMS settings box to turn this feature on. Click on Edit Settings; here, you can enter the information from the Twilio Dashboard.
You’ll need three bits of info from your Twilio account, all of which should be visible on your Twilio Dashboard:
- Account SID
- Auth Token
- and your Twilio phone number
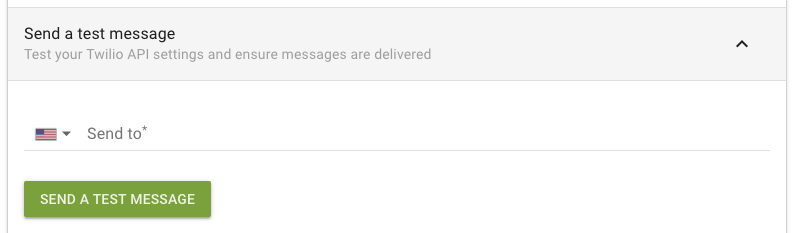
Send a Test Message
You can send a test message to confirm that your Twilio account information is correct. Under the Send a test message section, type in your phone number and click Send.
If your Twilio account is still in trial mode, you’ll only be able to send texts to numbers that you’ve verified in your Twilio account.
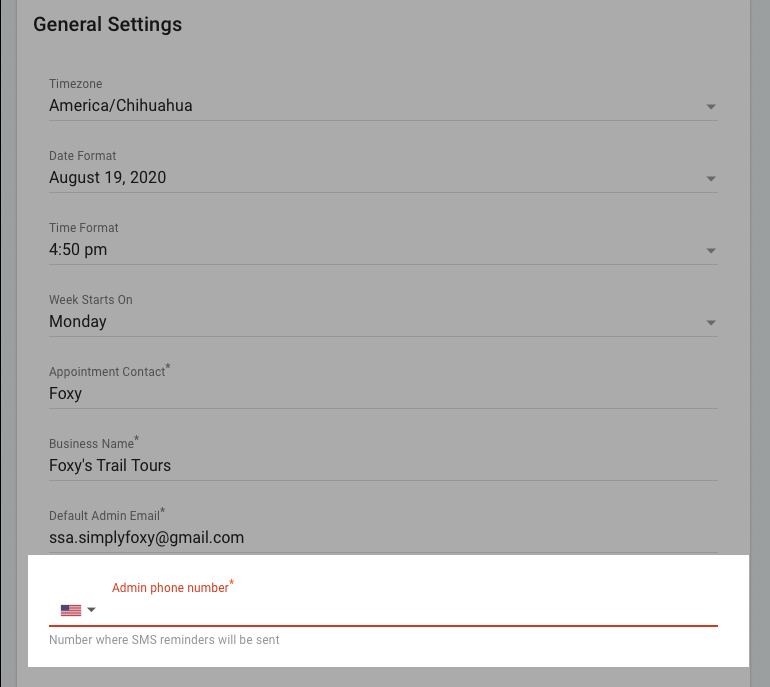
Update the Admin Phone in General Settings
You’ll need to enter an admin phone number if you’d like to send yourself text reminders and notifications about appointments. Go to Settings > General to enter your phone number.
Add the Phone Number Field to Appointment Types
To send SMS notifications, reminders, and follow-ups to your customers, you’ll need to ask them for a phone number in the booking form.
Edit your appointment types, and in the Customer Information section, be sure to add a field with the type Phone number. You can bulk-edit your appointment types to speed up this process!
We’re automatically checking for phone number fields and upgrading those from single-line text fields to phone number fields where we can. So you might find that some of your appointment types already have phone number fields.
Setup an SMS Notification
Setting up an SMS notification is similar to an Email Notification. Except some fields will vary.
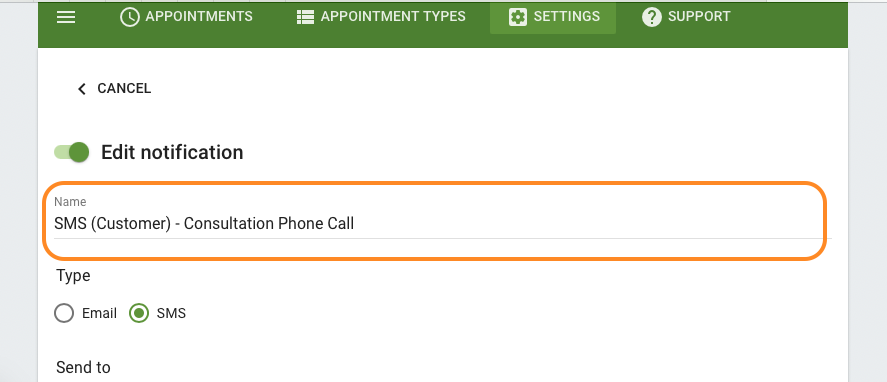
In SSA, go to Settings > Notifications and +Add a New Notification.
Name Field for Organizing Notifications
This is to help admins keep track of the notifications.
If you plan to create a lot of customized notifications, we recommend creating a naming system to help you edit them in the future. Keep these things in mind while naming:
- Include a quick note about who is receiving the notification (Admin, Customer, or someone else?)
- The appointment type connected to the notification (All or a only one?)
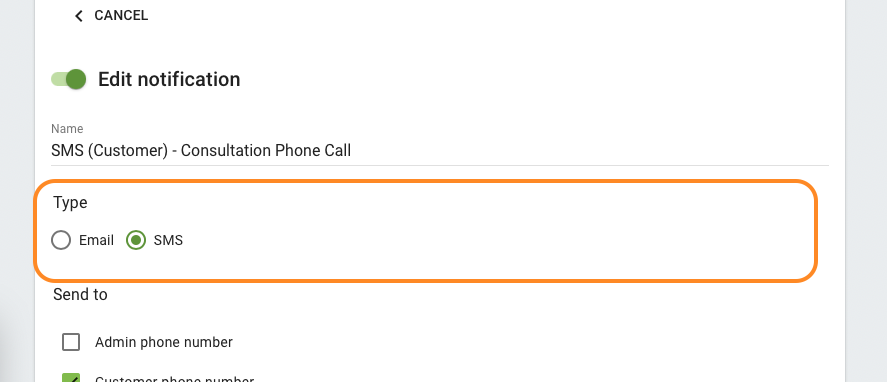
Choose the Type
After setting up your SSA with Twilio, a new option to choose a type of notification will appear.
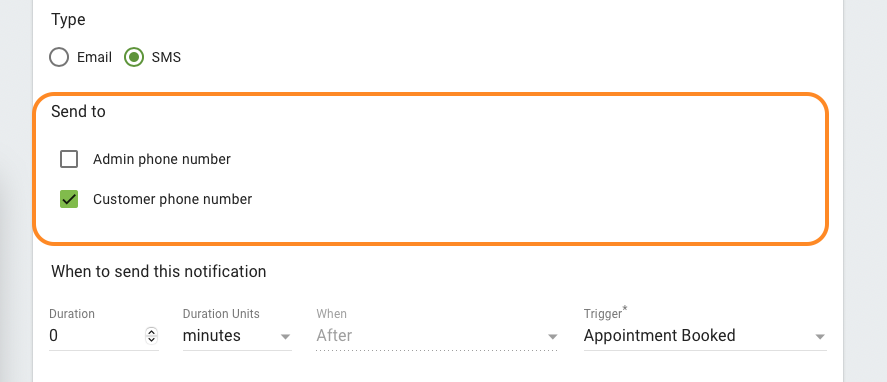
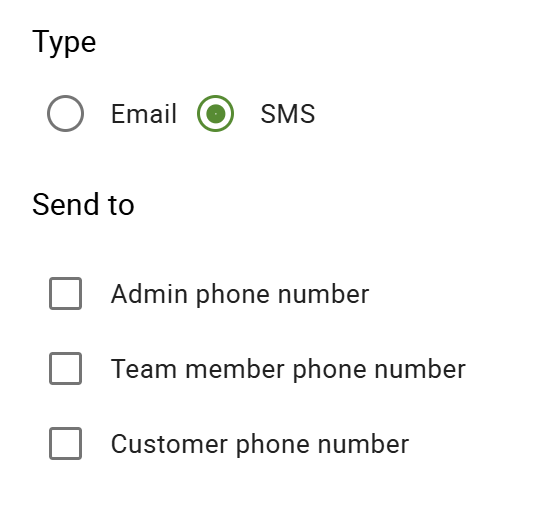
There are two buttons for selecting a Type: Email or SMS. Choose SMS.
Send To Either Admin or Customer
Next, select who this SMS notification is going to send to – Admin or Customer.
If you haven’t set up an admin phone number in the General Settings, you’ll only see the Customer phone number option here.
Sender Selection with Team Booking
For Business Edition users, with the Team Booking option, you can also select to send SMS to Team Member(s). Make sure that the team member’s phone number is added under the Contact tab within the Team Member profile in order for them to receive the SMS notification.
Triggers to Send Notifications at Specific Times or Events
Each notification has a trigger for sending. You can set up different notifications for different events. The triggers are:
- Booked: Sent when a customer finishes booking
- Edited: Sent when an admin or customer edits the information from the Booking Form (name, email address, etc.)
- Canceled: Sent when the admin or customer cancels the appointment.
- Time of Appointment: Send at a specific time before or after the time of the appointment.
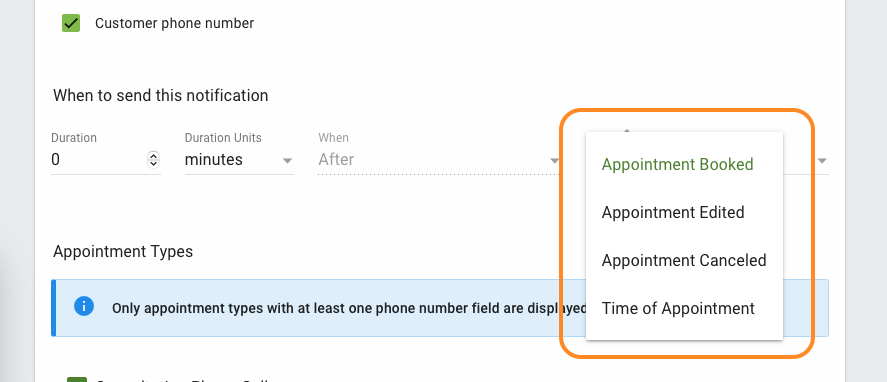
Tie Notifications to Appointment Types
The list here only shows Appointment Types that have a Phone Number field. Check off the Appointment Types that you want to be tied to this notification.
If you don’t see any, go back to your Appointment Types and add a Phone Number field in the Customer Information tab.
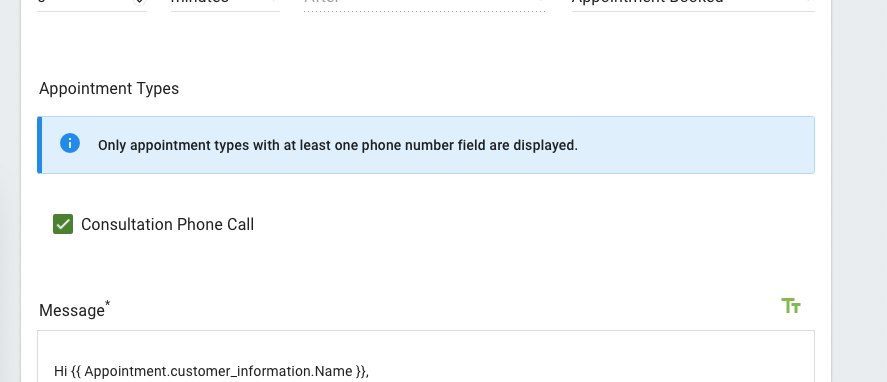
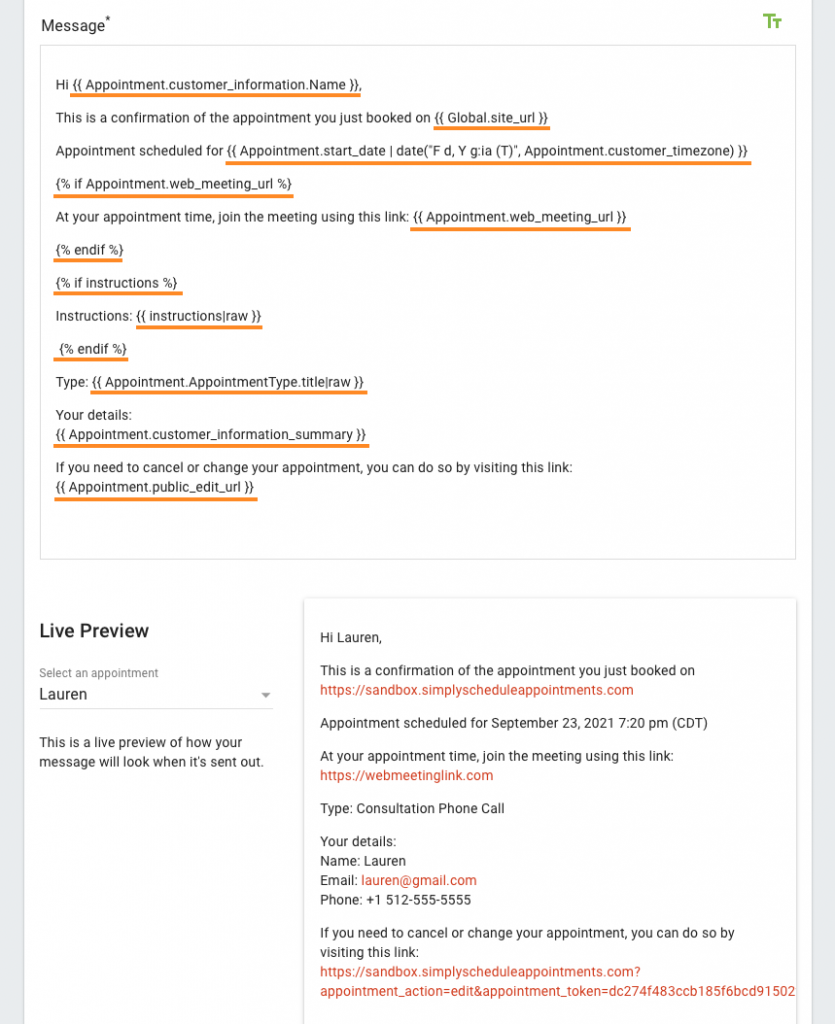
Message to Send Through SMS
The message field uses Twig Code Templates to insert appointment information. Click the Tt (text) icon at the top-right corner of the Message field to insert Twig Code Tokens automatically.
And keep an eye on the Live Preview box below the message box to ensure there are no errors.
Here’s a guide to help you write personalized messages using the Twig Code Templates: Writing Your Notification Subject and Message. Or, easily start with one of our default Messages: Default Notification Messages
Booking Appointments with SMS Field
Customers will be able to opt-in to receive text messages. If there’s an SMS notification tied to their selected appointment type, they’ll see a checkbox under the phone number field.
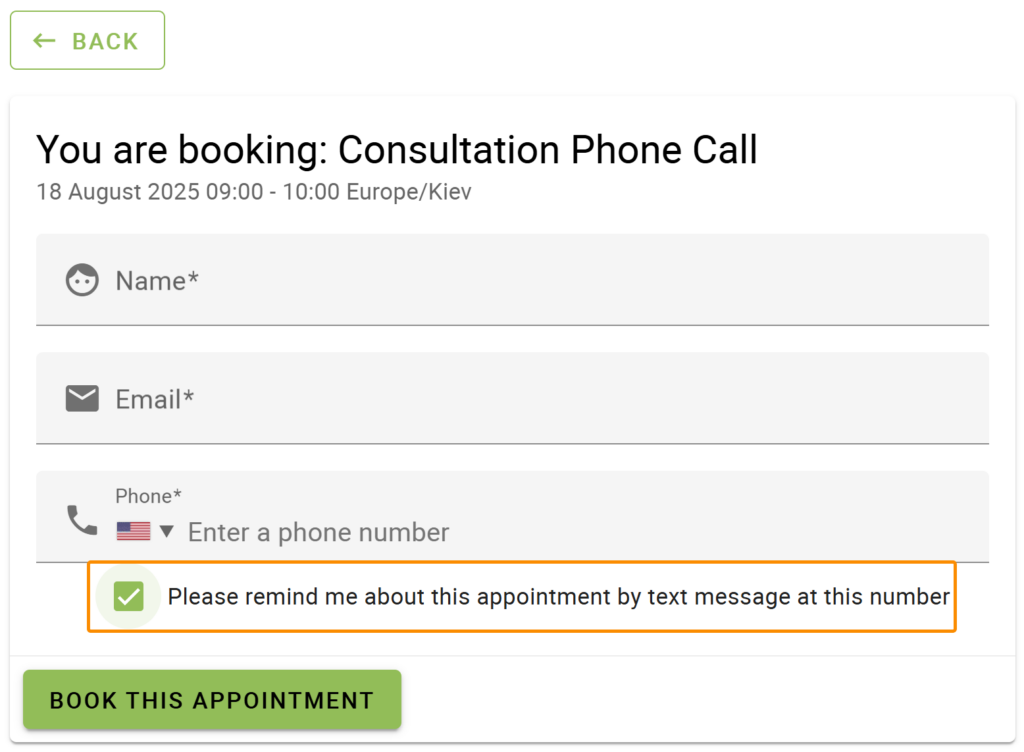
In addition to opting in, customers must enter a valid phone number to ensure they receive SMS notifications properly.
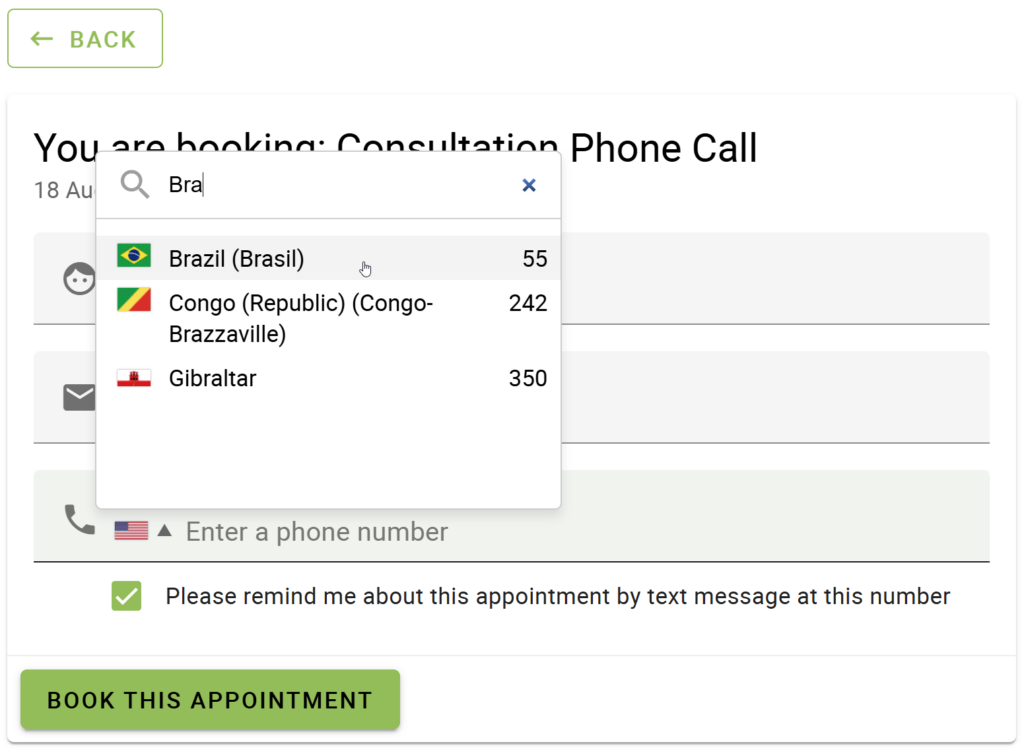
SSA automatically detects and displays the customer’s country in the phone field. However, customers can manually change the country by clicking the flag icon and selecting a country from the dropdown list or using the Search Country feature.
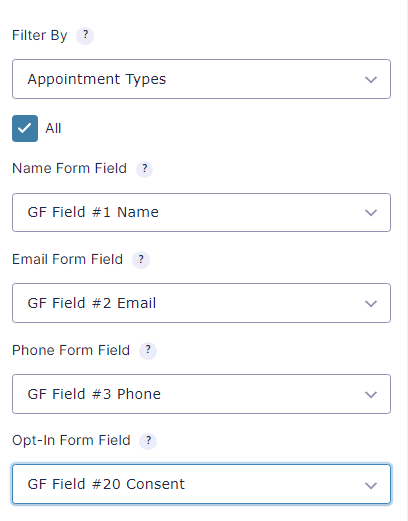
SMS with Form Integrations
With Form Integrations like Gravity Forms or Formidable Forms, this works similarly. If the form includes a consent field that is mapped to SSA’s opt-in field, then the opt-in will be enforced, and SMS notifications will only be allowed if the user has specifically checked that box.
Otherwise, all entries with a phone number field are opted-in by default as long as the SMS feature is enabled.
Related Guides
-

Professional Edition Guide
-
Reminders and Follow-Up Messages
-
Conversion Tracking Overview
-
Manage Payments for Bookings