In this document:
Introduction
Use PayPal test mode with Simply Schedule Appointments to ensure your account is set up correctly and that your payments will go through successfully. You can test how paid appointments work and see that your PayPal account is being updated after booking.
Make sure you’ve set up your PayPal account and SSA settings before you begin testing.
To get this set up:
- Create/Login to a PayPal Developer Account
- Enable PayPal Sandbox
- Use Test Business and Personal Accounts to Test Appointments
1. Create or Login to Your PayPal Developer Account
Go to the PayPal Developers page and either make an account or log in to your existing one. When signing up, make sure to use the same email as your real PayPal account.
After logging into your Dashboard, go to the Accounts page. This is where you’ll collect the information for the test accounts.
PayPal creates personal and business accounts by default. Under the Accounts column, click on the three dots button > click on View/Edit Account to see the test account credentials.
- The Personal sandbox account will be used to test out a user booking a paid appointment.
- The Business sandbox account will be what you’ll use to test whether the plugin delivers payments successfully.
The email should be under the Email field, and the password should be under the Password field.
You can use those login credentials to log in to the PayPal Sandbox account page.
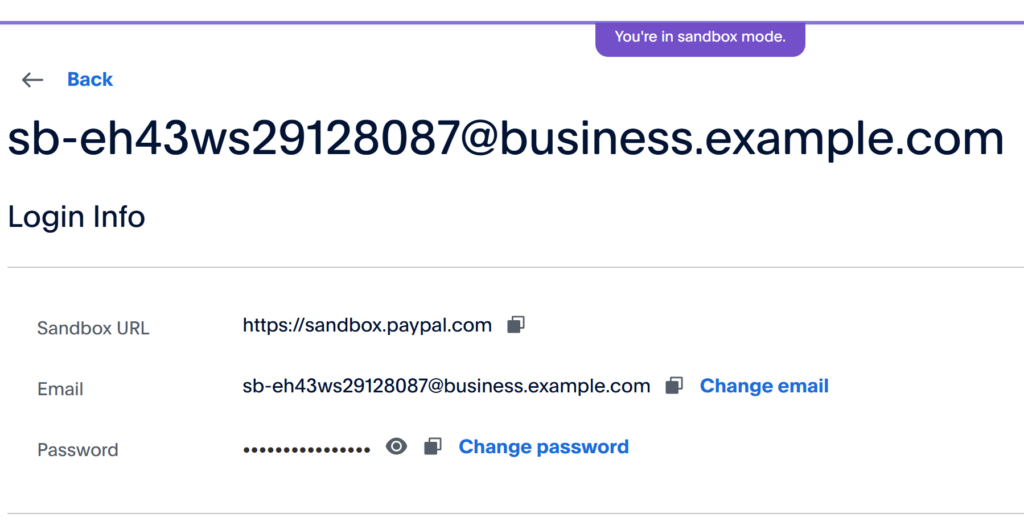
You can only be logged into one at a time. You’ll have to log out to switch between the business and personal sandbox.
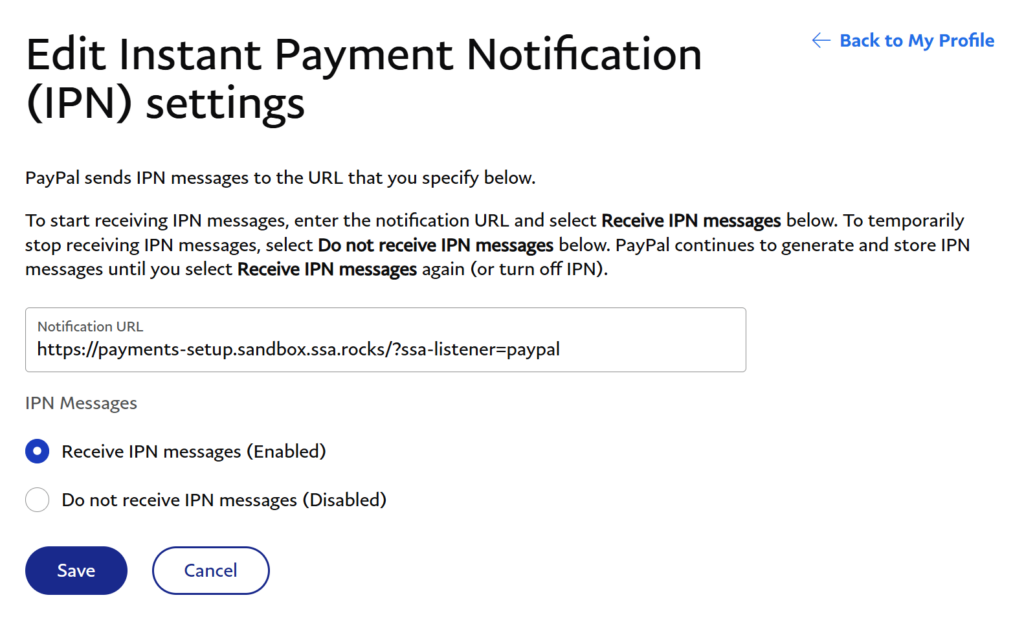
Updating IPN Settings in Business Test Account
You’ll also need to update the IPN settings in the test Business Account. To do this, log in to the Business Account through the Sandbox login page.
Hover over the Profile icon in the top-right corner > and click on Account Settings. Under the Products & Services section > click on Website Payments > and click on Update for Instant Payment Notifications.
Start the process on the page, and under the Notification URL field, paste in your IPN Notification URL generated on the SSA PayPal page. It should look like this:
https://yoursite.com/index.php?ssa-listener=paypalAnd choose to Enable to Receive IPN Messages. Click Save.
2. Set up PayPal Test Mode in the SSA Advanced Settings
Going back to the SSA settings, go to Payments > PayPal.
The first thing you’ll need to do is change out the email address for the sandbox Business email address.
This will only be for testing purposes; make sure to switch it back to your own once you’re done testing.
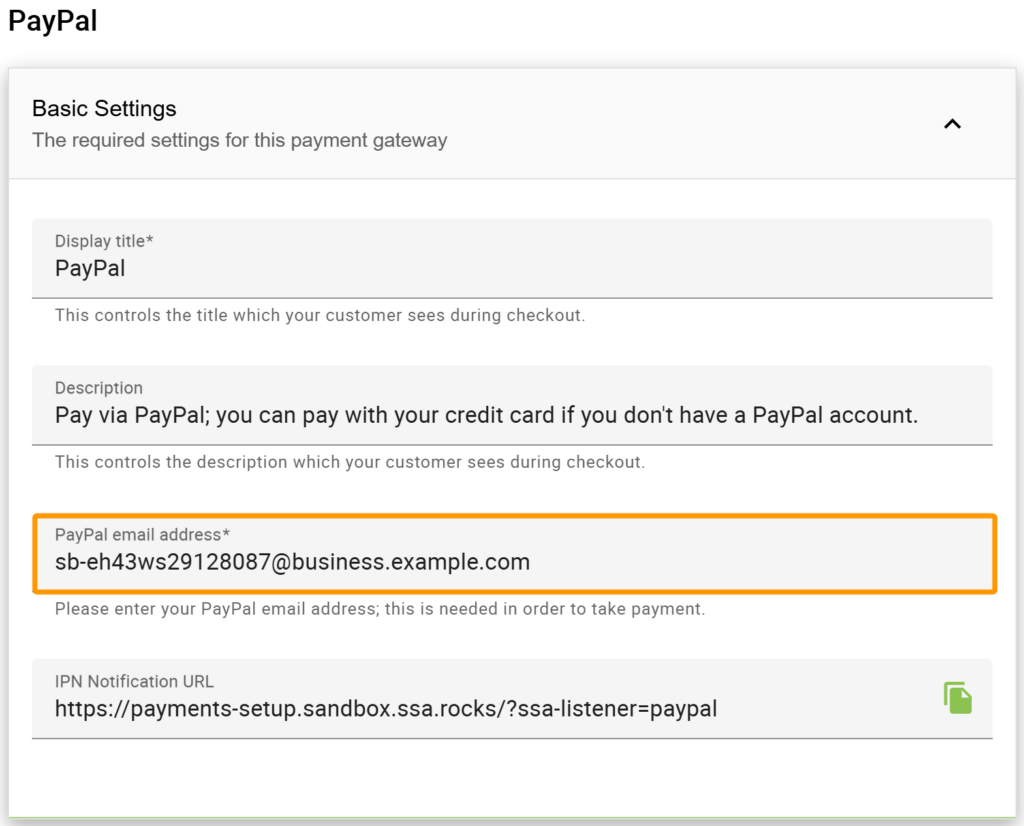
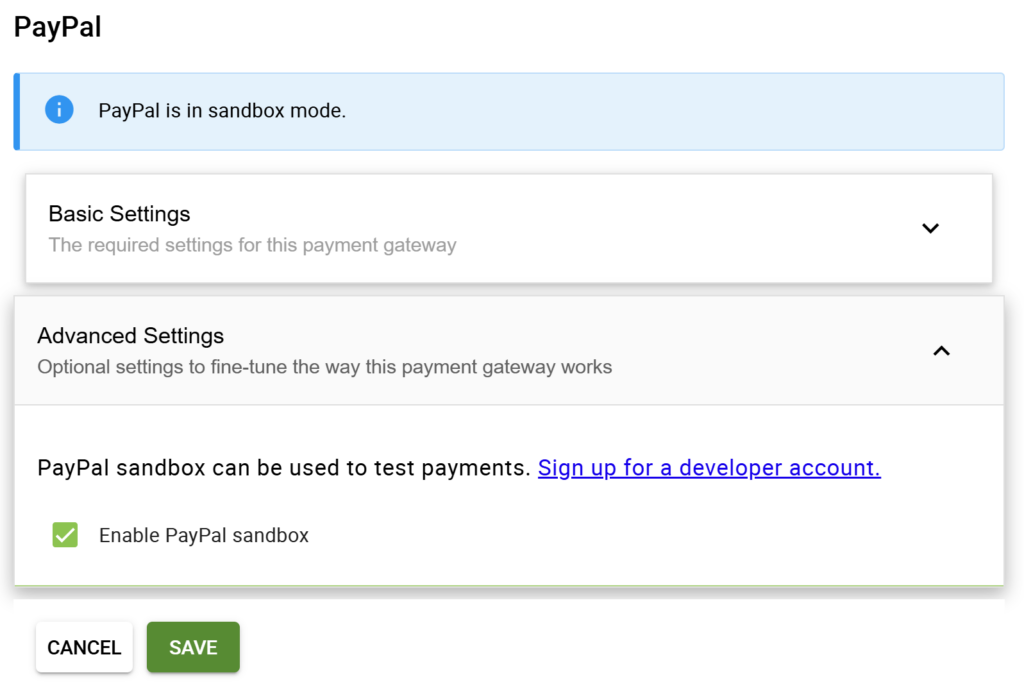
After switching out the email address, go ahead and Enable Test Mode under the Advanced Settings tab. Click Save.
A blue bar will appear at the top of the settings letting you know that PayPal is in test mode. And, when looking at the Payment settings, you’ll also see an exclamation point reminder for test mode.
And this should be all you need to set up test mode. Make sure the Appointment Types you want to test have PayPal enabled as a payment option.
3. Book a Test Paid Appointment
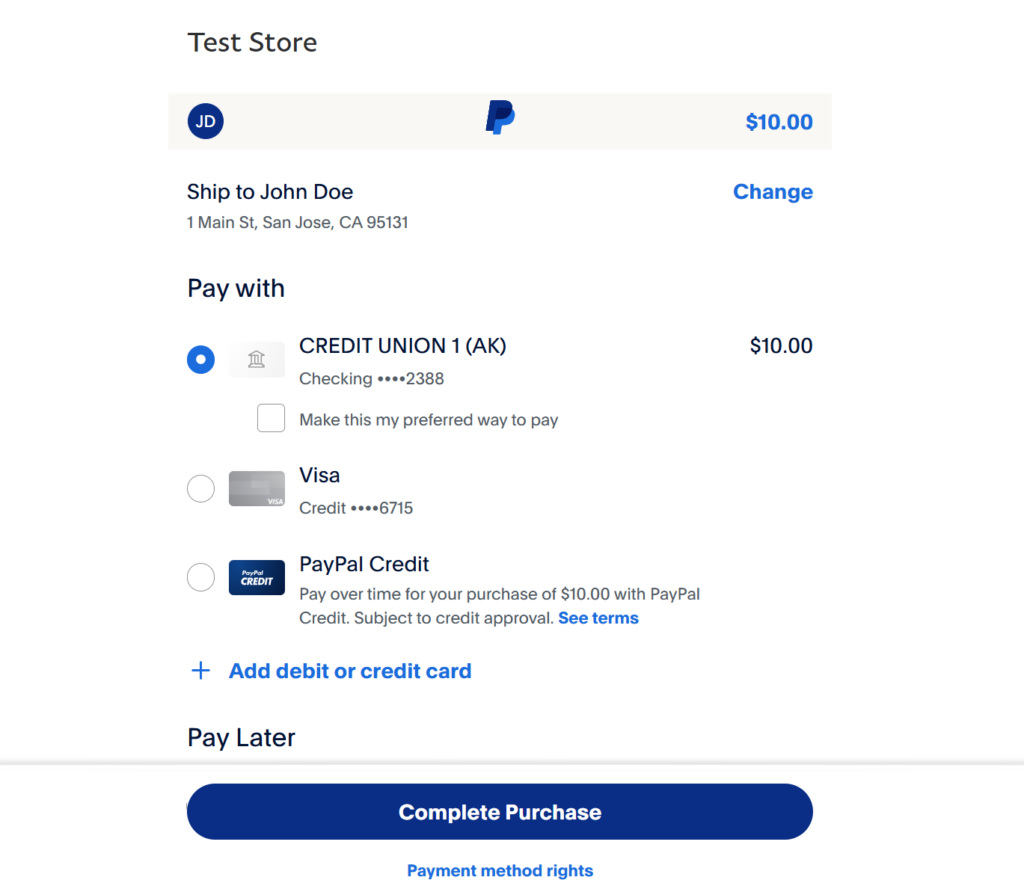
When booking, the PayPal login page will appear; make sure you use the sandbox Personal account to test the payment.
You’ll see the name of the sandbox Business store at the top of the PayPal payment page.
Viewing the Test Paid Appointment
After booking the paid appointment, you can head to the SSA Appointments page. You’ll find the new appointment on the list. It’ll look like a regular appointment.
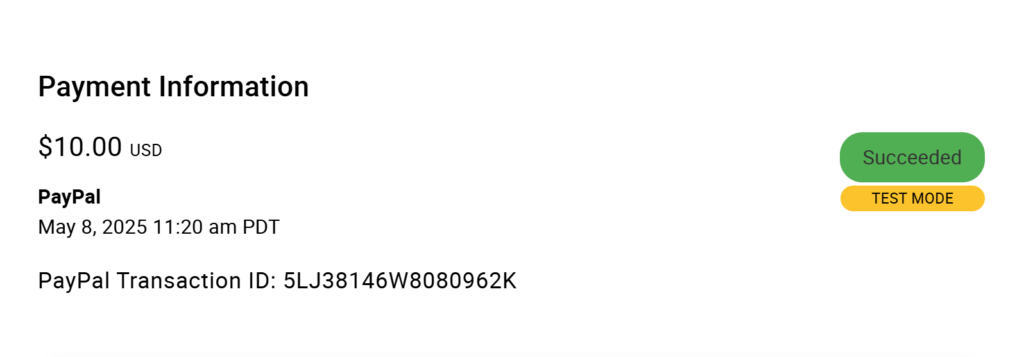
Only if you open the Appointment Details, you’ll see that it is a test appointment. Under the Status bar in the Payment Information section, you’ll see a yellow Test Mode bar.
You’ll be able to use the Payment ID to search for the transaction in the sandbox Business account.
Now, if you go into each of the Sandbox accounts, you’ll see how the transactions will look from the admin and customer perspective.
