In this document:
Introduction
Make it easy for your customers to book paid appointments using Stripe. Add the Stripe option to receive payments directly to your Stripe Business Account.
You’ll need to:
- Install an SSL Certificate
- Sign Up for a Stripe Account
- Set up the Publishable Key and Secret Key in SSA
- Set up the Stripe Webhook URL in Stripe
- Set up the Webhook Signing Secret in SSA
- Save Your Stripe SSA Basic Settings
- Select Preferred Payment Methods
- Adding Payments to Your Appointment Types
After finishing those steps, you’ll be ready to start taking Stripe payments! Finish setting up Payments for your appointments by adding your payment settings to your Appointment Types.
Video Walkthrough

1. Install an SSL Certificate
Stripe requires your site to have an SSL Certificate.
A quick way to tell if you are SSL Certified is to check your site’s URL. Make sure your URL starts with HTTPS, not just HTTP.
If you find that your site isn’t SSL certified, contact your hosting company for help in getting that set up.
2. Sign Up for a Stripe Account
If you don’t have one yet, go over to their website and get one set up. Stripe requires an account before you can start to accept payments, and it’s free to create an account!
Create or Login to your Stripe Account
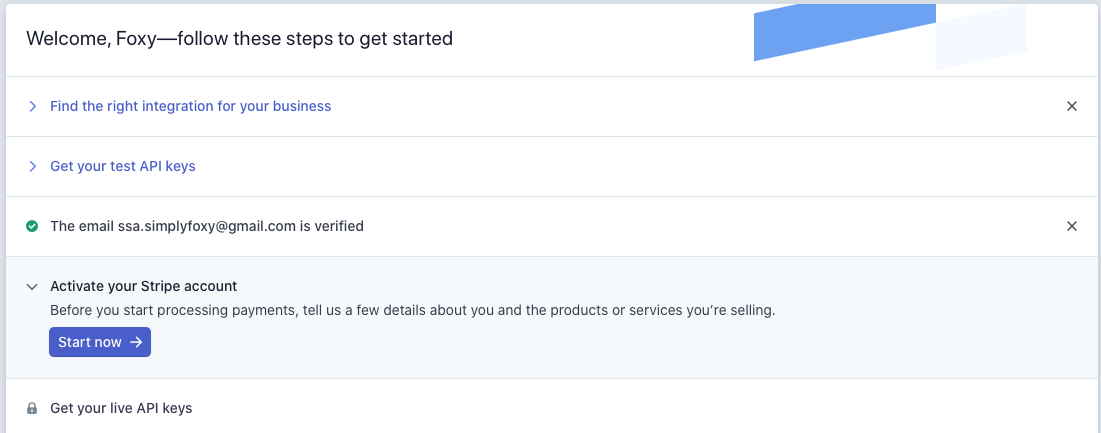
When you sign up for a new account, verify your email and onboard your account. Your account will continue to work as a test account until you verify and finish onboarding.
After verifying, Stripe will ask you to finish onboarding by asking for more information about your business, collecting your Bank details, etc.
You cannot accept payments or get live API keys until your account has been thoroughly set up.
3. Set up the Publishable Key and Secret Key in SSA
Once you’ve got your Stripe account, you’ll need to get your Publishable Key and your Secret Key from your Stripe account.
Copy and Paste the Keys from Stripe to SSA
Go to Developers > API keys. You need to make sure you’re copying the Live API keys.
The Publishable Key should already be displayed under the API keys, which can be copied directly.
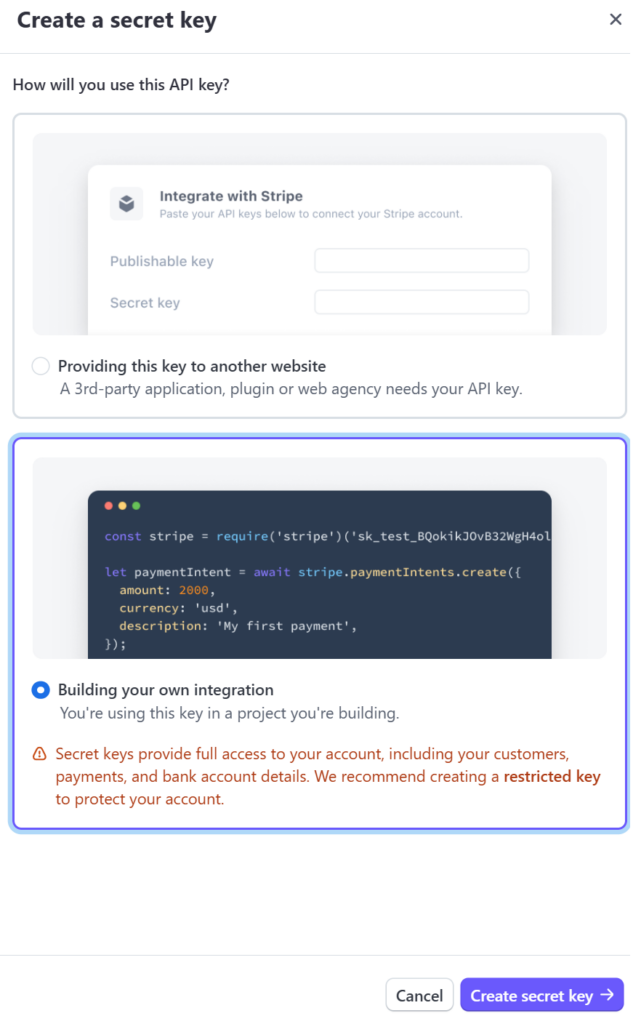
You’ll have to create the Secret Key via the following steps in order to copy it:
- Click on the Create Secret Key option under the API keys.
- Under How will you use this API key?, Select the Building your own integration button.
- Click on the Create Secret Key button at the bottom left.
- Enter the Key Name and select Create.
- Copy the generated Secret Key.
You will see a warning while selecting the Building your own integration option; however, it is completely safe to proceed, as the Secret Key will be securely added to your site.
Make sure to store your Secret Key in a separate and safe location; after you generate the key for the first time, you cannot copy or view it ever again.
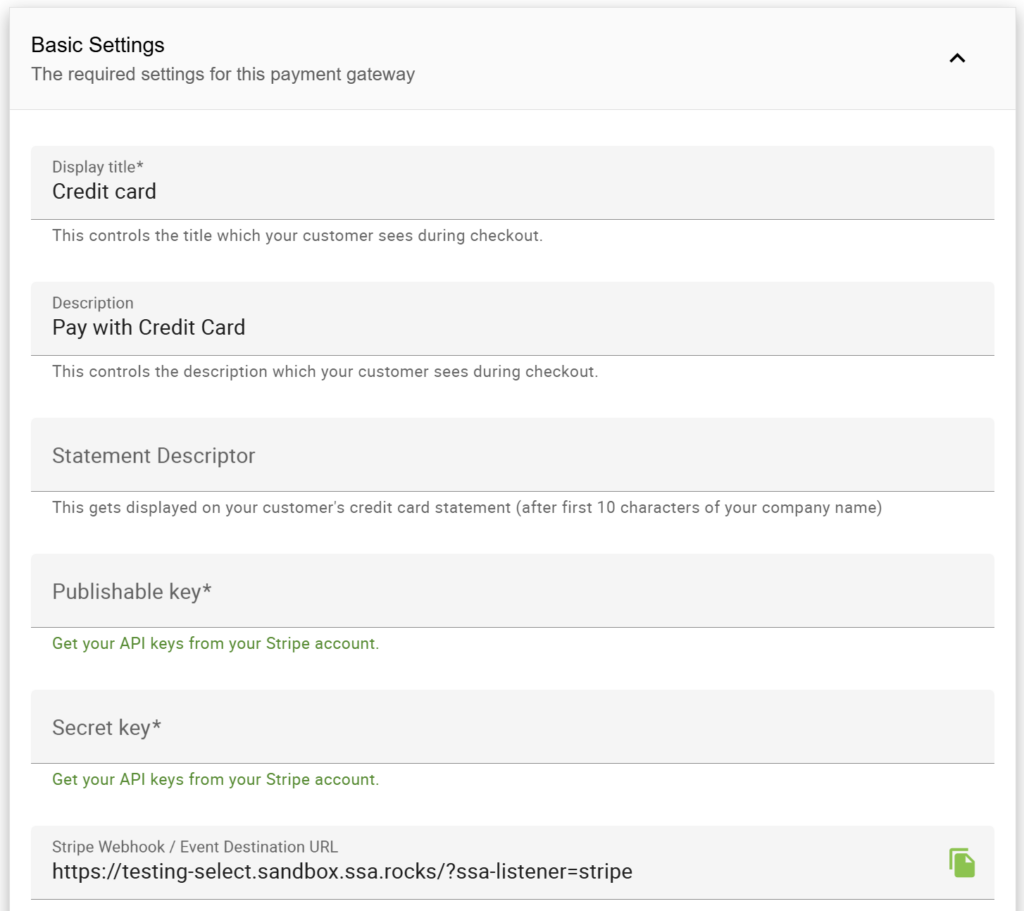
With your copied keys, go to your SSA Settings > Payments > Stripe > Under Basic Settings, and enter each key into its corresponding field.
4. Set up the Stripe Webhook URL in Stripe
You need to install an SSL Certificate for this step to work.
Copying the Webhook URL From SSA
Go to your SSA Settings > Payments > Stripe.
You’ll see the Stripe Webhook URL that you need to copy under the Basic Settings.
Paste the Webhook URL to Stripe
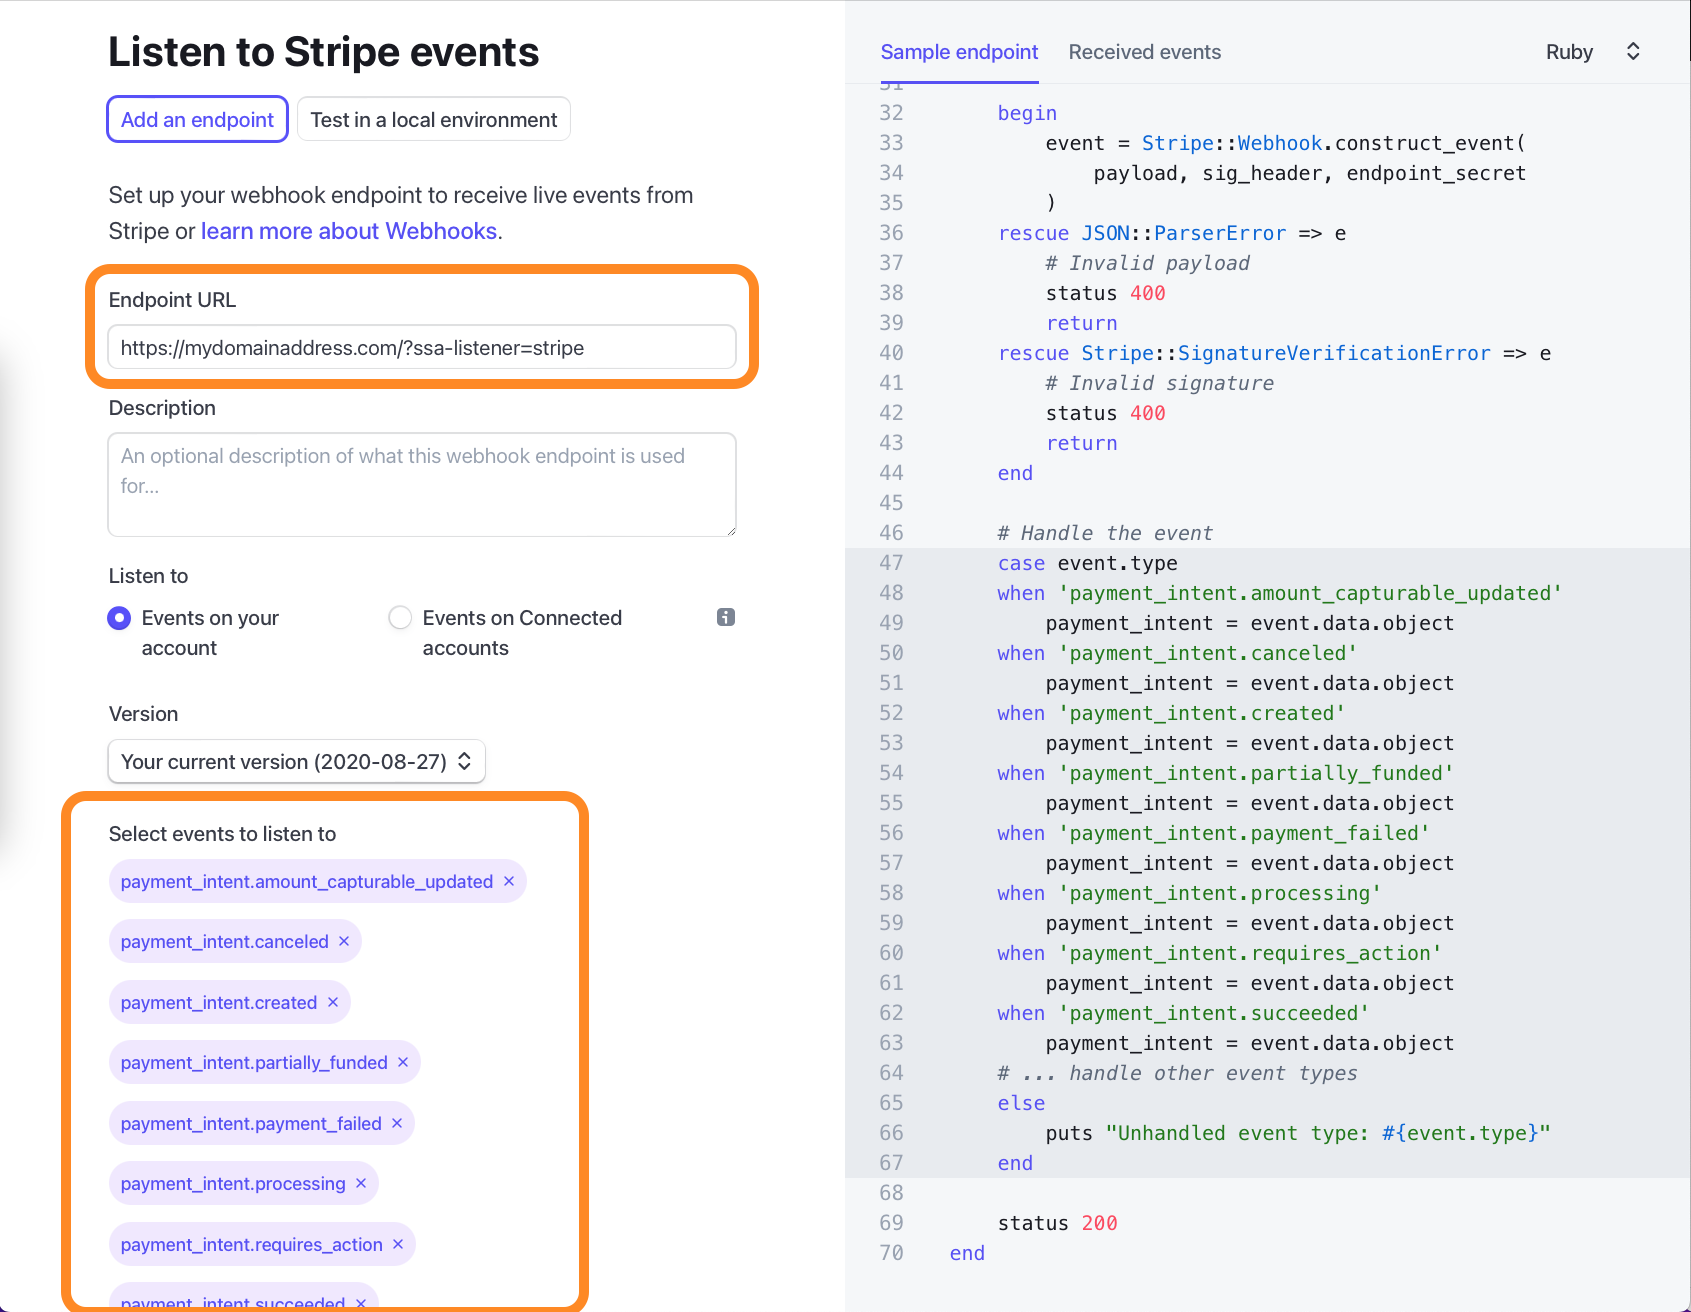
Go to Developers > Webhooks.
Click on + Add endpoint. Then paste in the Stripe Webhooks URL to the Endpoint URL field.
Selecting Events to Send
- Click on the +Select Events button
- Scroll through the list for the Payment Intent tab
- Click on the Select all Payment Intent events checkbox
- Click the Add Events button
Lastly, click +Add Endpoint at the bottom of the screen.
If you’re using Cloudflare, you’ll need to whitelist the SSA Webhook URLS as well. Please visit our guide on the 503 Error for Stripe Webhooks to see the setup steps.
5. Set up the Webhook Signing Secret in SSA
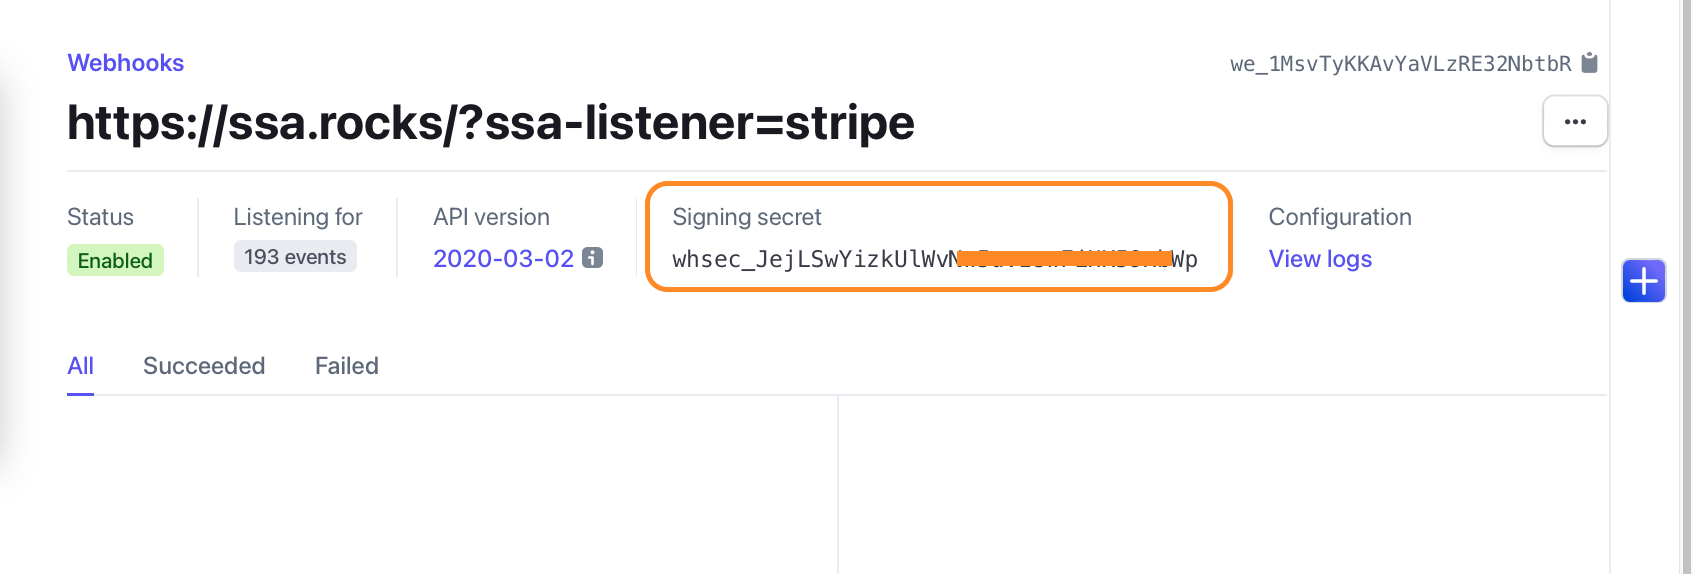
After finishing the Webhook creation from Step 4, you’ll be redirected to the Webhook detail page. From here, you’ll need to collect the Signing Secret.
Under the Signing Secret column > click Reveal > and copy the code shown.
Back in SSA Settings > Payments > Stripe, paste the code you just copied into the Webhook Signing Secret field.
6. Saving Your Stripe SSA Basic Settings
Double-check the Display title, Description fields, and Statement Descriptor to make sure that’s what you’d like your clients to see when they’re booking.
Basic Settings
- Display Title: The name that will display on the booking form for the Stripe payment option
- Description: The description that will display on the booking form for the Stripe payment option
- Statement Descriptor: This text follows your company’s name on your customer’s bank account statement
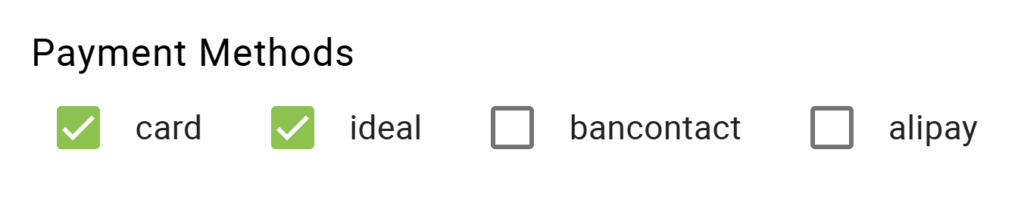
Payment Methods
The Stripe integration currently supports Card, iDeal, BanContact, and AliPay payments.
By default, Card and iDeal are enabled as the preferred payment options. You can uncheck the boxes for the payment options that you do not want to display to customers; however, you must keep at least one payment method selected, otherwise you will see an error regarding it.
The preferred payment options are global, meaning that they are applied to all Appointment Types and for live and test mode payments.
Requirements for Payment Methods
iDeal: Please note that the iDeal option requires the use of the Euro currency and the webhook field to be set up to be displayed, despite the checkbox being enabled.
BanContact: The BanContact option requires the use of the Euro currency and the webhook field to be set up and displayed, despite the checkbox being enabled.
AliPay: The AliPay option requires the use of USD or Chinese Yuan currency and the webhook field to be set up and displayed.
Advanced Settings
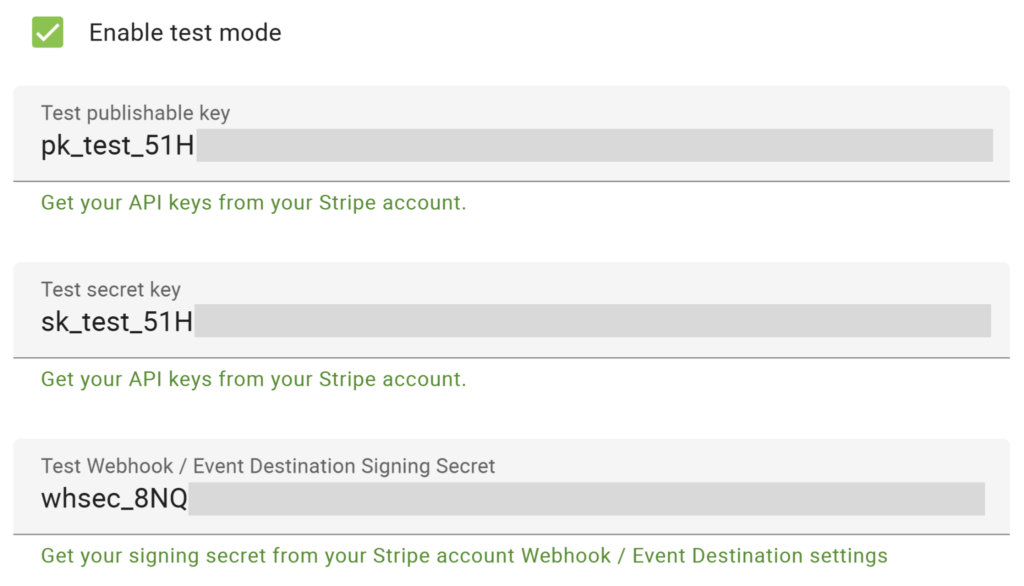
You can use the Advanced Settings section to put Stripe into test mode to test payments.
We have a guide to walk you through the Stripe Test Mode setup if you’re interested.
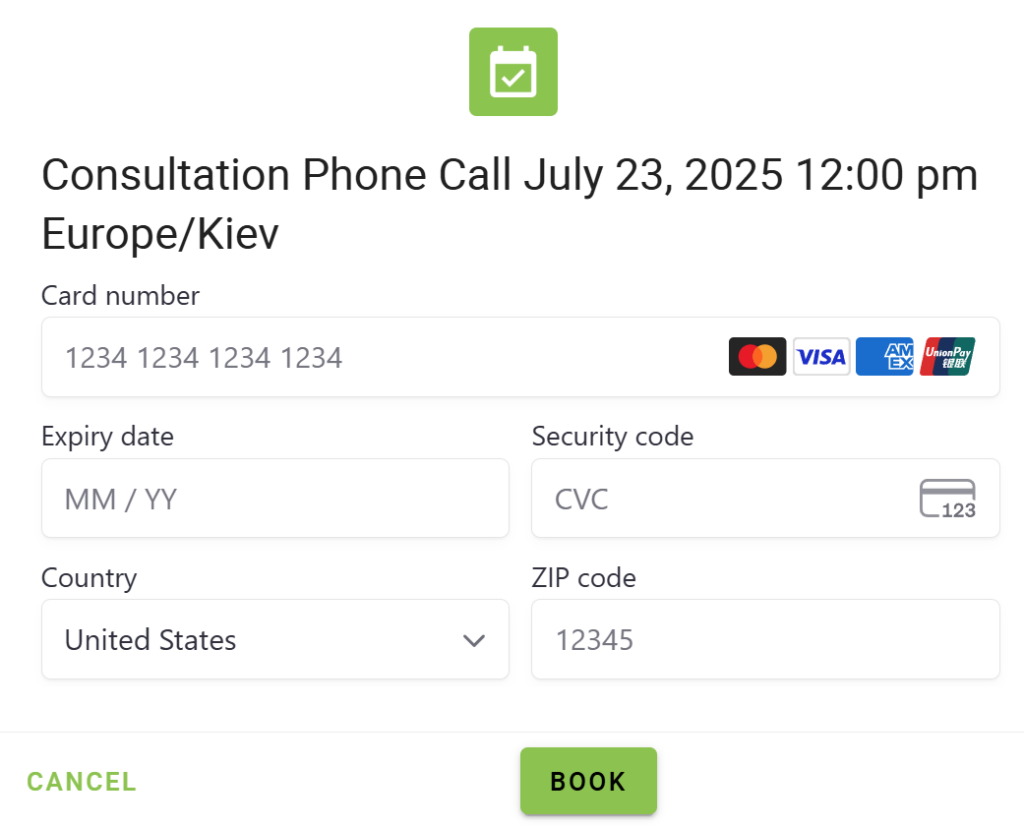
7. Adding Payments to Your Appointment Types
Now you can start accepting payments for your appointments with Stripe! Finish setting up your payments by adding your payment settings to your Appointment Types.
Adding Payments to Appointment Types
Manage Pending Bookings
An appointment with a Pending Payment status is waiting to hear back from Stripe. These are handled differently from normal bookings. And, the admin has a few options on how to handle them.
Learn more about managing pending bookings.