In this document:
Introduction
SSA has the ability to set up overlapping bookings within a single Appointment Type or across Appointment Types using the Capacity and Independent Availability features.
However, there is no way to make sure that each overlapping appointment within an Appointment Type starts at a unique time or to allocate a specific capacity to each time slot.
When to Use This Workaround
We have customers use the following workaround, although we will warn you, it’s not perfect. Use this workaround when you want bookings to be able to overlap and start at unique times.
If the interval between your desired start times is less than the duration of your appointments, we recommend using this workaround. For example, I want to have 2 appointments with 45-minute durations starting every 15 minutes.
Overlapping an Individual Appointment Type
If you would like to have bookings overlap for only one of your appointment types, you’ll need to make changes to the following areas –
- Adjust the Duration of the Appointment Type
- Adjust Appointment Type Availability Start Times
- Set the Capacity(Optional)
- Add in custom CSS
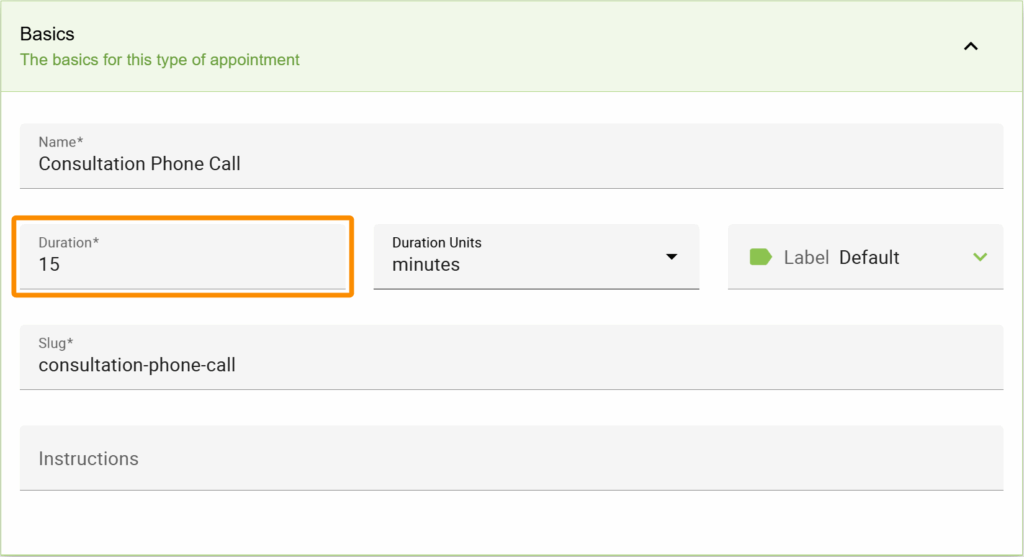
1. Adjust the Duration of the Appointment Type
In your Appointment Type Basic Settings, you would choose the duration to match your appointment start time intervals. For example, if I wanted to have appointments starting every 15 minutes, I would make my duration 15 minutes.
For this workaround to work, we have to reduce the duration in the backend. Don’t worry; to the user, it will still look like they’re booking the appropriate duration for the Appointment Type after we complete step 4.
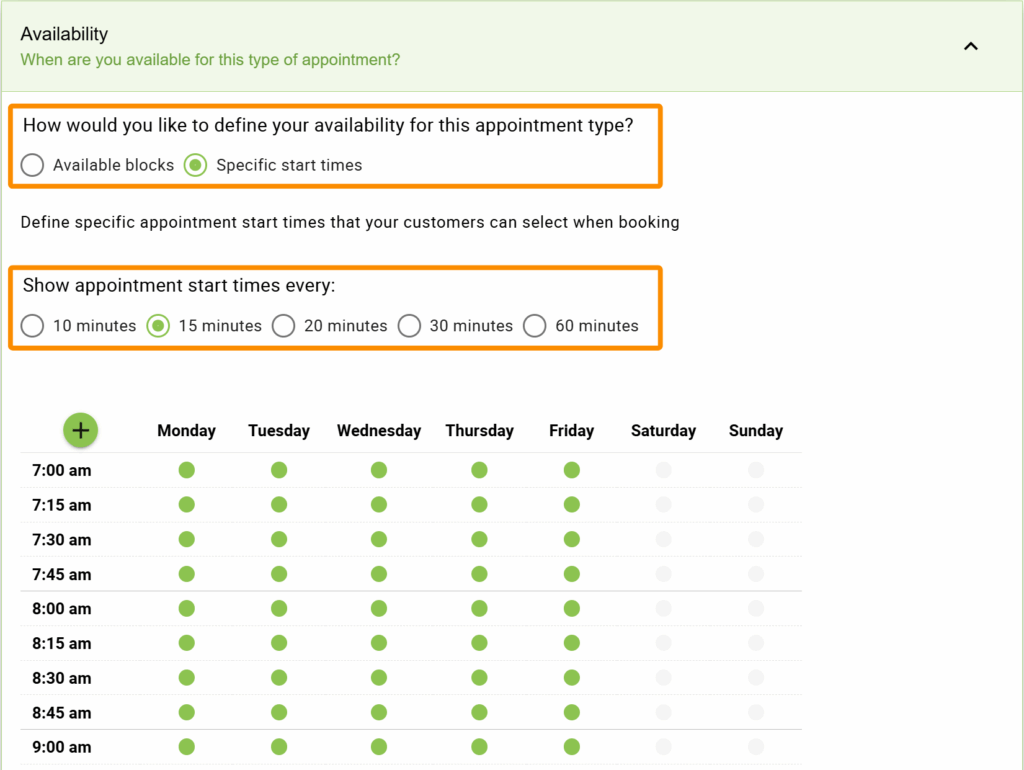
2. Adjust Appointment Type Availability Start Times
In your Appointment Type Availability Settings, we recommend choosing Specific Start Times and choosing a “Show appointment start times every:” interval that will help you achieve your desired Appointment Type interval.
For example, if my desired interval is:
- 15 minutes, I would choose the “Show appointment start times every: 15 minutes” option and highlight every time slot.
- 40 minutes, I would choose the “Show appointment start times every: 20 minutes” option and highlight every other time slot.
- 90 minutes, I would choose the “Show appointment start times every: 30 minutes” option and highlight every third time slot.
3. Set the Capacity (Optional)
Available in the Plus, Professional, and Business editions of the plugin.
If you would like to allow multiple appointments to be booked simultaneously, you could utilize our Capacity feature.
4. Add in custom CSS
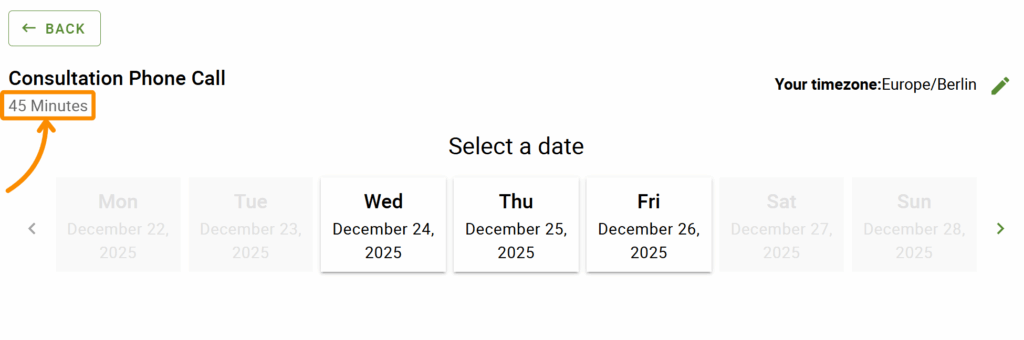
Using this final step will display the duration you would like your customers to see, as opposed to the duration we chose in step 1.
Please take note of all the lines of CSS that contain:
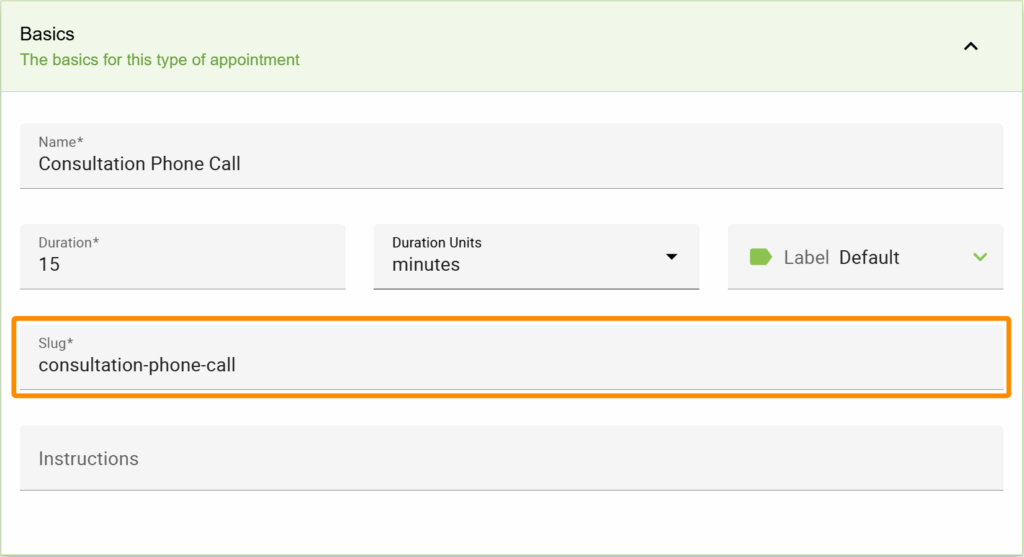
- “insert-slug-for-this-appointment-type” Go ahead and replace this line with the slug for the Appointment Type you would like to be able to overlap.
- “content: “ Replace the time in content with the duration you would like the customer to see.
Finding the Slug
You can find the slug for your Appointment Type in your Appointment Type’s Basics Settings.
CSS to hide and replace the duration for a specific Appointment Type
Add the CSS in SSA Settings > Styles > Custom CSS field. If you’d like to learn more, see our guide on adding custom CSS to Simply Schedule Appointments.
/* Hide all of the duration information for a specific Appointment Type */
.appointment-type-insert-slug-for-this-appointment-type .booking .booking-header .md-subheading .appointment-duration,
.book-type .type-insert-slug-for-this-appointment-type .md-subhead,
.appointment-type-insert-slug-for-this-appointment-type .confirm .md-card-header .md-subhead .appointment-time-divider,
.appointment-type-insert-slug-for-this-appointment-type .confirm .md-card-header .md-subhead .appointment-end-time {
display:none;
}
/* Replace with the duration you'd like customers to see */
.appointment-type-insert-slug-for-this-appointment-type .booking .booking-header .md-subheading::after {
content: "45 Minutes";
display: inline;
font-size:16px;
line-height:24px;
font-weight: 400;
letter-spacing: .01em;
}
.book-type .type-insert-slug-for-this-appointment-type .md-card-header::after {
content: "45 Minutes";
display: inline;
font-size:14px;
line-height:20px;
font-weight: 400;
letter-spacing: .01em;
opacity: .54;
}
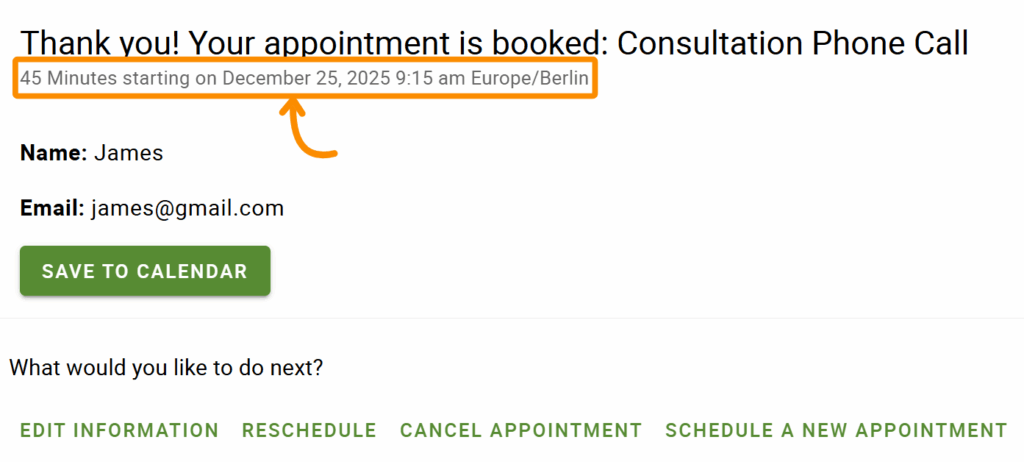
.appointment-type-insert-slug-for-this-appointment-type .confirm .md-subhead::before {
content: "45 Minutes starting on ";
display: inline;
font-size:14px;
line-height:20px;
font-weight: 400;
letter-spacing: .01em;
}Please take note that the content in this snippet is currently set to display “45 minutes“, and the content for the confirmation page is set to display “45 Minutes starting on “.
Related Guides
-

Recurring Appointments and Booking Multiple Appointment Types
-
How to Fix “There Are No Available Appointments”
-
Reschedule/Cancel Link 404 Error
-
Admin App or Booking App Never Loads