In this document:
Introduction
This guide walks you through how to use the notification filters on the SSA Notifications page. Use this to easily sort through your different notifications. And, make it easier to customize messages for all your appointment types.
Learn more about customizing your notifications using our other guides:
Using the Notification Filters
First, go to the SSA Settings Tab and open the Notifications settings. Right above the notifications list, in the top-right corner, is a button to open the Filters section.
Notification Filters
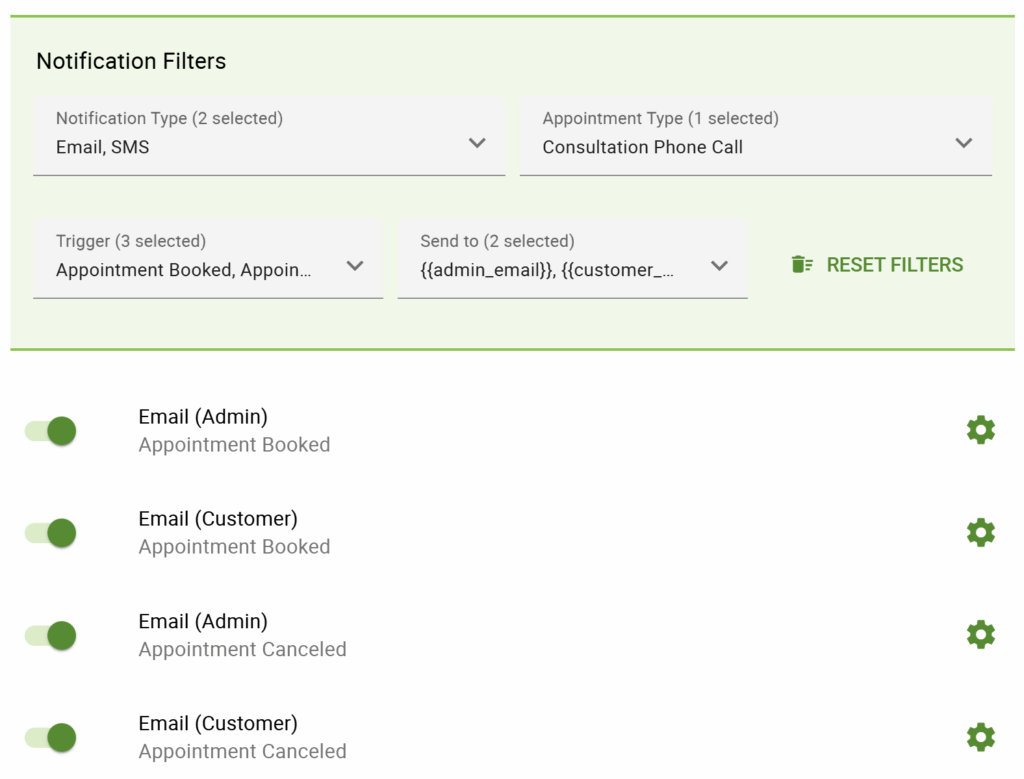
Upon opening the Filters section, you’ll see four dropdown menus:
- Notification Type: Depending on whether you have SMS enabled, you can choose either SMS or Email.
- Appointment Type: Find notifications based on the appointment types that use them, and choose at least one appointment type.
- Trigger: Find notifications based on when they’re triggered, choose Appointment Booked, Edited, Canceled, or Time of Appointment.
- Send To: Find notifications based on who receives them, admin, team, or customer emails, or phone numbers. This also shows email addresses you’ve manually added to notifications.
You can stack together filters to find a specific notification, or you can just use the filters individually.
If you need to start from scratch or see all your notifications at once, use the Reset Filters button.