In this document:
Introduction
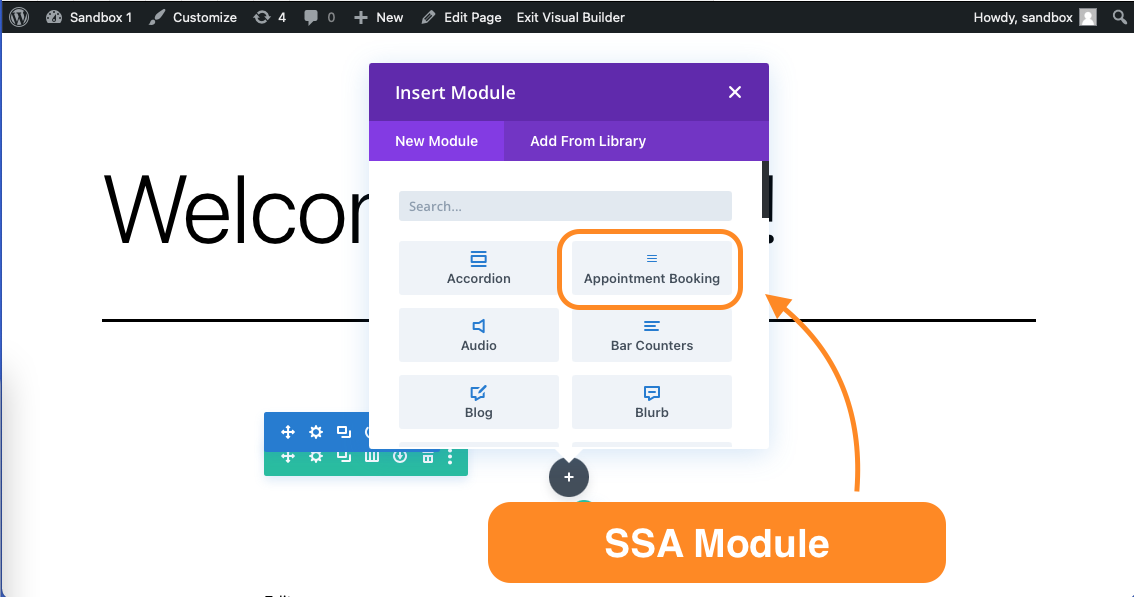
If you have both Simply Schedule Appointments and the Divi Page Builder installed, when you’re editing a page with the Divi, you’ll see our Appointment Booking module.
To use Simply Schedule Appointments with Divi, go through The Setup Wizard in SSA.
Setting Up a Booking Calendar with the Booking Module
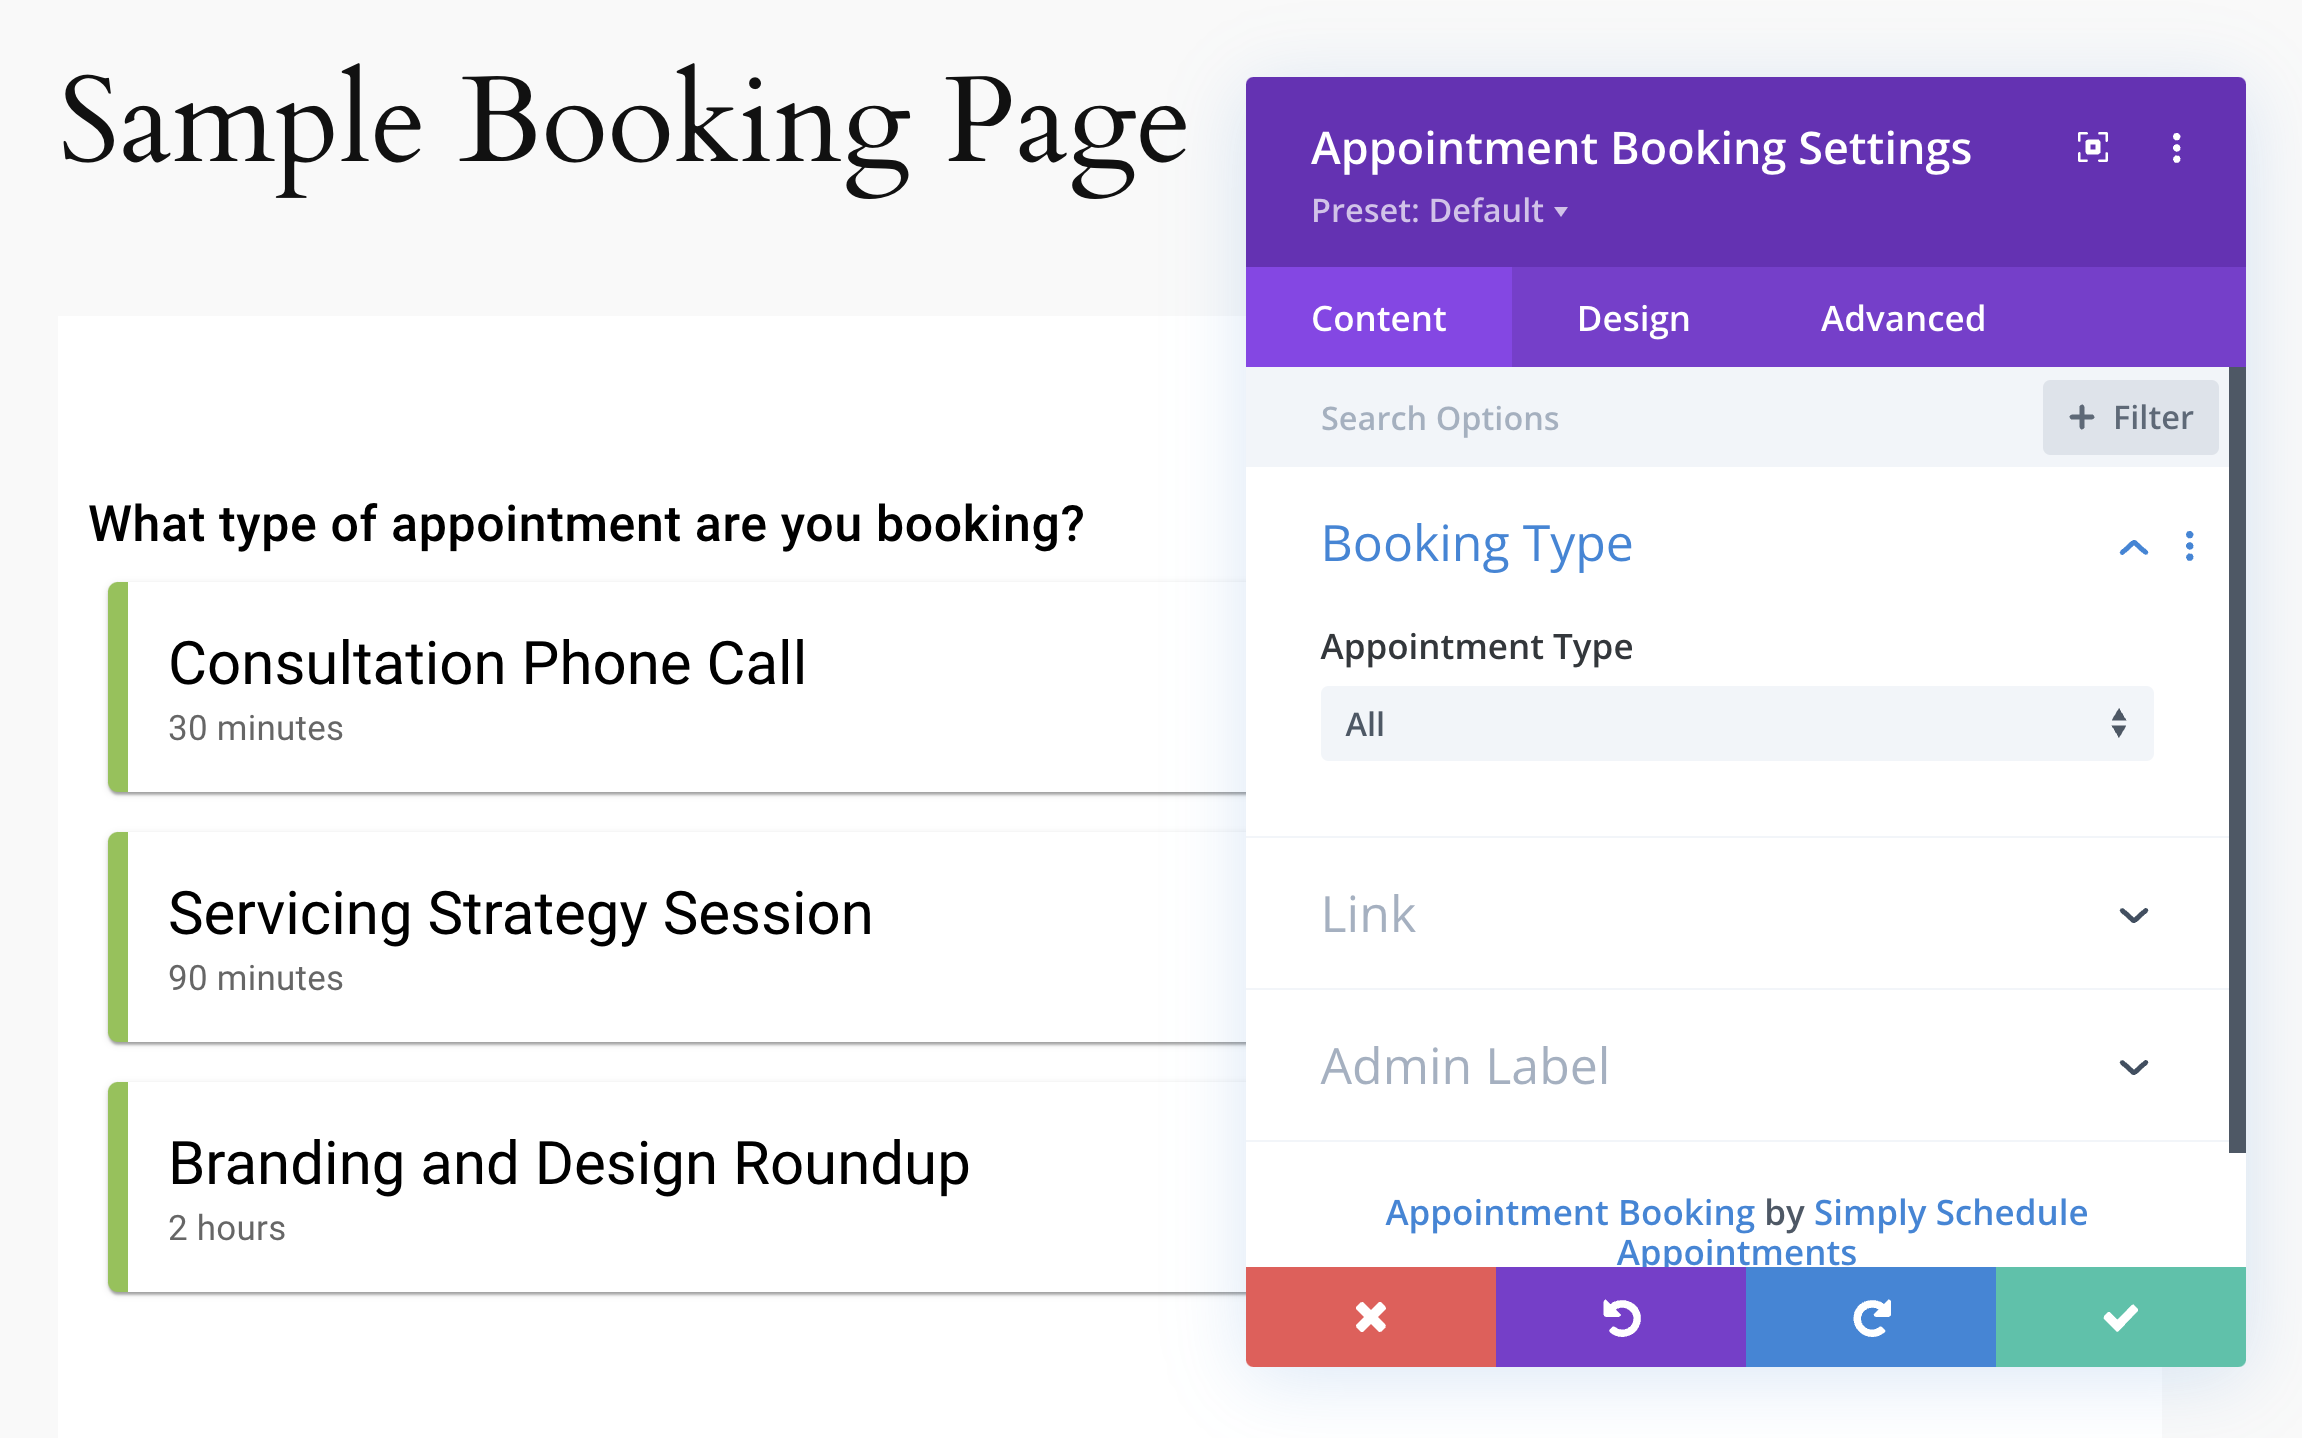
The Appointment Booking module helps you embed your Booking Calendars on the page so your visitors can book an appointment.
Once you click on the Appointment Booking module, you’ll see a floating settings box with three headings: Content, Design, and Advanced.
Content Settings for Booking Module
In the Content tab under the Booking Type dropdown, you’ll see an option to choose which Appointment Types you’d like to show in the Booking Calendar.
You can use the Admin Label dropdown to add an internal label to the module in the page builder view.
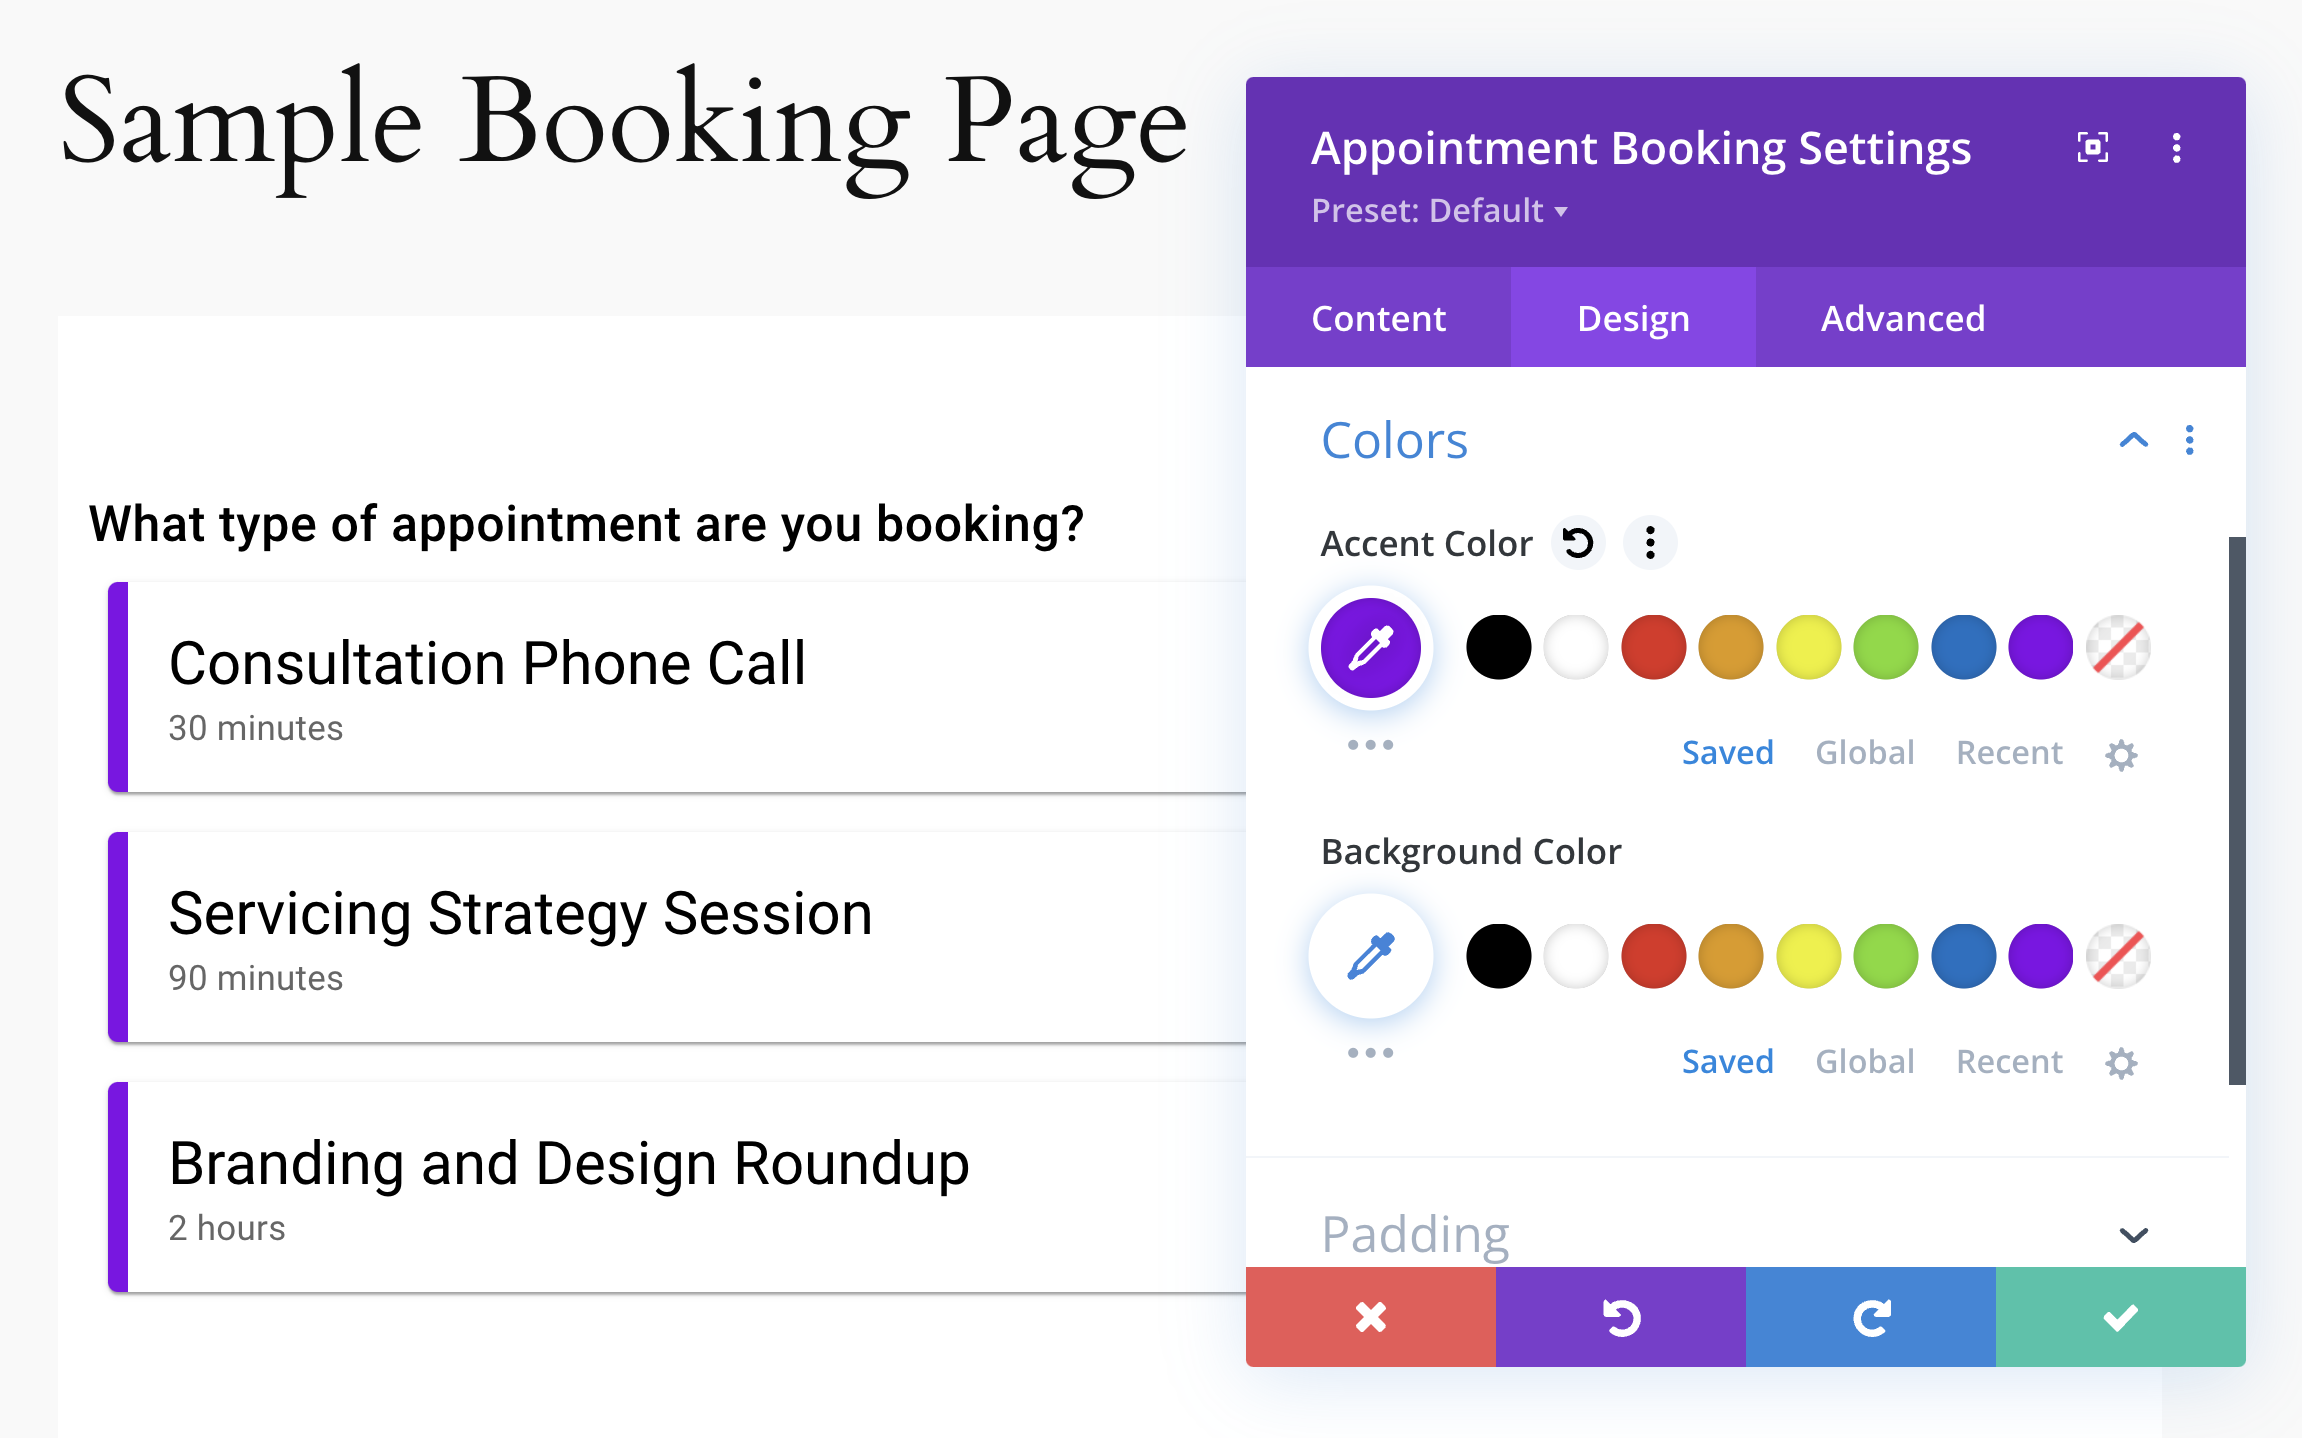
Design Settings for Booking Module
In the Design tab, you can adjust the font, colors, and padding settings for the Booking Calendar.
Advanced Settings for Booking Module
In the Advanced tab, you can fine-tune your booking module and add custom CSS code, IDs, and Classes, change the visibility for different types of devices (ex., only visible on desktop, not mobile), and other visual effects:

Whenever you’re finished with your changes, click on the green checkmark to save your changes.
Related Guides
-

Upcoming Appointments Module
-
Booking Appointments
-
Searching, Filtering, and Viewing Bookings
-
Cancel, Reschedule, Edit or Delete Bookings