What’s the secret to a booking form remaining down-to-earth? It would be the Gravity Forms Integration. In conjunction with Simply Schedule Appointments, complex booking forms blossom into existence. The Gravity Forms Appointment Booking process opens doors to endless possibilities.

Quick Overview
- Editions:
- Plus (v2.3.9.7)
- Professional (v3.3.9.7)
- Business (v4.3.9.7)
- Helpful Links:
Gravity Forms Booking System
Gravity Forms presents and prides itself on being the next generation of form building, and we can definitely concur with that. Their user-friendly form builder allows people to create beautiful and complex forms. Whether it be a simple contact form to an advanced form like a survey, quiz, checkout form, or user registration forms–Gravity Forms covers it all.
On top of that, Gravity Forms has numerous add-ons and integrations alone. Handling Payments with Gravity Forms has never been easier. PayPal Checkout, Stripe, and various other payment gateways are easy to slap into the system with the simple click of a button. And, if you were intrigued by the aspect of coupons, get this: coupon add-ons exist! All of your clients and customers can take advantage of wonderful discount opportunities.
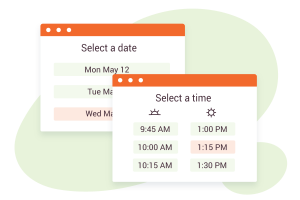
Combining all the goodness that Gravity Forms has to offer with Simply Schedule Appointments creates the perfect solution for your complex appointment scheduling needs.
With that said, we’d like to remind you how simple it is to set this integration up and hit the ground running.
Gravitating To Victory: How to create a Gravity Forms Booking System
You surely must realize the gravity of the situation… because you’re here and itching to learn more! To start, install Gravity Forms. If you don’t have Gravity Forms, you can test-drive their demo and install a premium version of Simply Schedule Appointments on the demo site.
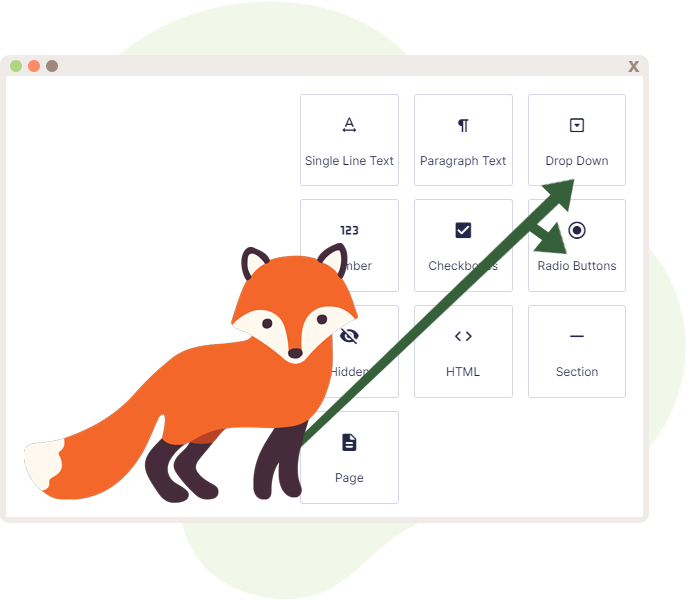
Gravitating towards the “Forms” within the dashboard will begin the creation process.
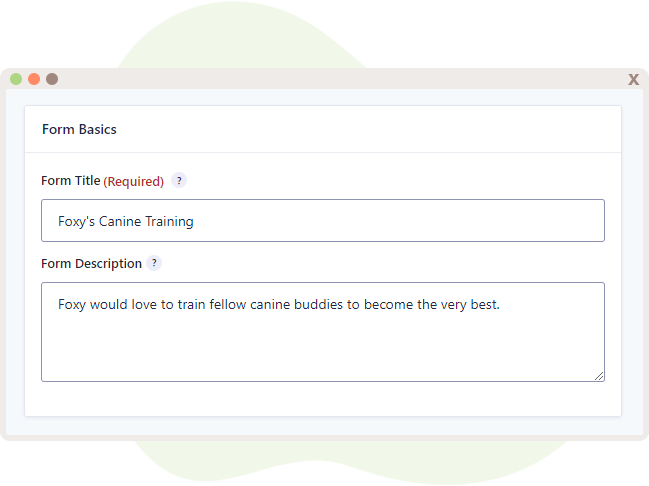
Tap “Add New” and enter in the Title and Description. For the sake of this blog, Foxy will be hosting pretend-training sessions for canine buddies.
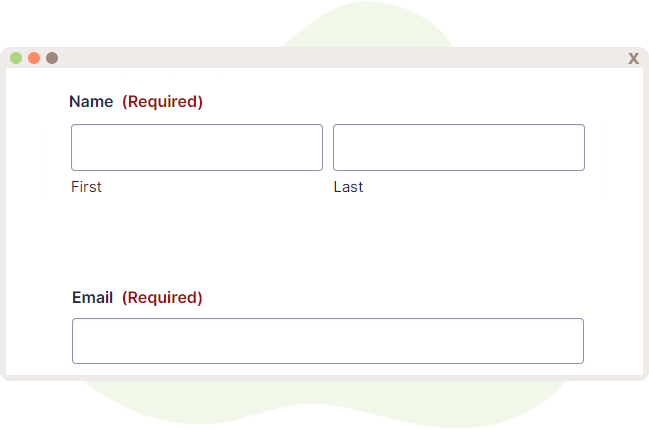
Now, in order for SSA to function as it should and for Gravity Forms to pass appointment information, the Name and Email fields are incredibly vital and need to exist. Toss them right into the fray.
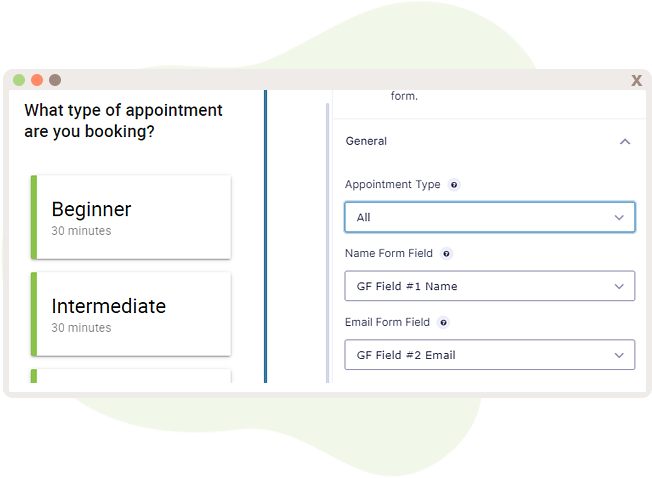
The Appointment field nudges into the form with ease. Initially, it will load up all the Appointment Types that exist within your SSA. But, this is quite editable if need be. Editing the field will allow you to pick one Appointment Type.
That is quite it, for starters. Are you ready to get funky though?
A Little More Complex: Adding the Appointment Field to Gravity Forms
Now that you’re confident with setting up the Gravity Forms portion of this setup, we can navigate the more complex routes to obtain fancy-looking appointment forms.
Showing Certain Appointment Types
The neatest thing you could do to spiffy up your form is to add in Conditional Logic. Gravity Forms Conditional Logic is the ability to set rules that can affect the process of the form based on an input or choice. Utilizing this neat feature allows easy form customization, which allows options to show up under certain conditions.
Let’s take that logic and run with it.
Preparing the Form
Using the form we just created earlier, we can add in a Radio field or Drop Down field. Or both. Both is good.
Foxy wants to offer appointments for Training for fellow canine buddies. But first, it needs to be divvied up a little between One-On-One and Group appointments. A radio field and dropdown field slip their way into the form just to organize things a little better.
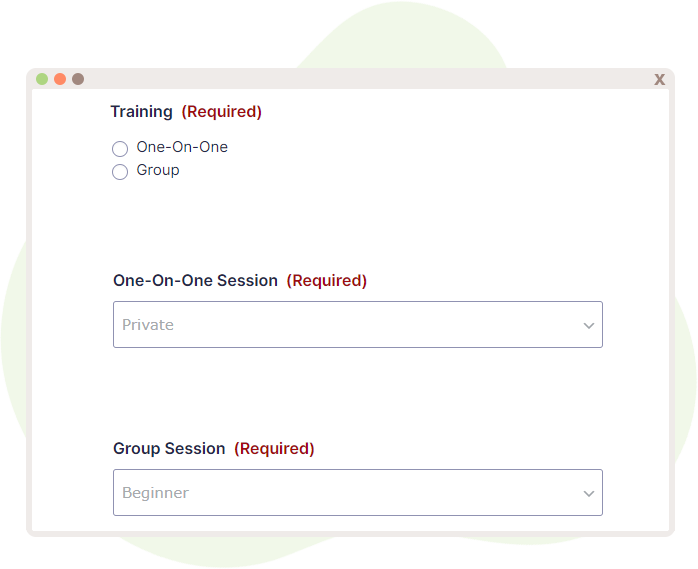
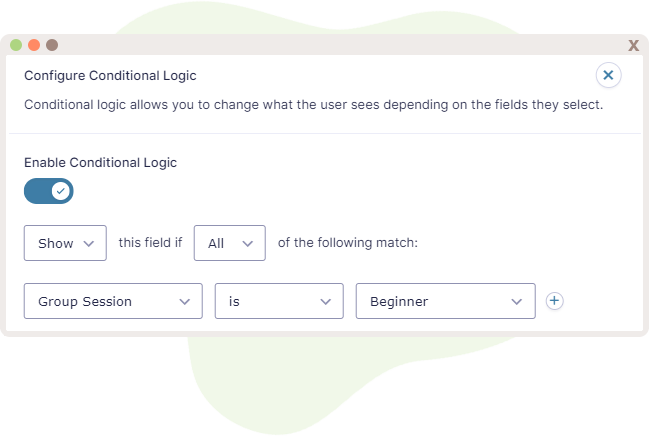
Sweet, looking spiffy already. Some magical logic tricks require application to the fields. For the “One-On-One” dropdown, clicking “Conditional Logic” in the sidebar will yield the the toggle button. The fun part begins.
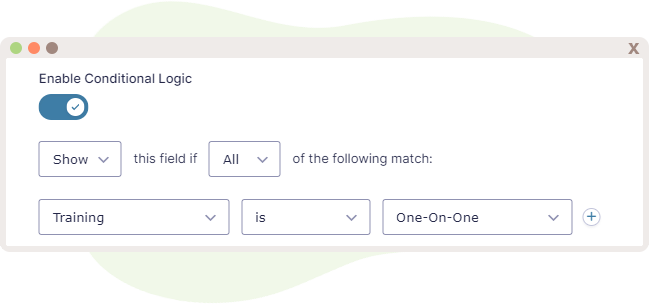
This lovely dropdown only shows when choosing “One-On-One” . Apply the same concept towards the “Group Session” dropdown field!
Conditional Appointment Fields
The next part gets a little tricky. There’s a bunch of dodging and maneuvering to do, but it will be worth it and ultimately organized.
The Appointment block will have to show one appointment at a time. So, there will be quite a bit of duplicating going on. But, this again keeps things neat and organized. Our first Appointment block will just show “Beginner”.
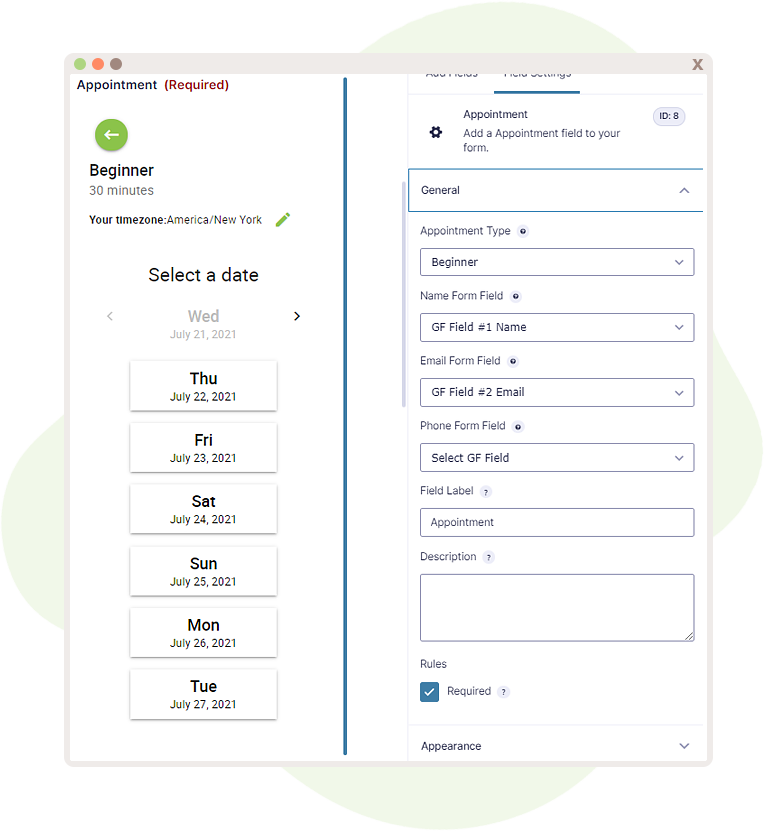
We’re going to toggle the Conditional Logic on for this as well, because this does need to appear when someone wants this training class, right?
Awesome-pawesome. That’s one down. To save time, the Appointment field duplicates for simplicity’s sake.
The process repeats for each Appointment Type from here on. Again, it appears a little daunting, but it is all well-worth it. Upon checking out how it looks…
The effort paid off for the sake of organization. How clean! Now you have it set to display certain Appointment Types upon various inputs.
Gravity Form Payment for Appointments
With the Gravity Forms integration, people can still toss money at Appointments. It opens the door for some more payment options, as well as neat coupon features that to be offered for some sweet deals and promotions.
Starting off with a fresh form that already has the Name and Email squared away, we’re now going to tackle Foxy’s Pupper Cut Salon. First, the “Product” field is necessary for continuing on with the additional fields. And, depending on the service or product being offered, the “Disable Quantity field” is either toggled on or off.
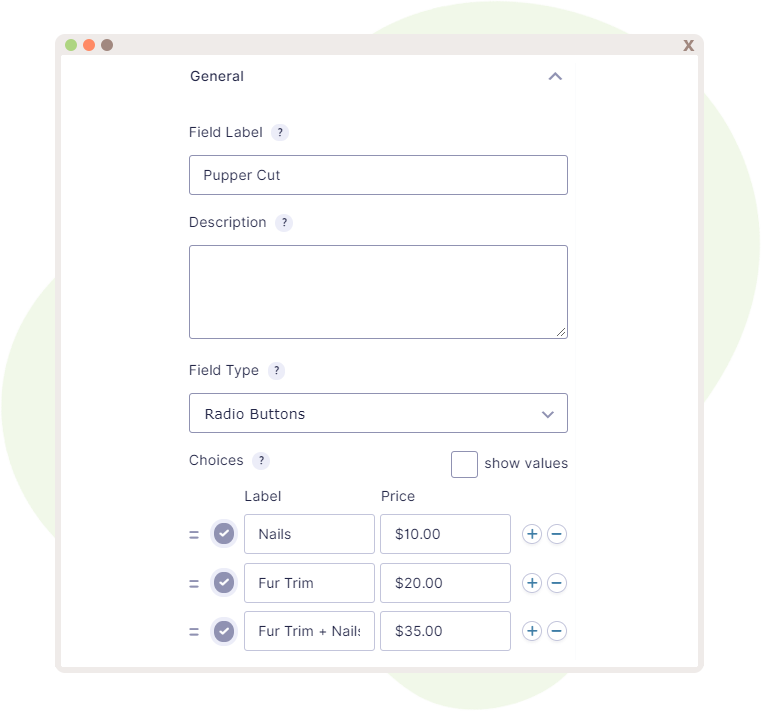
The accompanying prices is also to be thrown in after changing the “Field Type” to the preferred field.
After adding in the Total field so that users keep track of the pricing, the Appointments field is placed.
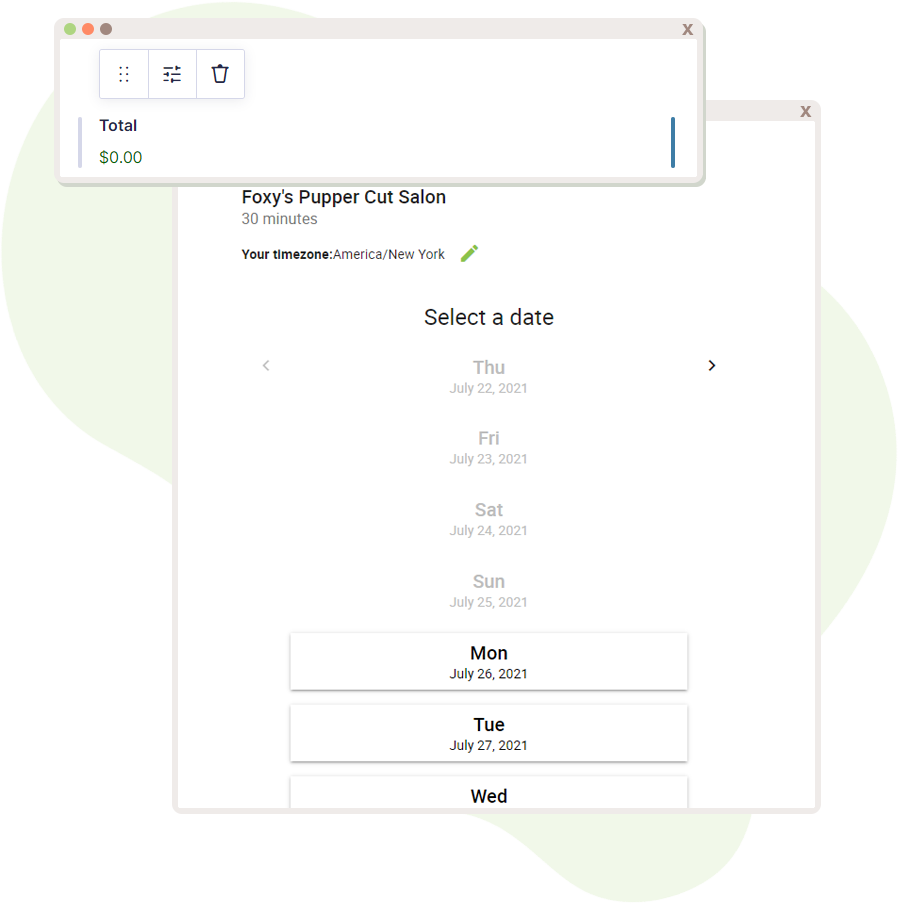
Nice! We now have a form that shows the pricing offered per service or product. But, what if we want to take that a step further?
Gravity Forms Payment Gateways
Visit this page for a full listing of the Gravity Form Payment Gateways. The appointment form you create should work with all of them.
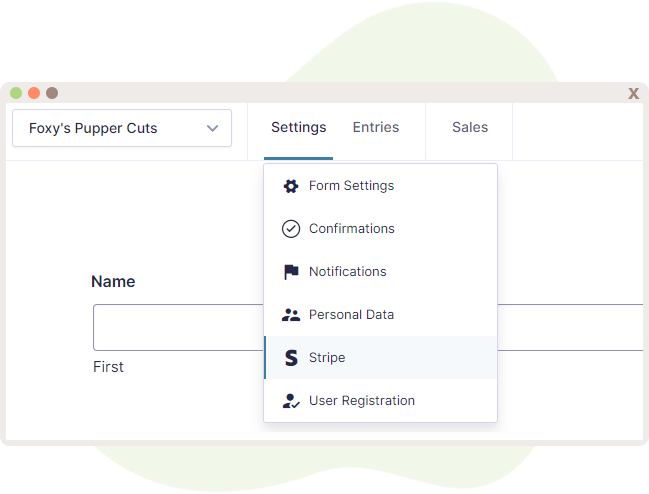
There is a wide variety of Gravity Forms Payment Gateways to be utilized, which is all based on preference. For this scenario, the Stripe add-on is used. Assuming an account has already been created and the add-on installed, the next steps are quite important.
The place to configure Stripe is within the Gravity Form’s Settings. There exists a neat little Stripe section now, and the coolest thing is that there is a “Test” mode so that users can fiddle with settings and figure out what works best for them. We have a sweet little guide that walks you through how to go about setting the Stripe Add-On up for use.
A Stripe Feed also is configured to accommodate communicating information to Stripe every time a user submits the form successfully.

After taking care of that, everything should be a breeze from here on out. Gravitating back to the form, a Stripe Card field is tossed in, which is found under “Pricing Fields”.
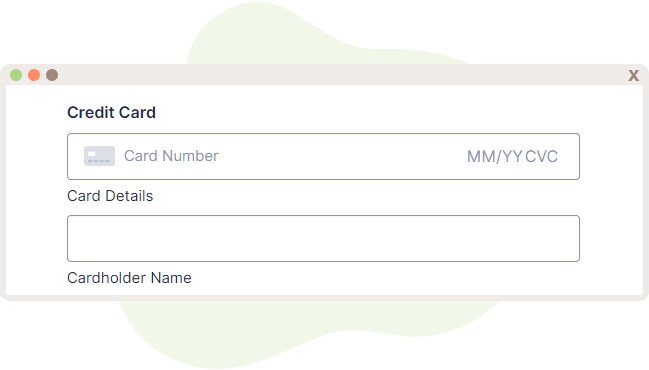
And done. Any payment gateway can be as easy as this to set up and plop right into the Gravity Forms. Now Appointments can get fancy.
Gravity Forms User Registration for Tracking Appointments
A common request we receive is a way for customers who already booked an appointment to be able to view upcoming appointments in one location. Normally, this would require the customer to be logged in already in order to view the Upcoming Appointments module.
Setting It Up For Action
The Gravity Form User Registration Add-On would allow admins to create advanced user registration forms and combine an appointment scheduling field in one go. Installing it would open the gateways for such fun possibilities.
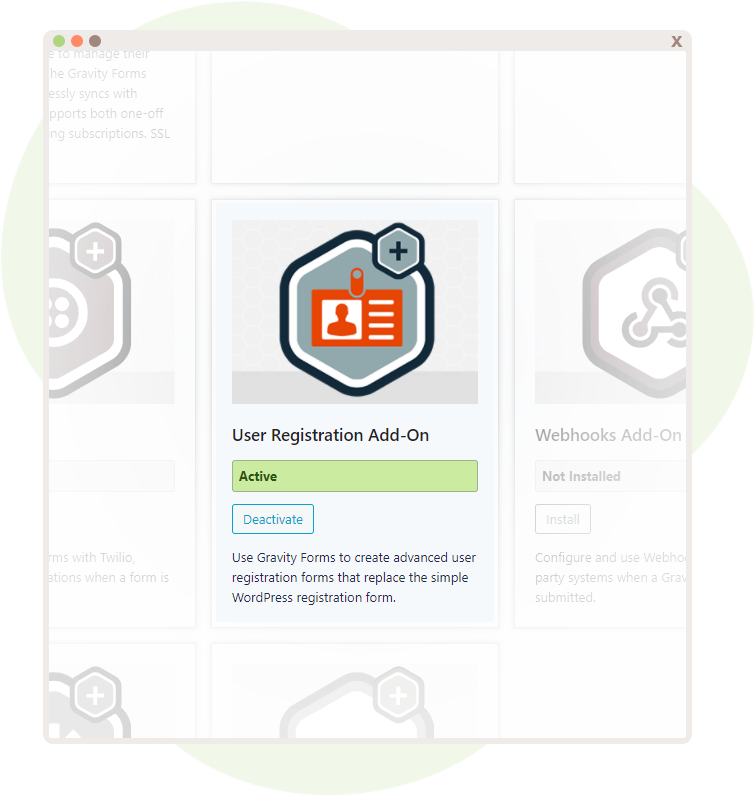
After installation of the User Registration Add-On, the form utilizing this feature should be edited to reflect the addition. With that said, the best way to get down to the business is by accessing that specific form’s settings and selecting User Registration.
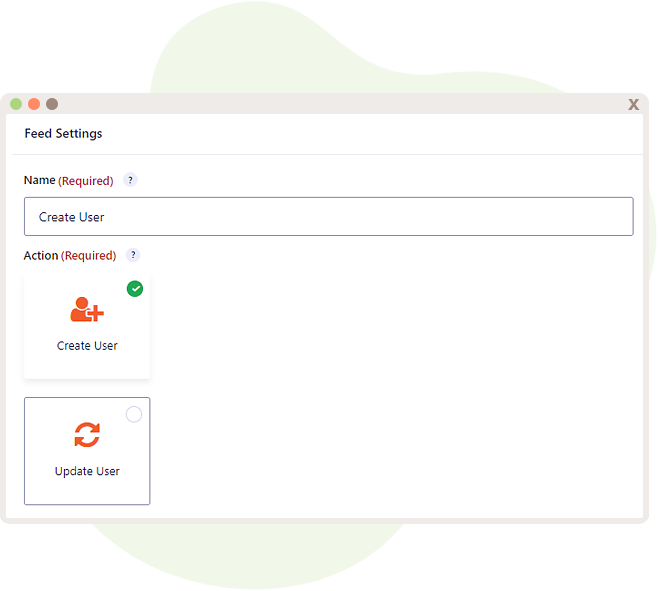
A new feed is created with the button that states “Add New”. A new screen will pop up, thus inquiring about the Action. “Create User” is our first course of action.
Mapping Fields
It’s incredibly vital to ensure that an Email field already exists, because this field is required by SSA in order to function correctly–along with the Name field. A single-line text field could also be created and used for mapping to the Username, but for simplicity’s sake, we’ll stick with the Username taking the customer’s email into account. Pun unintended.
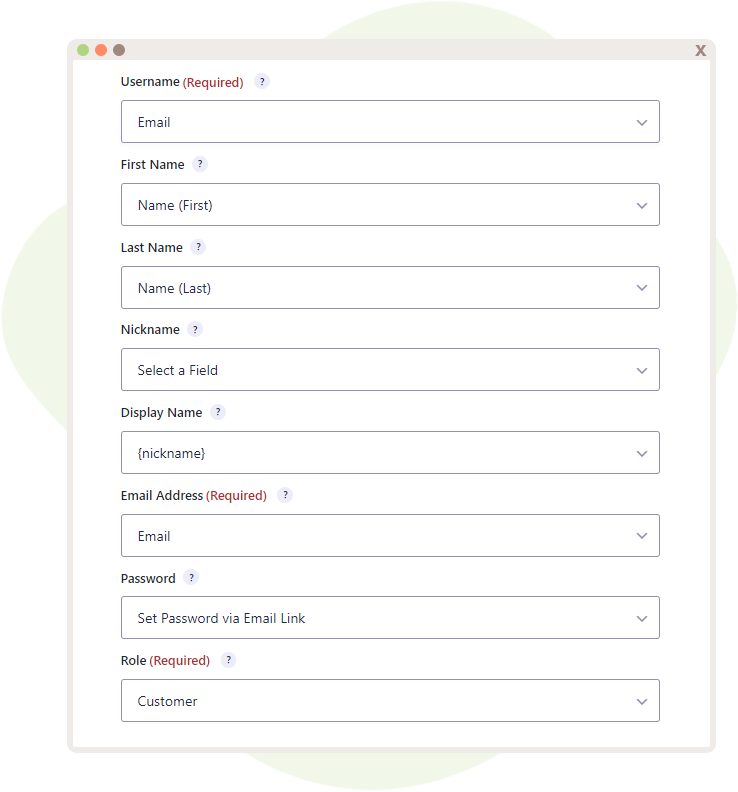
If you’re feeling particularly daring, the Role has the ability to be tweaked. In this example, “Customer” is utilized.
That’s all that needs to be done! Right off the bat, users can start utilizing this form and signing up. But, it doesn’t have to automatically sign them up. You retain the ability to activate accounts within the “Pending Activations” section.

One thing to note is that if an existing user submits a form that is intended for new users, it will notify them that an existing user is created. It is recommended to use a separate form for existing users to prevent confusion.
Finalize this process by adding in a page for the SSA Upcoming Appointments module, and you have yourself a pretty neat registration system that allows users to track their appointments! While there is still a little bit of micromanaging involved with accepting activations, there is definitely a lot less hassle involved and no manual account creations.
Protecting with reCaptcha
While there shouldn’t be any spambots sieging the Gravity Forms Integration, it can still happen from time to time, albeit rarely. So what better way to prevent this onslaught by ensuring that each user is an authentic human being?
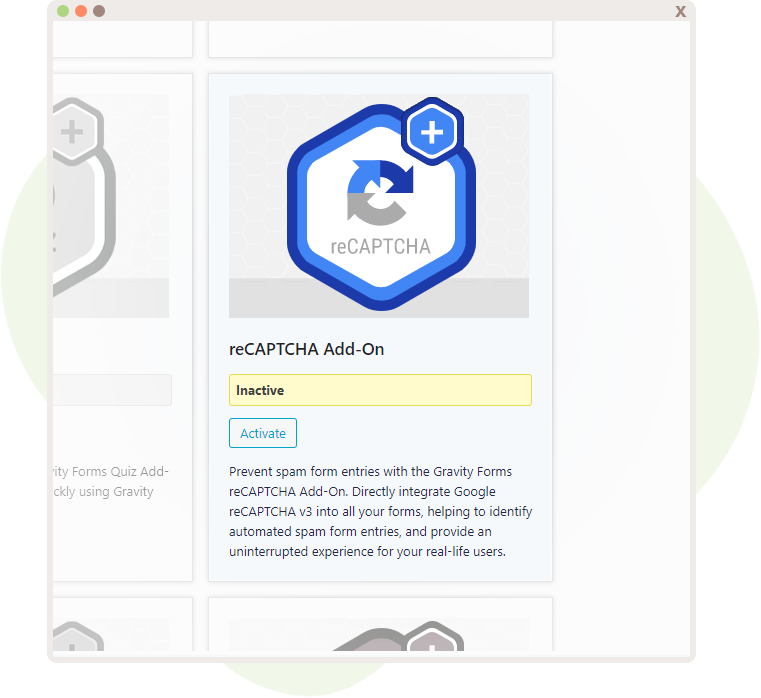
The Gravity Forms reCAPTCHA add-on boasts its protective magic over form entries by identifying the spam entries and allowing an uninterrupted experience for admins and users alike.
Activating this sentinel is rather simple. Surely this must strike fear into potential spam already.
And really, it’s smooth sailing from here on out. That’s it. Begone spam.
The way this add-on works is that reCAPTCHA tracks actions on the site, and Google uses that data to identify whether or not that activity is potential spam. Finally, when an entry submits, reCAPTCHA judges and scores it, storing that neat little score within the entry and determining its fate.
This provides a super seamless experience and doesn’t interrupt the form submission with reCAPTCHA checkboxes. Now you can rest easy knowing your Gravity Forms Integration won’t get heckled by spam bots, and users submit Appointments without being frustrated.
Use Cases and Examples
So, what are some cool things you can do with this integration and SSA? We already went over several options, but we just want to give you a glimpse of the possibilities.
Using the Gravity Forms Integration in conjunction with Simply Schedule Appointments, you can create Job Application Forms. On top of that, by implementing the reCAPTCHA Add-On, you can ensure there won’t be any fake applications as well. Tossing the User Registration Add-On into the mix will allow candidates to log in. With the Upcoming Appointments module, they can access this information and visit special member-only pages.
Moreover, this integration is also handy for Hair Salons and other businesses that require appointments. Sometimes businesses will host little sales, so having the Coupons Add-On on hand for scheduling appointments will provide a way to offer some sweet deals and entice customers to return for more.
Speaking of Businesses, the various payment add-ons make taking payments for appointments a walk in the park. There is the PayPal Add-On, the Stripe Add-On, as well as the Square Add-On so that you have various payment gateways to work with and offer for your customers.
Wrapping Up Gravity Forms Appointment Booking
Let Gravity Forms Appointment Booking take the wheel and provide a seamless and wonderful experience with scheduling appointments. We hope that you’ll gravitate towards this neat integration and enjoy all the benefits that both Simply Schedule Appointments and Gravity Forms offers!
What do you use Gravity Forms for on your website? What are your favorite Gravity Forms Add-ons? Let us know in the comments below 🙂