Whether you’re a doctor, yoga teacher, tutor, or just need a little extra help keeping your schedule on track, Google Calendar has set the standard in providing a great calendar experience. It’s free, powerful, simple to use, and is accessible anywhere you have an internet connection (including mobile devices too!)
In addition to its own built in features, Google Calendar also integrates very closely with several third party tools and plugins, which can add even more functionality to help you keep your schedule on track.
With so much power and functionality available, sometimes it can be a bit overwhelming if you’re new to Google Calendar. This guide will show you how to set up your Google Calendar, step-by-step.
We’ll also look at how you can use Simply Schedule Appointments to synchronize bookings with your Google Calendar.
Getting Started / Initial Setup
How do I Get a Google Calendar account?
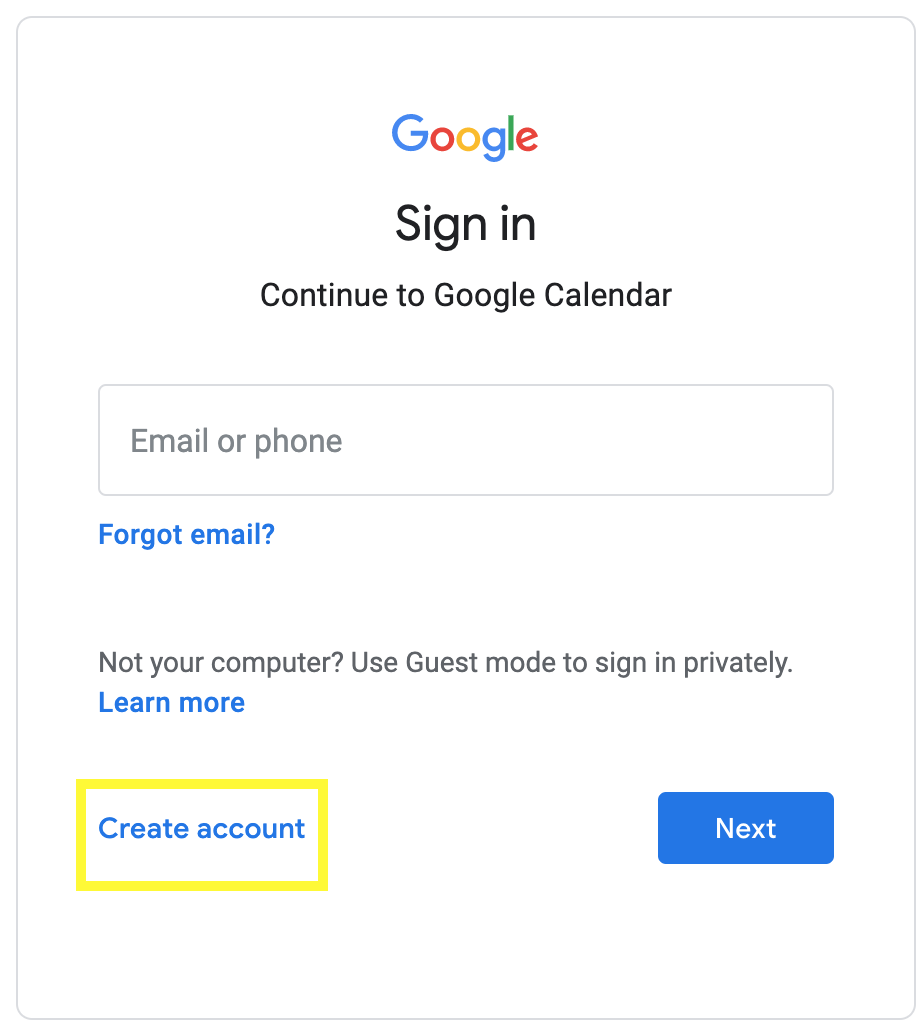
If you use Gmail or your company uses G Suite, there’s good news – you already have it! Google Calendar is free and it comes standard with any gmail account. As long as you’re signed into Gmail, you can get to the calendar by following this link: calendar.google.com
You’ll see a screen where you can enter your credentials and follow the on screen prompts.
If you don’t already have a gmail account, click “Create Account” and follow the on screen prompts to complete the process.
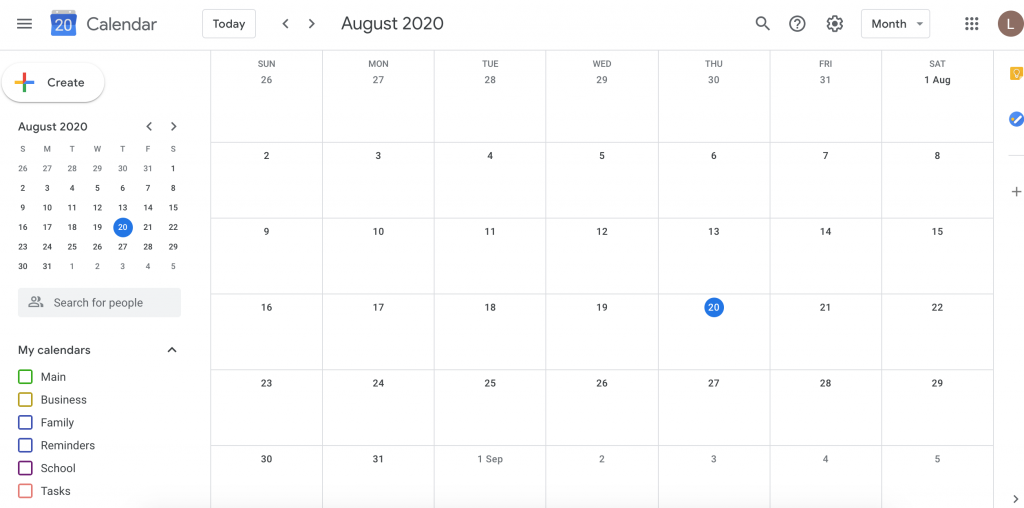
Once you’re signed into Google Calendar, you’ll see the main month view appear by default:
Set Up the Basics
Before you start creating your calendars and events, you’ll want to make sure you have the basics set up. This includes setting your:
- Language
- Country
- Date Format
- Time Format
- Each of these settings can be found by going to:
- Settings ⇒ General ⇒ Language and Region
Create Your Calendar(s)
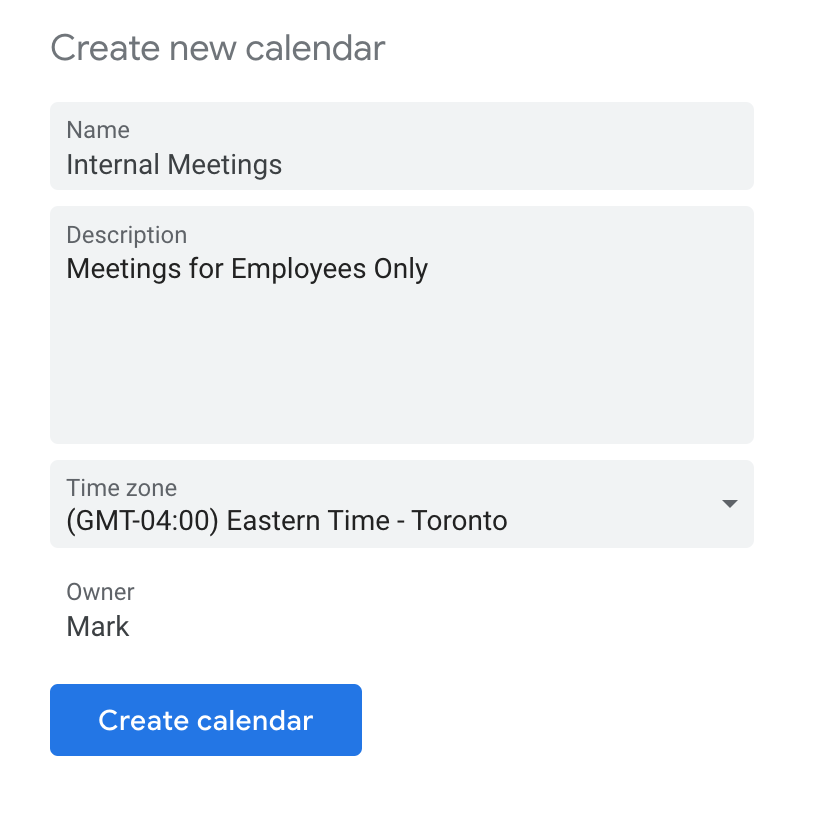
Google Calendar allows you to create different calendars for different types of events. For example, you could have a separate calendar for:
- Internal Meetings with employees,
- Time off
- Appointments booked by customers
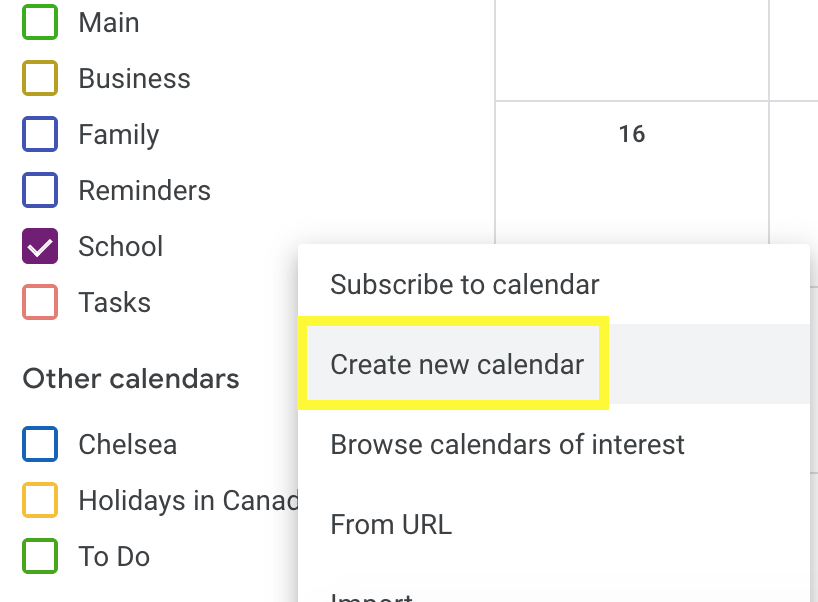
To add a new calendar, look towards the bottom left corner of the screen. Under “Other Calendars”, click the “+” button and click “Add New Calendar”:
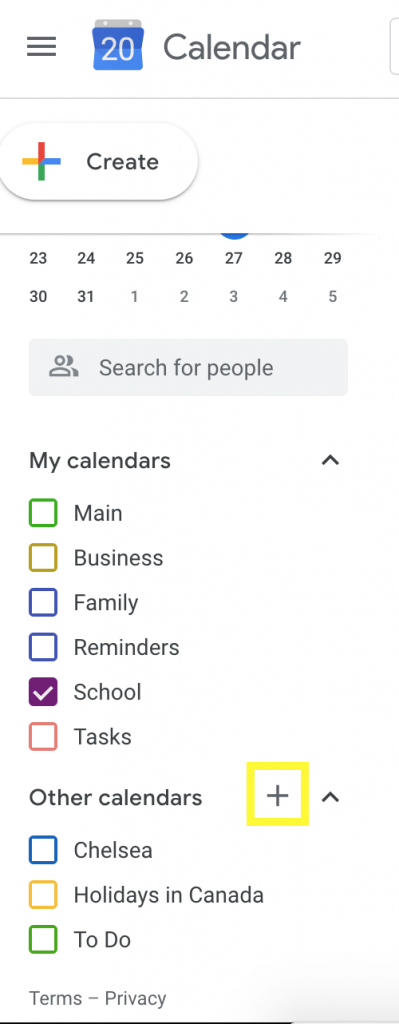
Repeat these steps for any additional calendars you’d like to create. You should see each new calendar appear on the left side of the screen.
Other Ways to Add Calendars to Google Calendar
Import from Other Services
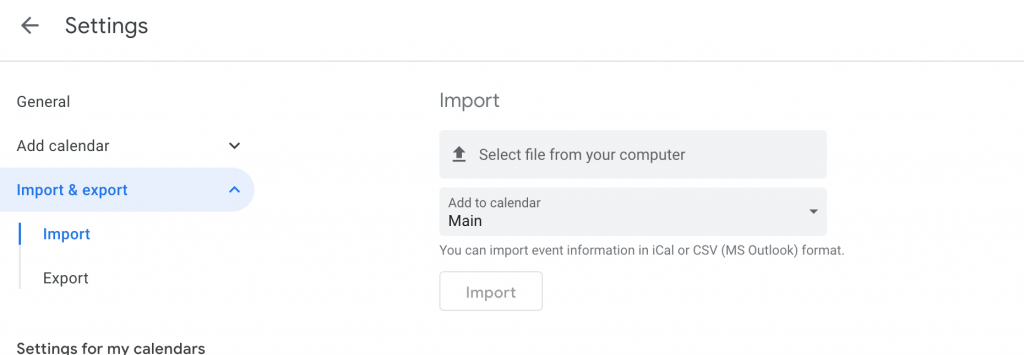
If you already have a calendar with existing events from a service like iCal or Outlook, it’s easy to import your existing calendar into Google Calendar. If you have a .ics file that’s been exported from your old calendar system, you can import it in Google Calendar by going to:
Settings ⇒ Import & Export ⇒ Import
Click “Select file from your computer” to choose your .ics file, and choose which calendar you’d like to add the events to.
When you’re ready, click “Import” to complete the process.
Subscribe to a Calendar from a URL
Sometimes, there may be a public calendar available with public events that you’d like to add to your calendar.
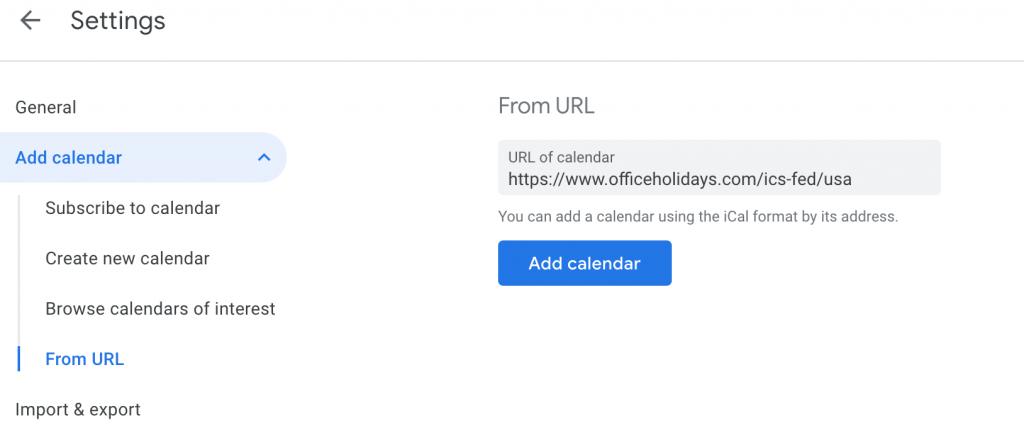
For example, the link below contains a public calendar URL that shows every Federal Holiday of the year.
https://www.officeholidays.com/subscribe/usa
You can add this functionality to your Google Calendar by copying this URL https://www.officeholidays.com/ics-fed/usa, and then navigating to:
Settings ⇒ Add Calendar ⇒ From URL
Paste the link into the URL box, and click “Add Calendar”. You should then see the events load on your Google Calendar view.
Creating Events
- Click on any day on the calendar to add a new event. Here, you can set the details of the event, such as:
- The event title
- The event description
- The event start & end times
- The event invitees
- The event location
- The event description
Add a Notification to your Event
When you’re making a calendar event, notifications can be helpful to remind your guests that they have an event coming up.
To add a reminder, open your event and click on the “Add notification” button. You will see there are two notification types available:
- Notification: This is an alert that appears in your Google Calendar page directly
- Email: Google calendar sends an email to everyone with the event details inside
Once you choose your notification type, you can choose when you want the notification to be sent. You can also add multiple notifications. In the example video below, we’ve added 3 notifications:
- A Google Calendar notification 10 minutes before the event starts
- A Google Calendar notification 2 days before the event starts
- And finally, an email 1 hour before the event starts
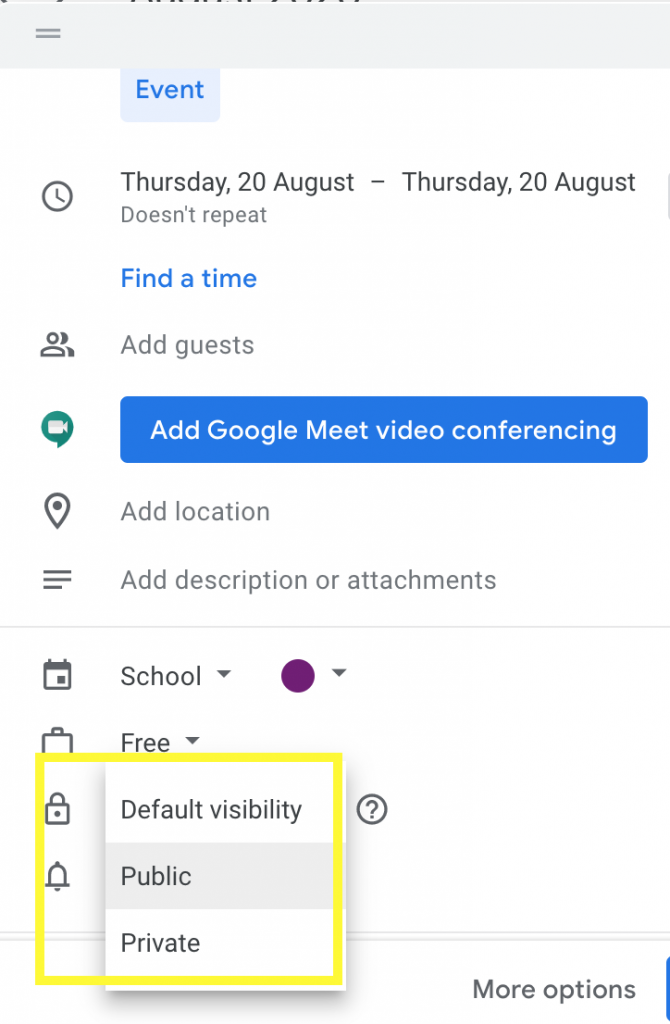
Choose Whether your Events are Public or Private
With Google Calendar, an event can either be public or private:
Public: The event by default is visible to anyone who has access to your calendar
Private: The event by default will just say “busy”, and other users will only be able to see your calendar if they have special permissions to make changes to your calendar
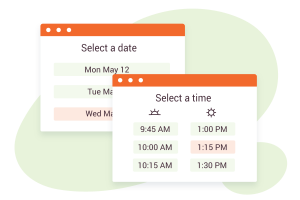
Let Your Users Book Their Own Appointments
If you run a business that relies on customer appointments, by default you’ll need to manually add each appointment as an event in Google Calendar. This can be a tedious and long process if you’re booking multiple appointments every day.
Thankfully, Simply Schedule Appointments Plus makes it easy for your customers to book their own appointments on your WordPress website. It’s a simple plugin that displays a live view of your calendar, and lets your customers pick a date and time that is most convenient for them.
Best of all, the premium versions directly integrate with your Google Calendar, so any customer bookings get transferred to Google Calendar. Likewise, if you already have an event booked in your Google Calendar, it automatically won’t be available for customers, eliminating the chance of a double booking occurring.
Let’s take a look at how you can set up Simply Schedule Appointments to sync with your Google Calendar integration.
Install Simply Schedule Appointments
When you purchase a premium edition of Simply Schedule Appointments, follow these steps to install the plugin:
Once the plugin is installed and set up, take a look at our After the Setup guide that walks you step by step to help you configure basic settings like the Timezone and Date Format (make sure these match Google Calendar!), your Appointment Types that customers can choose from when they book an appointment, and the other great features that are included in the plugin.
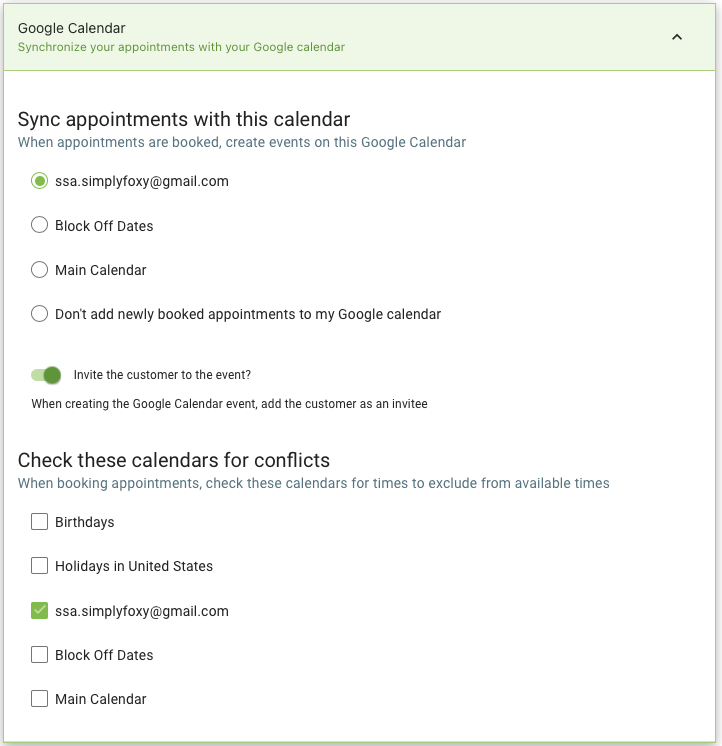
At this point, you’re ready to set up Google Calendar. Our Google Calendar Setup Guide contains the full steps to set up Google Calendar to sync with Simply Schedule Appointments. At a high level, these steps involve :
- Enabling Google Calendar Sync from the Simply Schedule Appointment Settings area
- Set up your Google Client ID and Client Secret Tokens
- Edit your SSA Appointment types to allow Google Calendar to:
- Sync booked appointments from SSA to Google Calendar
- Check Google Calendar for conflicts when a customer is booking an appointment through SSA
- Or both
And that’s it! Once these steps are completed, you’ll have a fully functioning scheduling system. Simply Schedule Appointments takes care of the front end for managing customer bookings, and Google Calendar takes care of the back end for managing your calendar as a whole.
For a full guide that shows how to set up Google Calendar and Simply Schedule Appointments, feel free to visit the link below:
Conclusion
In this guide, we reviewed why Google Calendar is a great choice to manage your schedules. We looked at how to get started by creating a Gcal account, exploring the calendar interface, and setting up the basics such as language, time zone and country.
Once we covered the basics, we reviewed how to create calendars, appointments, and even some advanced features such as notifications and importing from a URL.
Finally, we reviewed how you can integrate Simply Schedule Appointments with Google Calendar to allow your customers to book their own appointments! This powerful combo takes the best of both services and creates a seamless booking experience, making it easy for you and your customers to better manage your schedules.