In this document:
Introduction
How do you set up bookings on a per-day basis so that the time slot selection screen is skipped? Use the following settings to allow your customers to only pick a date in your booking calendar.
Note that a booking calendar can still have days that skip the time selection screen and days that require the customer to choose a time. It can be mixed!
To set this up:
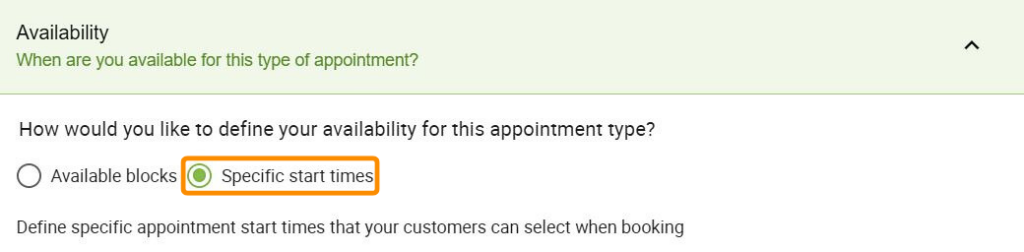
- Use the Specific Start Times setting for the Appointment Type.
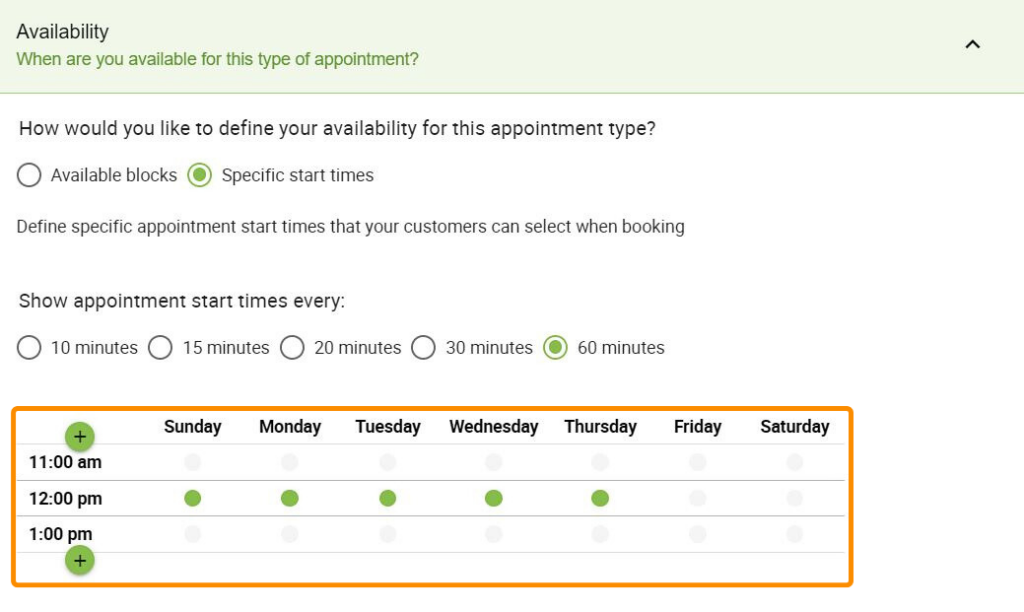
- Select a single time slot for each day.
- Optional: Set the Capacity.
- Hide all of the Time Slot information in the calendars and notifications.
Useful For
- All-day appointments where customers only need to choose a date.
- Only offer a single time slot each day.
Booking Per Day Demo
When using the “Only Pick a Date” workaround, you’ll only have to pick an Appointment Type (if listed out), pick a date, and fill out the booking form.
Live Booking Calendar
Step 1: Use Specific Start Times
Under your Appointment Type’s availability tab, choose the Specific Start Times option; this step is important for this setup to work properly.
Step 2: Select Single Time Slot
In the availability calendar, only choose one time slot per day.
Optional: Add a Capacity to Allow Multiple Bookings Per Day
If you’d like multiple people to be able to book a day with you, you’ll need to use the Capacity feature. Each day, you can accept a maximum number of bookings; once the capacity is met, the day will no longer be bookable.
Read our guide on the Capacity feature to learn more.
Step 3: Hide Time Slot Information in the Booking Calendars and Notifications
Lastly, to best give off the impression that your user is booking a day and not a specific time, we’ll need to make changes to the booking calendar and the notifications.
Booking Calendar Changes Using CSS
With the following CSS snippet, you can hide any information in the booking calendar that may confuse the user when booking a specific day.
This hides:
- Start Time
- End Date and Time
- Duration
/* Hide the Appointment Time Info For "Only Pick a Date" Workaround */
body .appointment-duration,
body .divider,
body .appointment-end-time,
body .appointment-start-time .appointment-start-t,
body .appointment-time-divider,
body .appointment-timezone {
display: none;
}
To add CSS to the plugin, go to SSA Settings > Styles > Custom CSS And paste the code snippets > Save!
Optional String To Add in Front of the Start Date
This next CSS snippet is optional, but we think it makes it easier to understand that the user is booking a specific day.
You’re welcome to change the phrasing; just replace “Appointment on ” with your own choice of words.
/* Add a "Appointment on " string before date info */
 .appointment-start-time::before {
 content: "Appointment on ";
 font-size:14px;
 line-height:20px;
 margin-top: 8px;
 font-weight: 400;
 letter-spacing: .01em
 }
Notification Changes Using Twig
Lastly, you’ll also need to update your Notifications because, by default, we include the start time for the appointment. Instead, replace the existing ‘Appointment.start_date” template with this Twig code template to only display the start date:
{{ Appointment.start_date | date("F d, Y", Appointment.customer_timezone) }}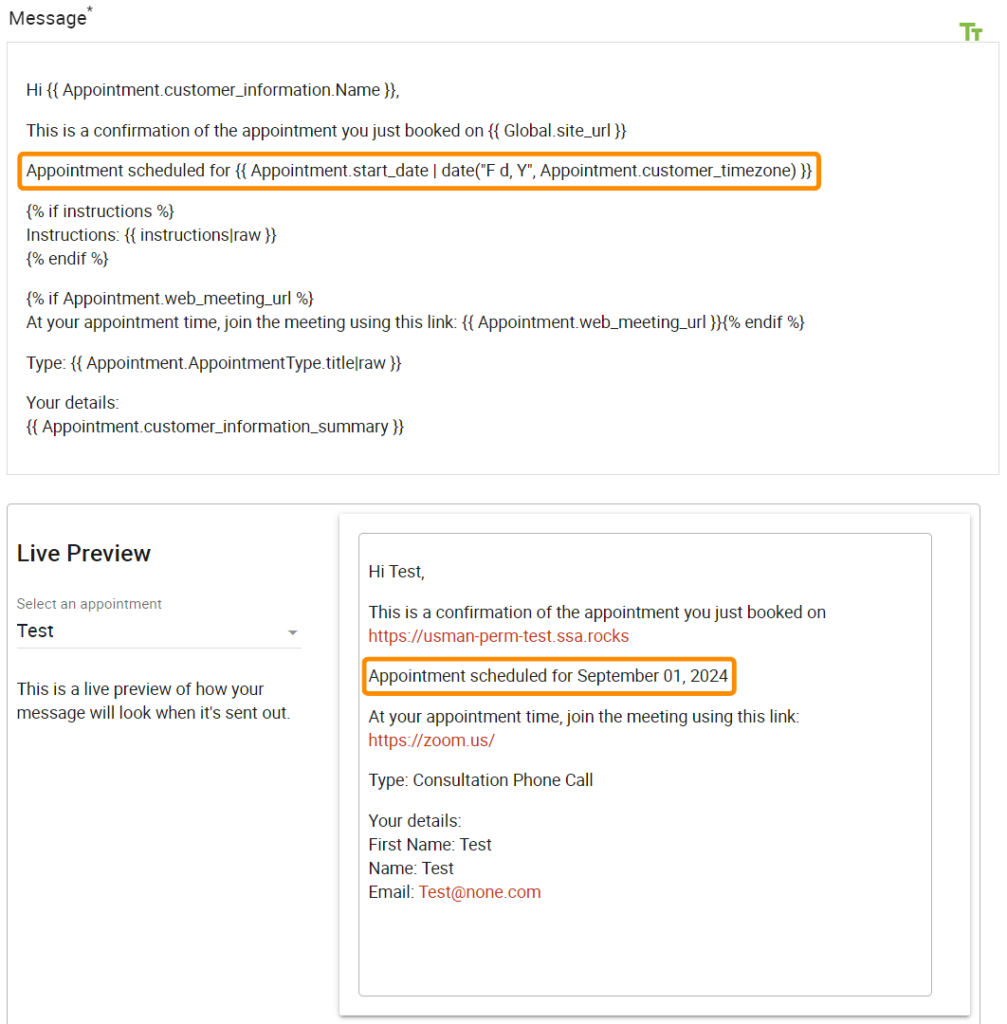
Related Guides
-

Full Day Or Multiple Day Duration Setup
-

Styling the Booking Calendar
-
Unique Weekly or Monthly Availability
-
One-Off Event Setup