In this document:
Introduction
The default text in the booking calendar is for general booking purposes. But, sometimes, it’s necessary to change the default text, including headers and titles, to make more sense to your customers and business.
This guide explains the four methods you can use to change the default text in the booking calendar:
- Using the Translate Words plugin: This is a simple, lightweight plugin for those that want to customize a couple of phrases.
- Using the Loco Translate plugin: This is a good option for those that want to get involved with their custom translations and don’t want to use our WordPress translation system.
- No plugin: Adding to your theme’s functions.php file
- Code Snippets plugin to add PHP: Alternative to adding to the functions.php file
What This is Useful For
- Change the name and email address field label in the booking form
- Say something other than, “What type of appointment are you booking?”
- Translation included in language pack not in the proper form.
This guide will only allow you to customize the default phrasing provided by our plugin. If you have created custom fields and would like to change text, follow this guide on editing Custom Fields. You can even customize these fields in your preferred language.
Loco Translate Plugin
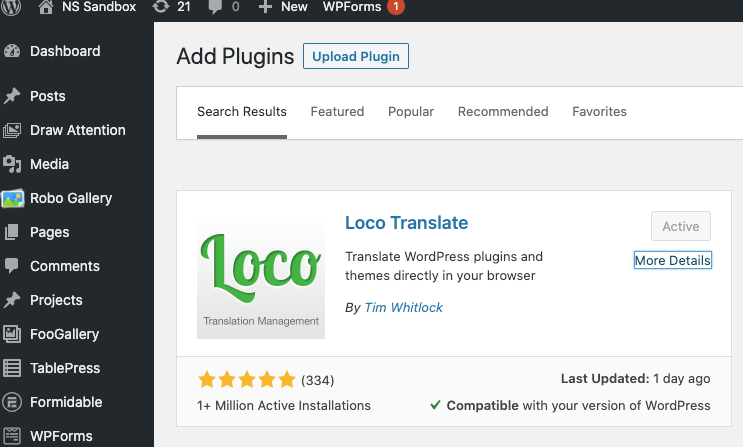
Loco Translate is a free plugin that allows users to edit the built-in plugin field labels and text. First, you’ll want to install and activate the Loco Translate plugin.
Updating Text for Languages Without a Translation Pack
If you’re looking to add custom translations or change text for English (US) or any language for which SSA doesn’t offer a language pack, you must create a new language profile within Loco Translate.
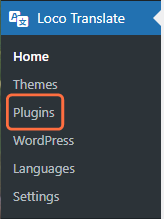
After activating Loco Translate, look for the Loco Translate tab on the bottom left side of your WordPress Dashboard and then choose Plugins.
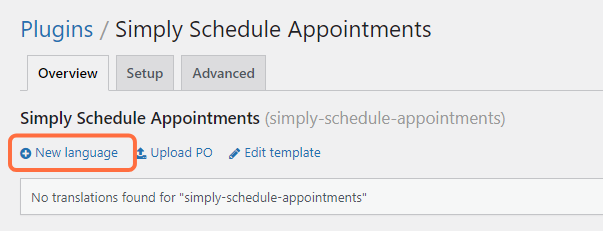
You should see a full list of all the plugins installed on your site. Click Simply Schedule Appointments, and then click New Language.

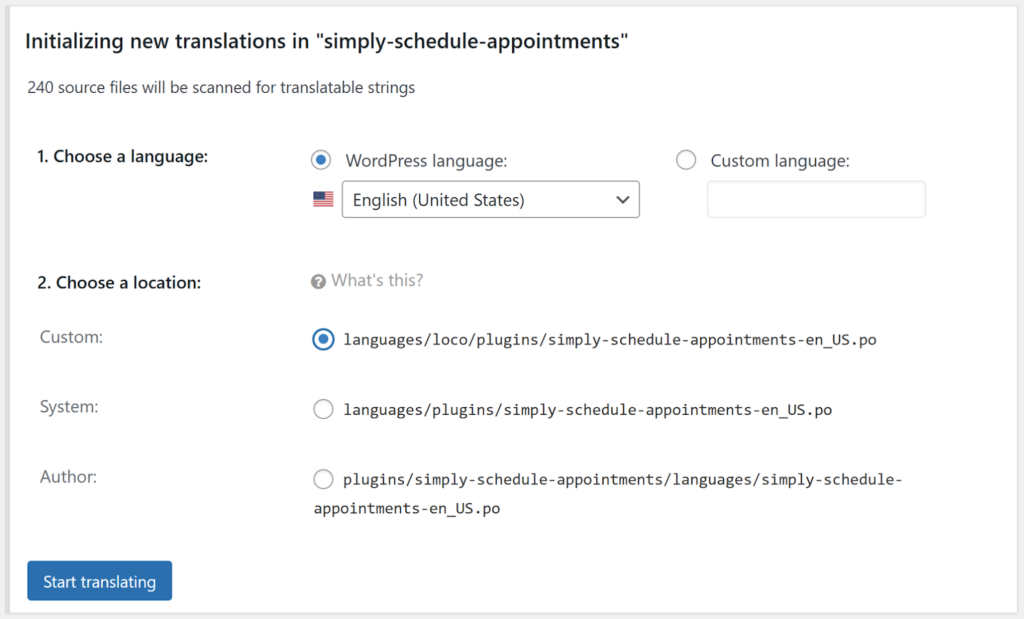
The next screen will show options to initialize the new language, set up the two steps, like so:
- Choose a language: Select the language you currently use on your WordPress site.
- Choose a location: Select the Custom option.
When you’re ready, click Start Translating.
Updating Text for Languages With a Translation Pack
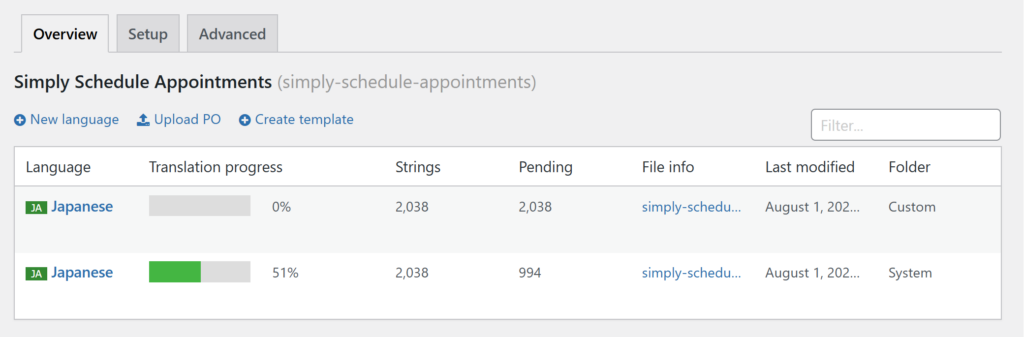
If you download the translation pack for a language within the SSA Translation setting, Loco Translate automatically creates a System language file for it within Loco Translate for the Simply Schedule Appointments plugin.

In that case, if you want to add your own custom translations and prevent them from being overwritten later by the language pack updates within SSA, you need to copy the existing language saved in the System folder and create a Custom file for it before you start translating.
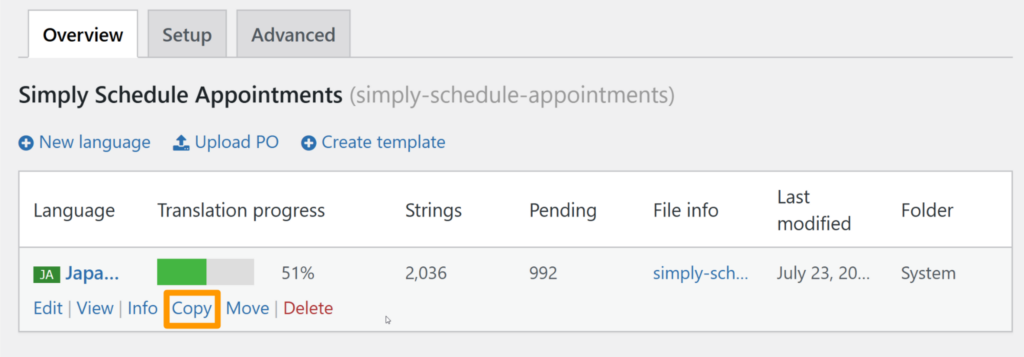
A new copy of the language will be created in the Custom Folder.
New strings added through the SSA plugin language pack updates won’t affect your custom translations in the custom file
Start Translating
After creating the new language profile, you can now start translating and changing the text!
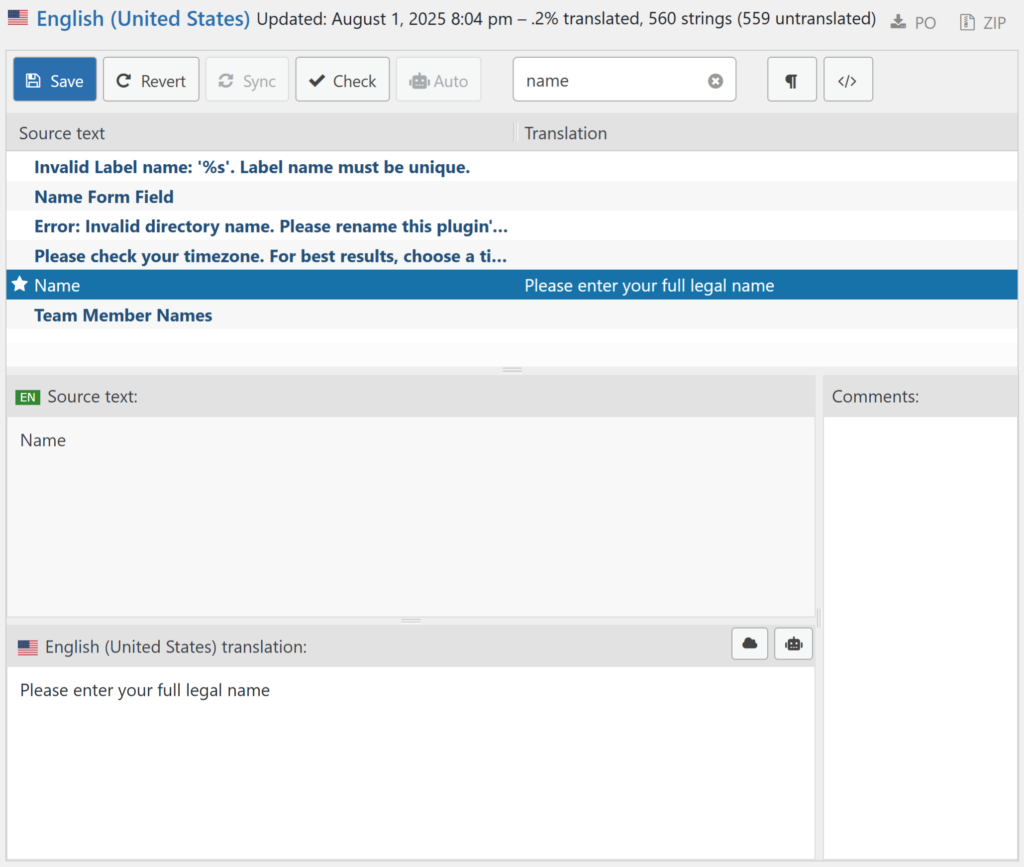
The top half of the screen displays a list of all the different phrases in Simply Schedule Appointments. You can use the filter section to search for the phrase you want to change.
Let’s say we want to change the default “Name” field to display as “Please enter your full legal name” for the English (US) language. We can follow these steps to change the field label:
- Use the filter to search for “Name”.
- Click on the field label “Name”.
- Towards the bottom of the screen, you will see an area for the translated text. Enter the new phrase here.
- Click Save.
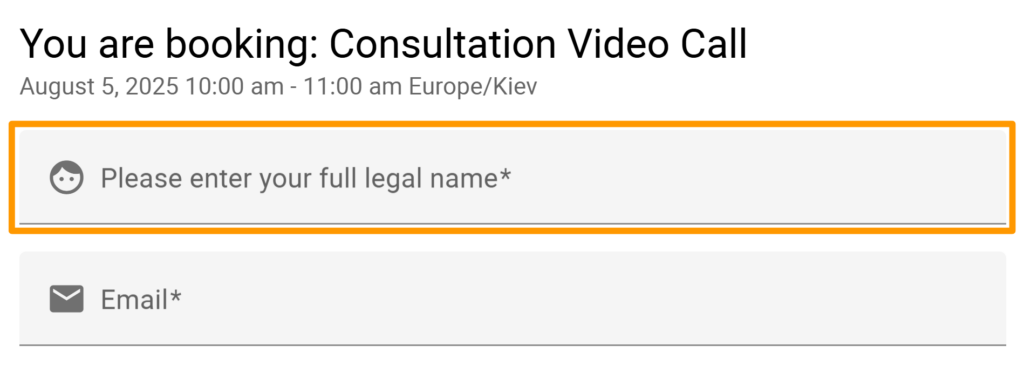
Check the Simply Schedule Appointments booking form to make sure that it’s working:
And that’s it! You can repeat the steps above for any other built-in labels you’d like to change.
No Plugin: Adding to the functions.php File
If you’re comfortable with adding PHP code to your functions.php file (or a custom plugin), this code should help you achieve the same thing as LocoTranslate without adding the performance overhead of another plugin:
add_filter( 'gettext', 'customize_ssa_button_text', 100, 3 );

function customize_ssa_button_text( $translated_text, $text, $domain )
{
    if ( $domain !== 'simply-schedule-appointments' )
    {
        return $translated_text;
    }

    // Replace only OLD_TEXT
    if ( $text === 'OLD_TEXT' ) {
        return 'NEW_TEXT';
    }

    return $translated_text;
}
Just make sure to make the proper replacements in this bit of code, for example:
if ( $text === 'There are no available appointment times.' ) {
    return 'Sorry, there are no appointments at this time. Check again Monday morning :)';
}
Replacing all instances of a word
If you want to replace a word across the entire plugin, you could use the following snippet. Keep in mind that str_replace is case-sensitive, so ‘Appointment’ and ‘appointment’ are different.
$translated_text = str_replace('EXISTING_WORD', 'NEW_WORD', $translated_text);

//For example, if I want to replace all instances of 'Appointment' with 'Meeting', I'd have to write something like -
$translated_text = str_replace('appointment', 'meeting', $translated_text);
$translated_text = str_replace('Appointment', 'Meeting', $translated_text);
So, if you were replacing phrases and also wanted to replace all the instances of a word, your snippet would look like this:
add_filter( 'gettext', 'customize_ssa_button_text', 100, 3 );

function customize_ssa_button_text( $translated_text, $text, $domain )
{
    if ( $domain !== 'simply-schedule-appointments' )
    {
        return $translated_text;
    }

    // Replace only OLD_TEXT
    if ( $text === 'OLD_TEXT' ) {
        return 'NEW_TEXT';
    }

    // Replace all instances of EXISTING_WORD
    $translated_text = str_replace('EXISTING_WORD', 'NEW_WORD', $translated_text);

    return $translated_text;
}
Accessing the functions.php File
In your WordPress Dashboard, go to Appearance > Theme Editor. On the right-side, you should see a sidebar with files. Select the functions.php file.
Scroll all the way to the bottom and paste in the above code, ensuring you’ve properly replaced the old text and new text fields.
Click Update File and that should be it!
Using the Code Snippets Plugin: Adding PHP
Another alternative is to use the PHP code from the above section and enter it into the free Code Snippets plugin instead of the functions.php file. This is a lightweight option that will also be useful in case you need to add other custom code to your site.
After you install and activate the plugin, go to Snippets > Add New and enter the PHP from above into the Code editor.
Leave the “Run snippet everywhere” button selected. And, don’t forget to enter a Title and Description to help you remember what the code does. When you’re done click Save Changes and Activate.