In this document:
Introduction
Simply Schedule Appointments automatically creates and sends email notifications to the admin and customer when an appointment is booked, edited, or canceled. Or you can also add more notifications!
Customize the email notifications by:
- Personalizing the subject and message
- Changing who receives the notification
- Tying it to a specific Appointment Type
View Your Notifications
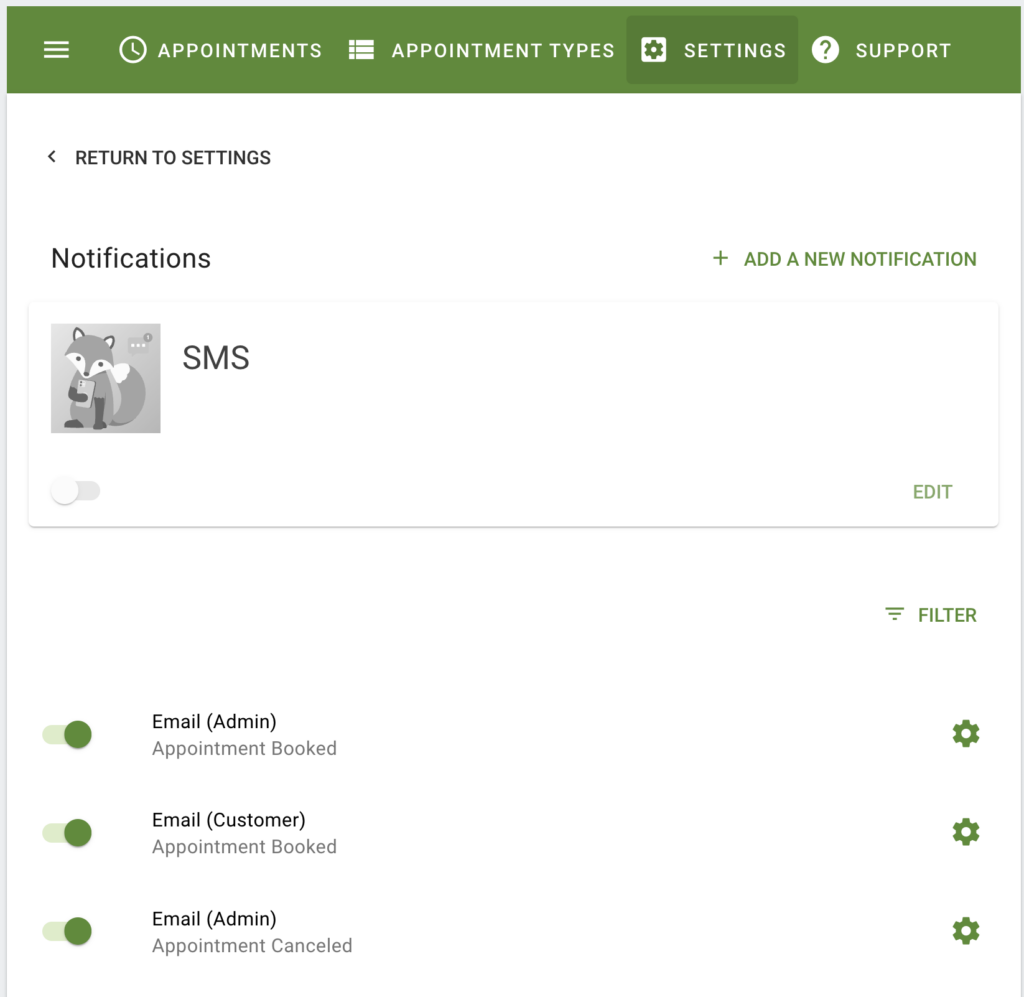
You can see the list of notifications by going to SSA Settings > Notifications. To add a new blank notification, click the Add A New Notification button at the top-right.
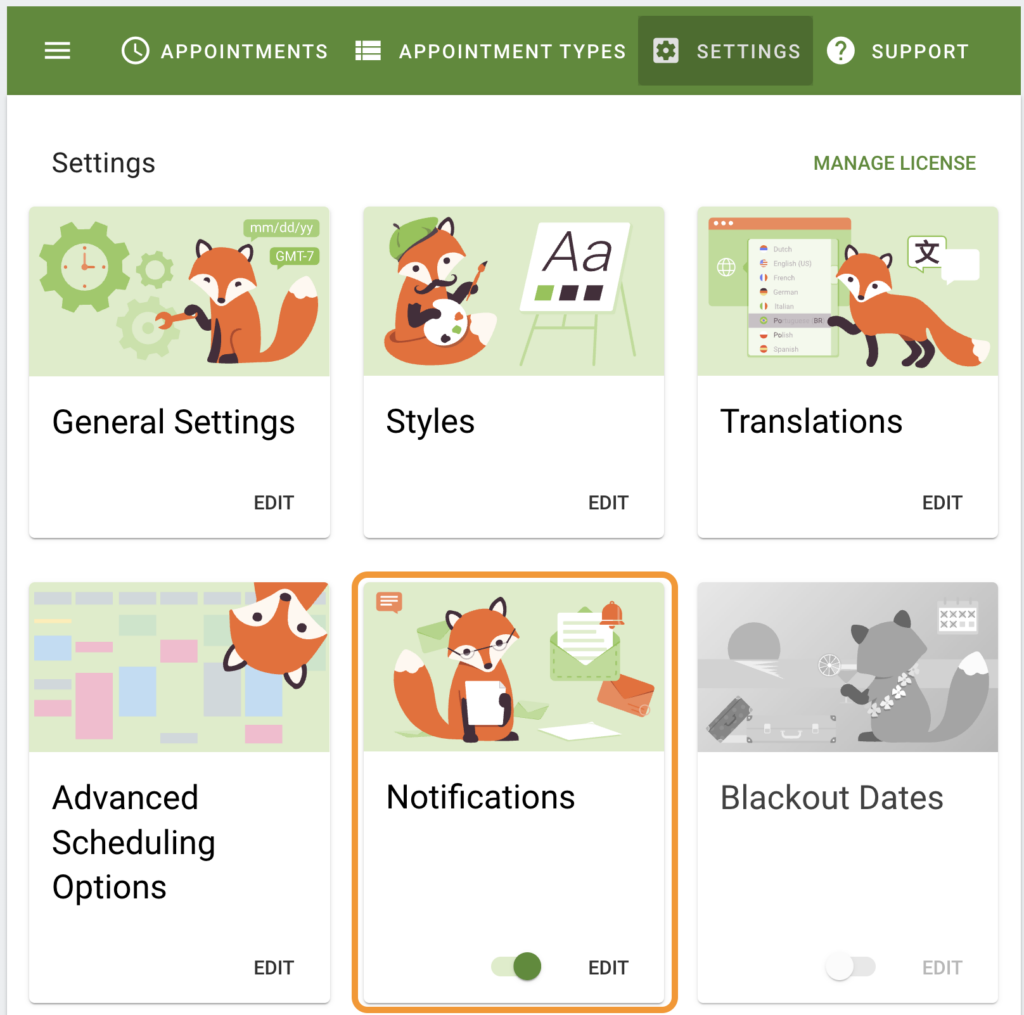
Or, from the list of notifications, you can click the cog button to edit, clone, or delete a notification.
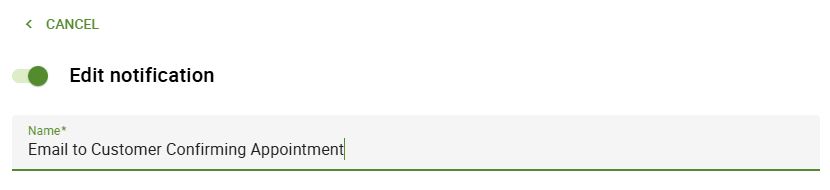
Adding or Editing a Notification
When adding or editing email notifications, you can change the following settings:
Name Field for Organizing Notifications
The Name field is to help admins manage their notifications. Customers never see this.
If you plan to create a lot of customized notifications, we recommend creating a naming system to help you edit them in the future. Keep these things in mind while naming:
- Include a quick note about who receives the notification (Admin, Customer, Team Member, or someone else?)
- The appointment type is connected to the notification. (Is it all or only one?)
The SMS feature is available in the Professional and Business Editions.
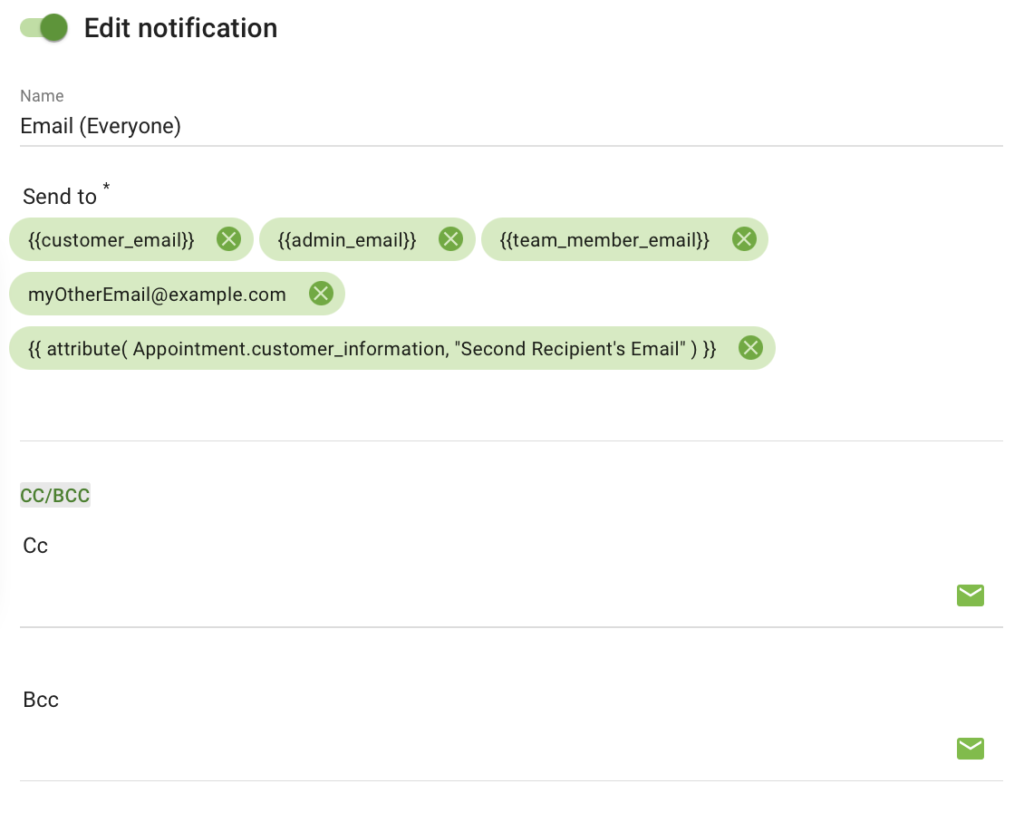
Send To, CC, and BCC fields to Choose Who Receives Notification
Click the envelope icon to the right of each field to get a shortcut code for inserting the admin email, team member email, or customer email.
You can also add any email addresses you’d like to these fields. For example, [email protected].
CC and BCC
By default, the CC and BCC fields are empty and hidden. Click the CC/BCC button to reveal them under the Send To field.
Add Additional Recipients from the Booking Form
Emails collected from additional custom fields can be added to the Send To list. Use the following Twig template to add the additional custom field emails:
{{ attribute( Appointment.customer_information, "Second Email Field Label" ) }}Make sure to replace the Second Email Field Label with the name of the field you’re using to collect the additional email addresses.
Along with the CC/BCC field, there is a Reply-to field that can be edited. By default, this field is automatically set depending on the recipient, and we recommend leaving it empty unless it’s necessary to set an email here.
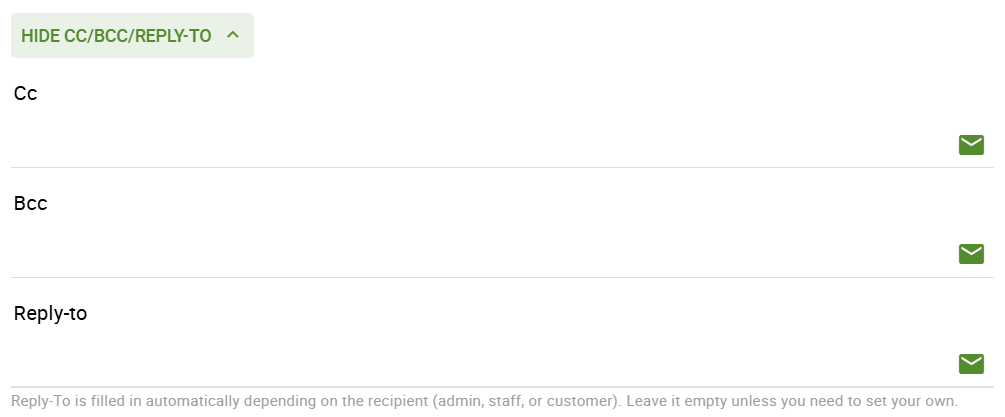
A good use case for this is to set a team member as the reply-to contact when the admin isn’t the one handling appointment responses directly.
As a note though, only one reply-to email can be set.
Triggers to Send Notifications at Specific Times or Events
Each notification has a trigger for when it needs to be sent. You can set up different notifications for different events. The triggers are:
- Booked: Sent when a customer finishes booking
- Edited: Sent when an admin or customer edits the information from the Booking Form (name, email address, etc.)
- Canceled: Sent when the admin or customer cancels the appointment.
- Time-Triggered: Sent at a specific time before or after the time of the appointment.
Rescheduling Triggers
We do not offer a Rescheduling trigger because of how the plugin works at this time. When an appointment is rescheduled, the start date and time are just overwritten with the new time slot. As a result, only a confirmation email will be sent out for the new rescheduled time slot.
To help communicate the rescheduled information, we recommend adding the rescheduling history twig from this guide to your confirmation messages.
Tie Notifications to Appointment Types
By default, notifications send out for All Appointment Types.
To pick specific Appointment Types to send this notification, uncheck the All checkbox. This will show you a list of your Appointment Types. Check the Appointment Types that you want to be tied to this notification.
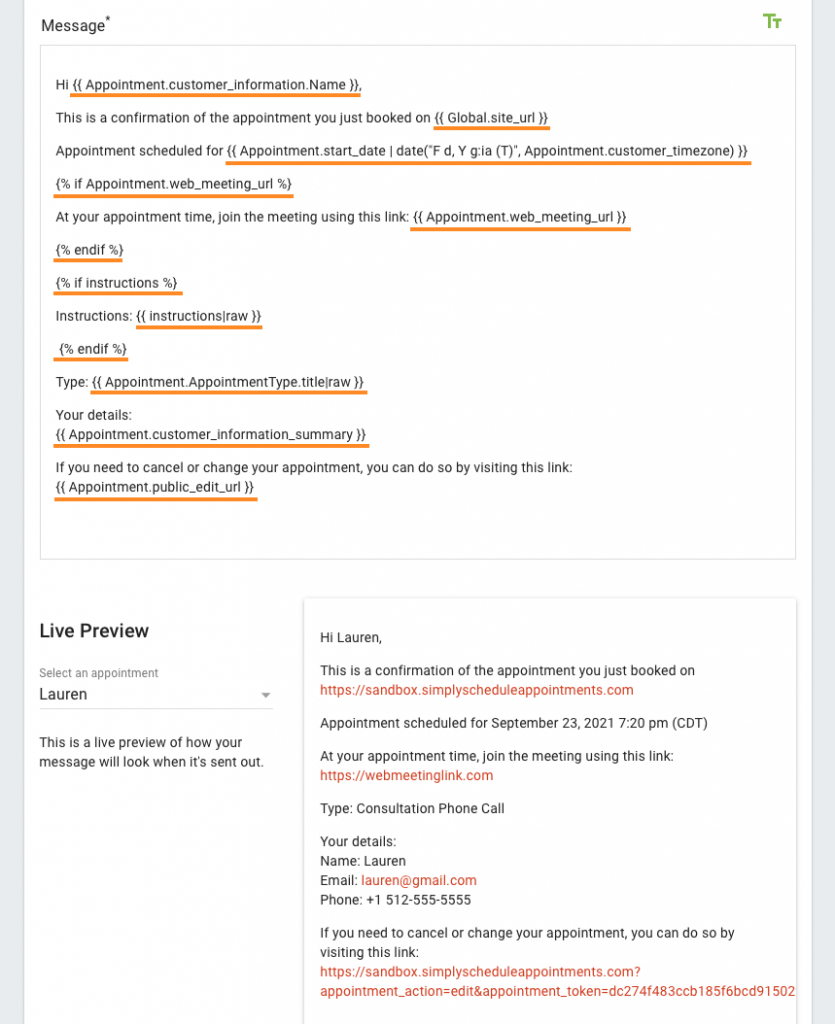
Subject and Message
The Text editors for the subject and message fields work based on “What you see is what you get”; anything written here is literally what you’ll see in the email. Both the subject and the message also use Twig Code Templates to fill in information from the appointment itself.
Click the Tt (text) icon at the top-right corner of the Message field to insert Twig Code Tokens automatically. Or, just type {{ to open the list of options right where you’re typing.
And keep an eye on the Live Preview box below the message box to ensure there are no errors.
Here’s a guide to help you write personalized messages for your Subject and Message — Writing Your Own Notification Subject and Message