The latest Team Booking feature invokes the power of friendship to achieve a common goal. The days of having to argue over who does what can be eliminated. Now the possibility of assigning new bookings to certain Team Members is very real.

Quick Overview
- Editions:
- Business (4.4.2.0)
- Helpful Links:
Why Should You Need a Team?
Team Booking is a fantastic feature that allows team members or employees to collaborate while separating their duties and having their own schedules. Not everyone will realistically have the same schedule, and it cuts down on the confusion when people know who oversees which appointment.
Appointment Types can require certain team members at will. Not every Appointment Type needs a dedicated team member, but it is incredibly useful in certain situations.
For example, say there is a salon or barber shop where certain staff members specialize in various things. An Appointment Type can be assigned to Team Member A, and they would be able to customize their own availability. Team Member B can oversee another Appointment Type with their own availability as well. Then, there can be a shared Appointment Type that both members can participate in and share the glory. Now everyone can coordinate their own lunches and breaks! Yay!
Best of all, you could even set the Appointment Types up in such a way that people will be able to “choose” their barber/hair stylist. While this isn’t a built-in feature yet, and we hope to add it soon, we can offer a little workaround for it. It’s easy–indicating in the Appointment Type title who the appointment is with.
Assembling the Dream Team
Interested in indulging yourself with the power of teamwork? It’s customizable, and best of all, it’s simple to pick up. This is a team effort, so we’ll charge through this together!
With that said, let’s make our way to our SSA Settings. Scroll down a tad until you see the card that says “Team” and toggle it on.
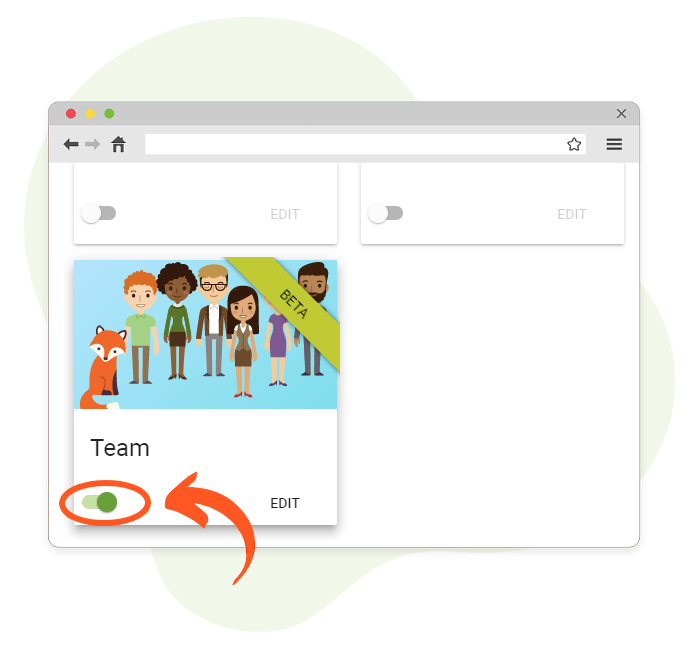
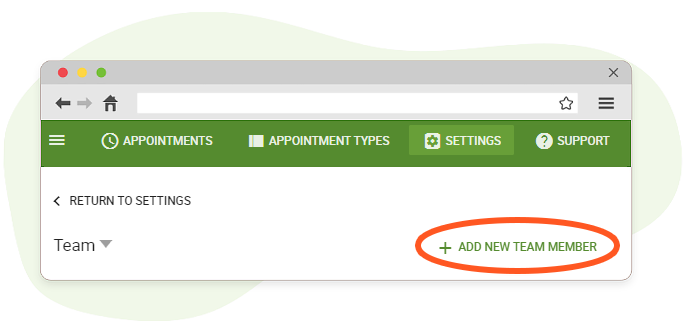
Now let’s start customizing it. Click on it to edit it. We have quite a few options here, but we want to start by adding a Team Member first. Click “ + Add New Team Member”.
It’ll prompt you for an email address. You can add any email address, even if it’s not associated with a WordPress user yet.
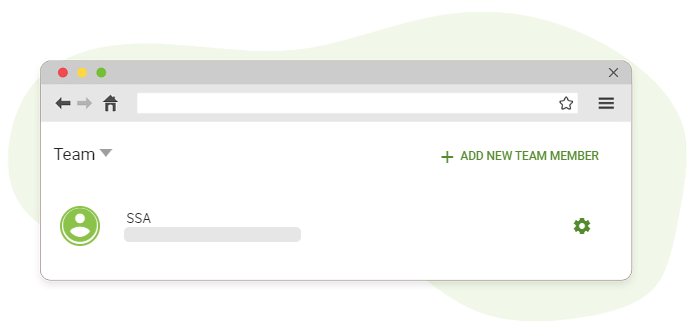
That’s team member #1! You did it! This is a beautiful start to a team. It was all as simple as one-two-three. You can keep adding team members to build up a little team.
The most important is setting up Appointment Types for team members. So let’s do that. Head on over to Appointment Types and click one of them. There will be a section dedicated to Team Members within the settings, prompting three choices: Any, All, and None. I’ll go over these options briefly.
- Any – This means that you can match a customer with any of the selected team members.
- All – All of the selected team members are needed for an appointment.
- None – Team members aren’t necessary for this appointment.
Make sure you tie an Appointment Type to at least one of the first two options so that Team Members can be utilized for that Appointment!
Granting Individuality
“But, what if my team needs a break at different times!?” No worries–not everyone has to share a schedule. In fact, each individual team member can have their own availability set to their heart’s content.
Click on the team member that you wish to edit. Hover over “Availability” and tap it so that it shifts over to the Availability screen.
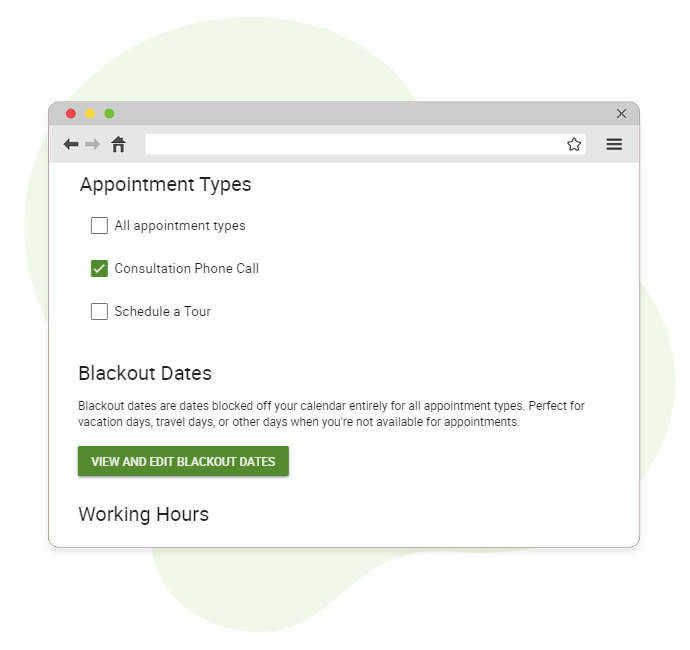
Within this awesome little panel, you’ll be able to assign Appointment Types to the team member. Blackout dates and Working Hours can be set as well. Let’s try setting custom working hours.
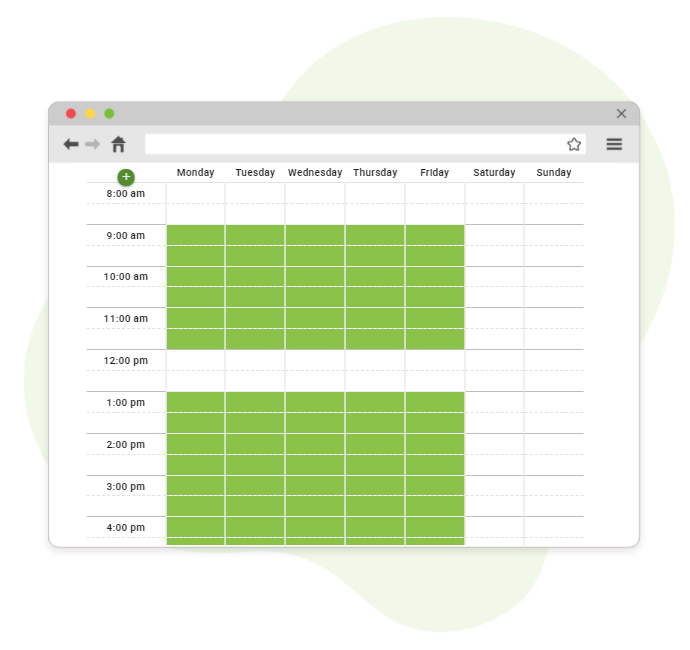
With a little gap for lunch, it’s perfect. Now everyone can enjoy their own schedules and quiet time.
Equipping the Team
What if your team members desire to manage their own schedule? This can be done quite easily. We have dedicated a “Team Member” user role to allow team members the ability to view their own bookings and settings.
Within your WordPress dashboard, head on over to “Users” and click on a user or create a new user. You’ll want to select the “Team Member” role within the settings.

Buuut, we still need a way for them to access the back-end. Remember that only Team Members registered as WordPress users can log in. With that said, the login page will be the same one you use for logging in, but they will have a limited view of everything–no worries about anything being set aflame!
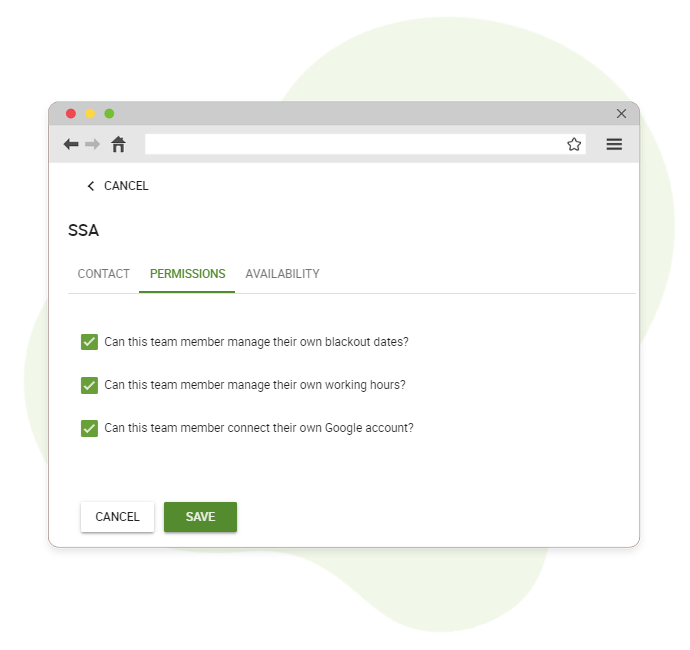
Next, you’ll want to be sure that they can actually access the Appointments. Head on over to your SSA Settings, and to your Team module. Select the team member and then tap “Permissions”. You’ll want to set the permissions according to what you want them to be in control of.
Once the team member has logged in, they will see their profiles and appointments. They can head on over to their Profile to pull up their Availability, and here is where they can manage their own schedule. No more having to play the middle-man.
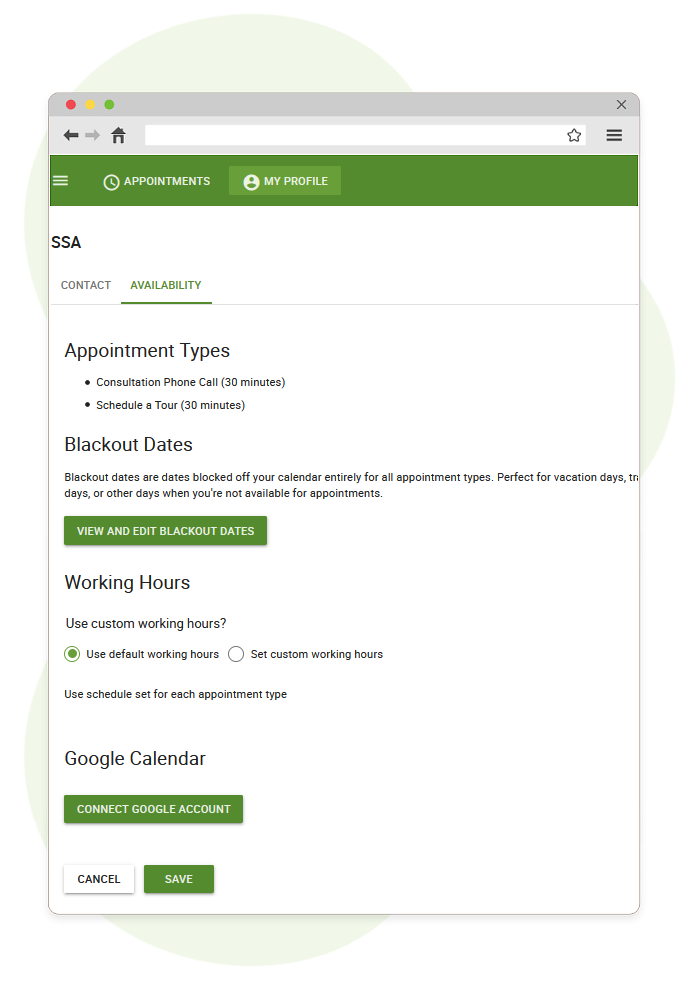
There is also that pretty sweet setting that allows them to sync their own Google Calendar to SSA.
By the way, let’s get into that…
More Useful Equipment
If you have already set up Google Calendar, this part will be easy-peasy. If you have not, and you are interested in setting up Google Calendar, feel free to visit this super awesome and detailed walkthrough here.
When the team member logs in, they’ll be able to visit their profile and connect their Google Account to Google Calendar. See this button?
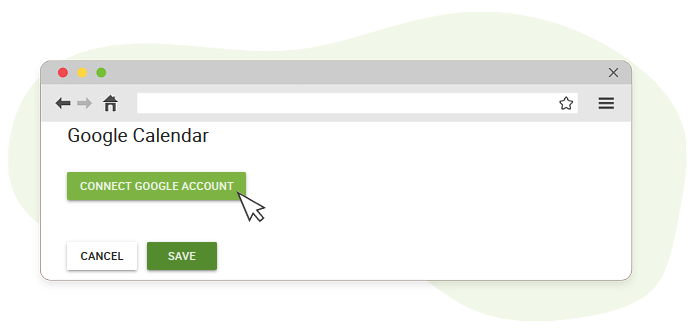
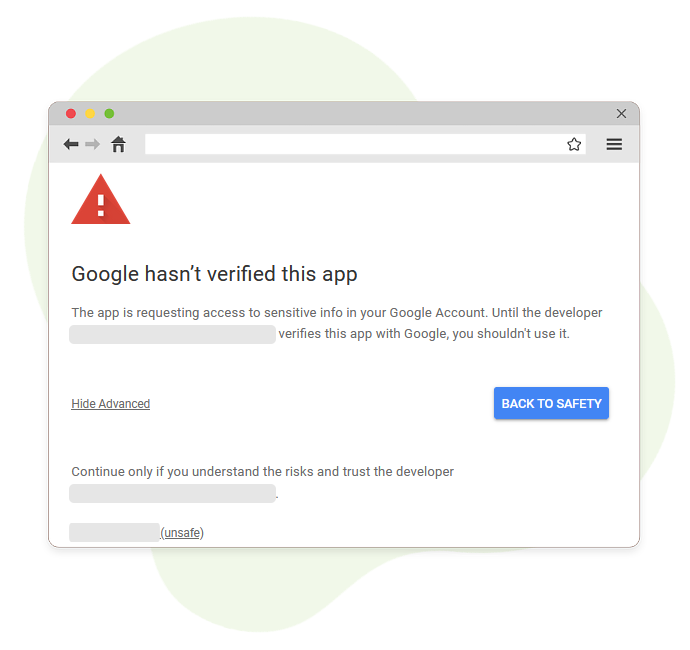
The team member will click that button, prompting them to select their account. Generally, there will be a screen saying “Google hasn’t verified this app”. They can ignore this, and press “Advanced”, and then select “Go to (site name)”.
They can then select “Allow” so that they’re able to sync their calendar.
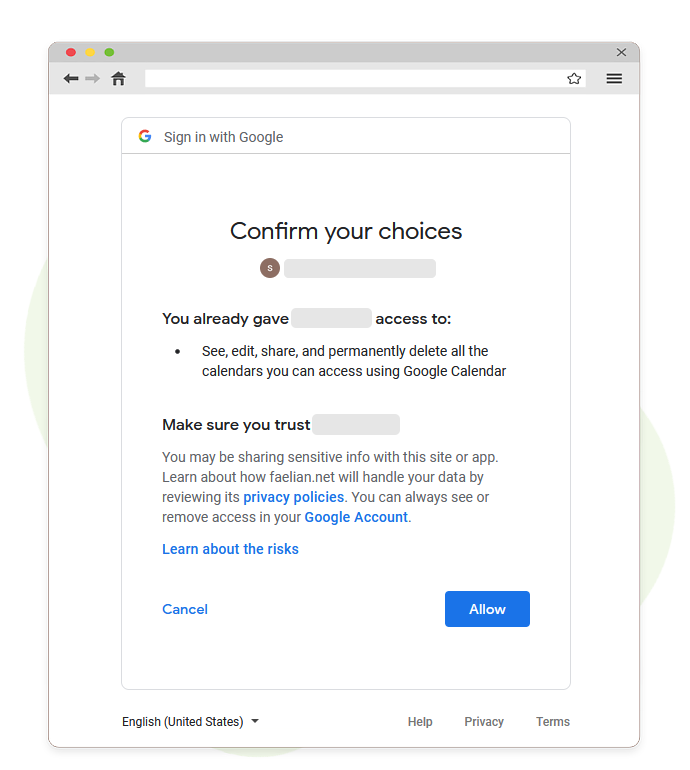
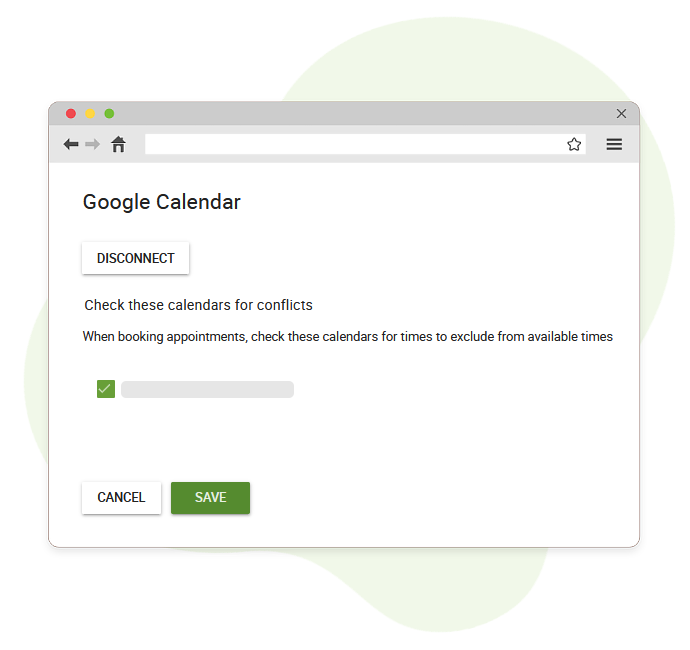
And, once that’s done… Head back on over to the Profile, and Availability section. They will see that the Google Calendar is connected now, and they can select a calendar to check for conflicts. So if they already have events booked within Google Calendar, no new appointments can be booked during that time! It’s truly a lifesaver.
It’s Not Over Yet
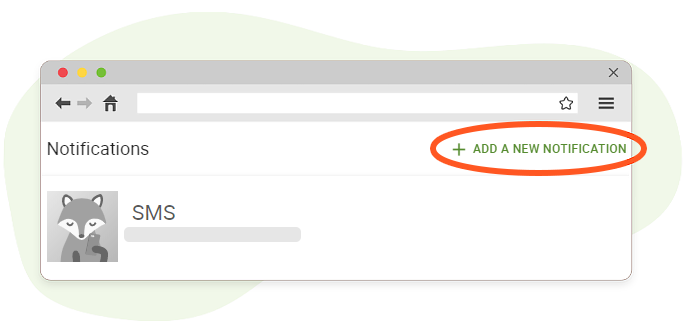
But before we can call it a day, we need to set up notifications for our team. It would be quite the unwelcome surprise if they didn’t know about an appointment on x day. We would like to prevent unhappy grumbling.
Within your settings, drop on down to Notifications and tap that box. Start by adding a new notification.
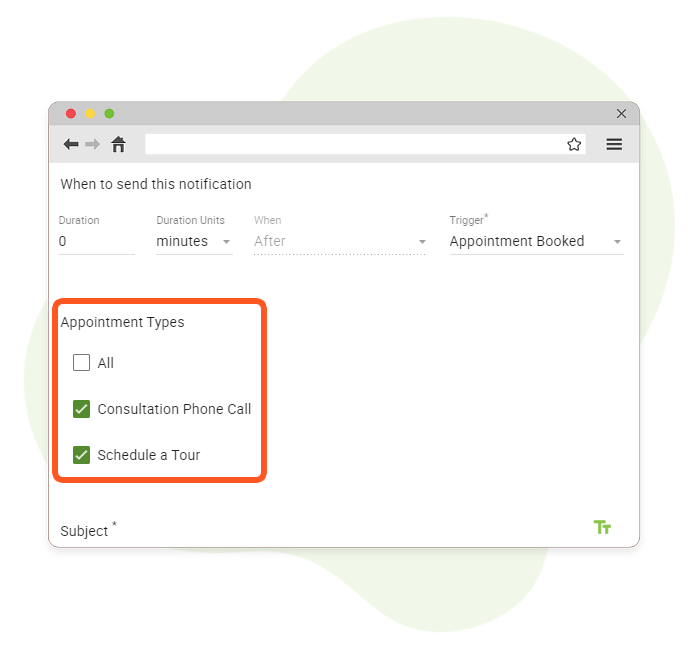
Here we can start customizing it so it’s tailored to your expectations. Most importantly, though, is setting the “Send to” for a team member. Click that little green envelope and you’ll see the twig code as follows:
{{team_member_email}}Now, you can check the Appointment Types that you wish to associate with the Team Member notifications.
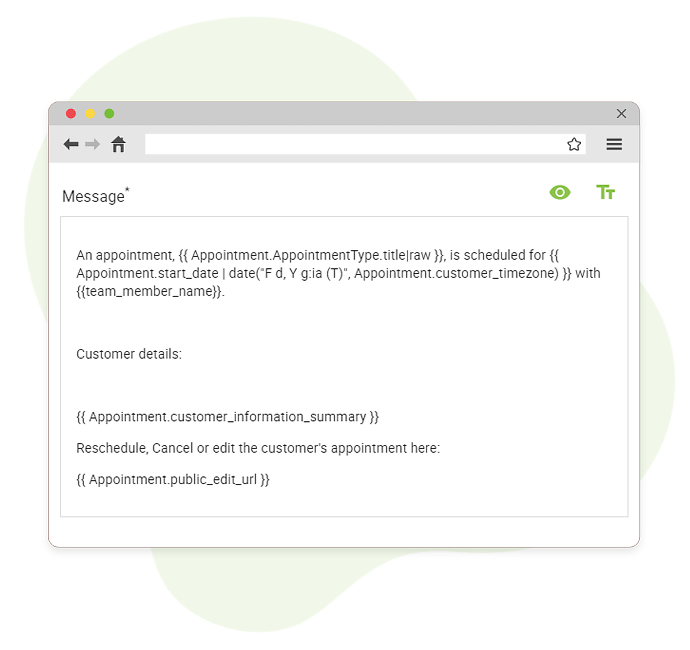
I highly suggest you give this guide a peek so that you can check out the example Team Notification templates that are available for the messages. It also helps get the ball rolling too if you’re in a hurry.
Once you’ve waved your wand and performed a few magic tricks to make the notification look fancy and to your liking, you’re done! That’s quite it. Now your team will receive special notifications of their own so that they’re not caught off-guard by unannounced appointments.
Victory at Last
Now that you’ve assembled a group and properly equipped them with the right tools to succeed, you can take full advantage of the Team Booking feature for all your business needs. We seek to keep adding more features to make Team Booking a wholesome and straightforward experience.