In this document:
Introduction
In this guide, we will cover details on understanding and configuring the developer settings, managing appointment data, and testing beta releases in the Simply Schedule Appointments.

Developer Settings

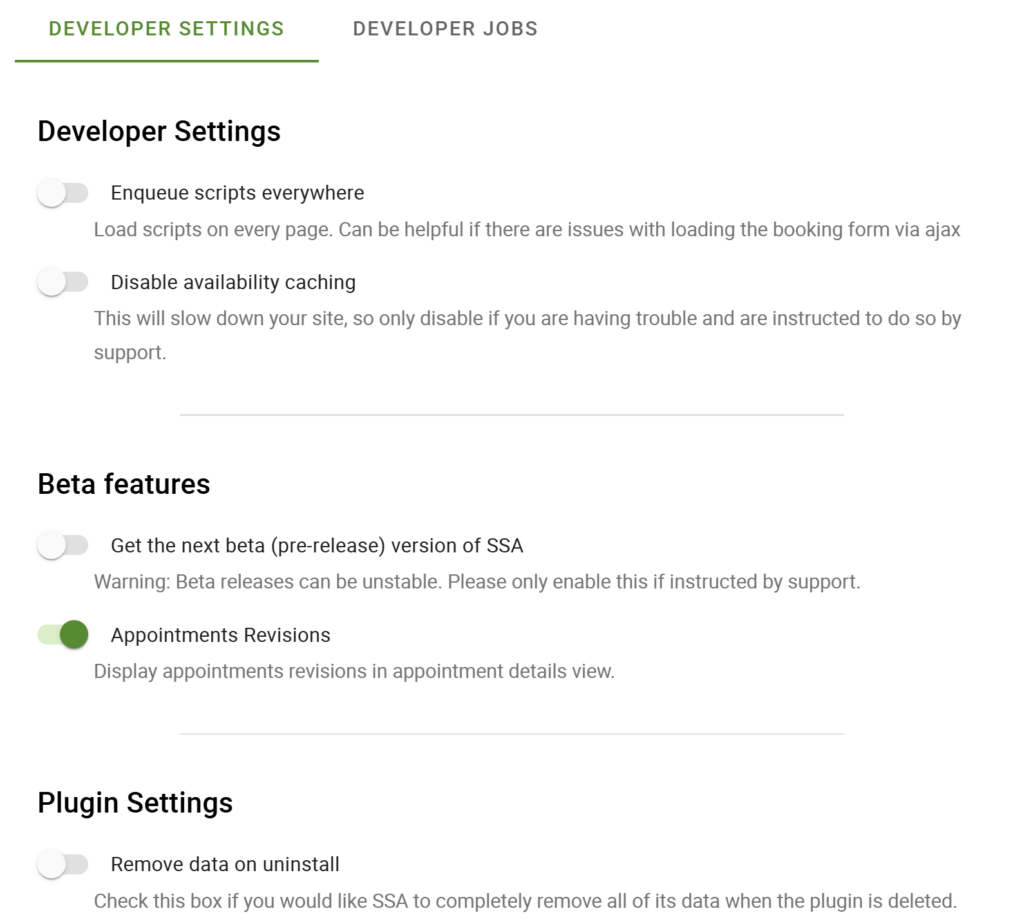
Enqueue Script Everywhere
Enqueue Script Everywhere makes sure that your JavaScript (scripts) or CSS (stylesheets) files load correctly in the right sequence on every page of your WordPress site, no matter which theme you’re using.
Toggling on this setting can be useful if you’re having trouble loading the booking form while using an AJAX framework to update data dynamically without reloading the entire page.
Disable Availability Caching
The Availability Caching option in Simply Schedule Appointments temporarily stores available time slots and days to load your booking calendar faster.
Disabling this option will force the calendar to run the availability algorithm to check the booking calendar information instead of relying on the caching system.
Remember, Enqueue Script Everywhere and Disable Availability Caching settings are primarily for troubleshooting purposes. Only activate them if our support team has specifically instructed you to do so.
Get the next beta (pre-release) version of SSA
This option, when enabled, will allow you to receive beta updates for early access to new features and bug fixes for the Simply Schedule Appointments plugin.
You should be careful before enabling this option, as new releases before the official plugin update can be unstable. Hence, it’s best to test the beta updates on staging first and set up a backup before enabling it on the live website.
Appointments Revisions
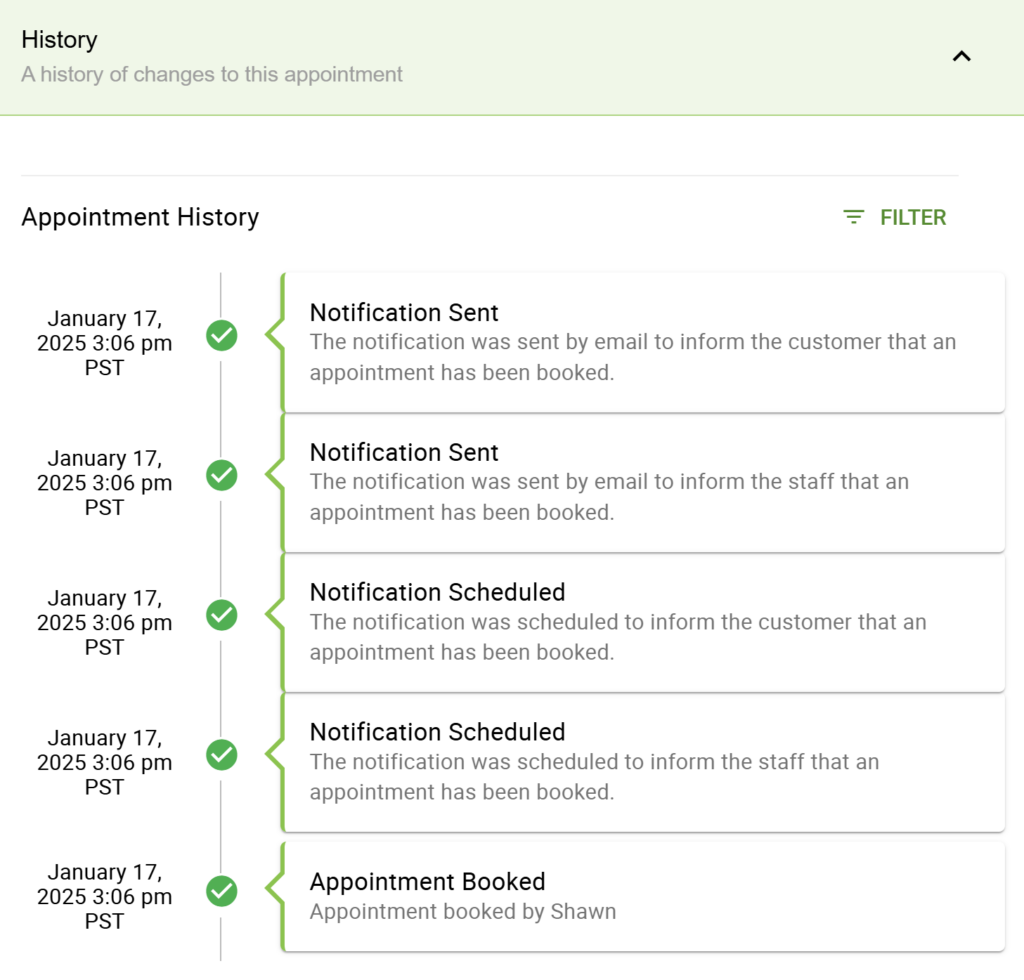
Turning on the Appointments Revisions toggle will allow you to review the history of all the events for an Appointment since the booking was initiated.
This could include information like Appointment Booking, Appointment Cancellation, Payment Status, Assigned Team Member, Notifications Scheduling and Cancellation, Google Calendar sync, etc.
To view revisions for any appointment, go to SSA Appointments > Scroll from the list of appointments to select the Appointment > History. The drop-down details would display the entire history of that appointment.

Importing the appointments and settings for SSA from your existing site into the new site using the Import and Export feature truncates the Appointment History data.
That’s why you won’t see any Appointment History for the imported appointments on the new site.
Remove data on uninstall
When you uninstall the Simply Schedule Appointments plugin, the plugin files will be removed from your website; however, the databases created on installation won’t be removed.
To remove all the database entries and data along with the plugin files of Simply Schedule Appointments on uninstallation, you have to enable this option.
Developer Jobs
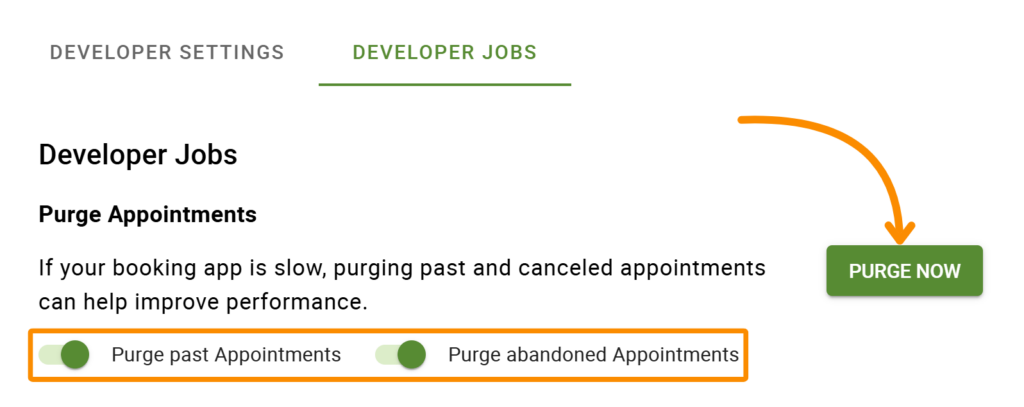
Purge Appointments
Purge Past Appointments option is for deleting all of your past appointments.
Purge Abandoned Appointments option is for deleting all the appointments with canceled and abandoned status.
Turn on the toggle for one or both of these options and select “Purge Now” to remove the appointment data related to each selected option.
Read more details about Purge Old or Abandoned Appointments.

Related Guides
-

MemberPress Appointments for Memberships
-

Appointments Tab for Member Dashboards
-

ssa/appointments/customer_information/get_defaults Filter
-

ssa/templates/get_template_vars Filter
