In this document:
Introduction
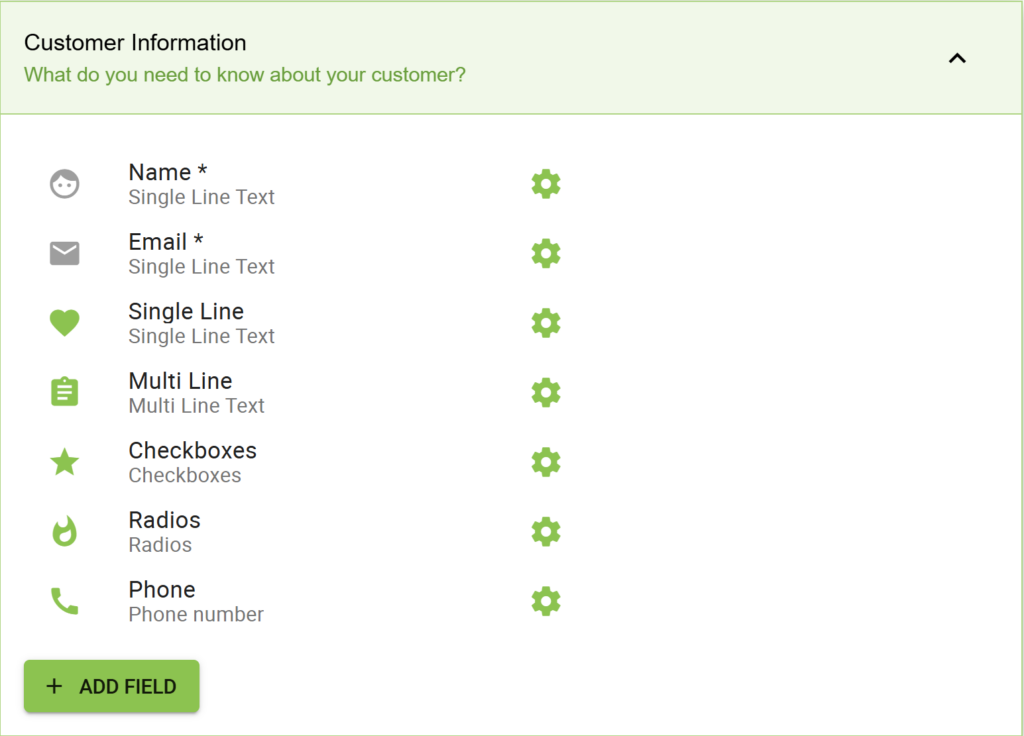
Create custom fields to collect tailored information when your customer books an appointment.
Custom fields include checkboxes, radio buttons, multi-line text, single-line text, and phone numbers.
Video Walkthrough

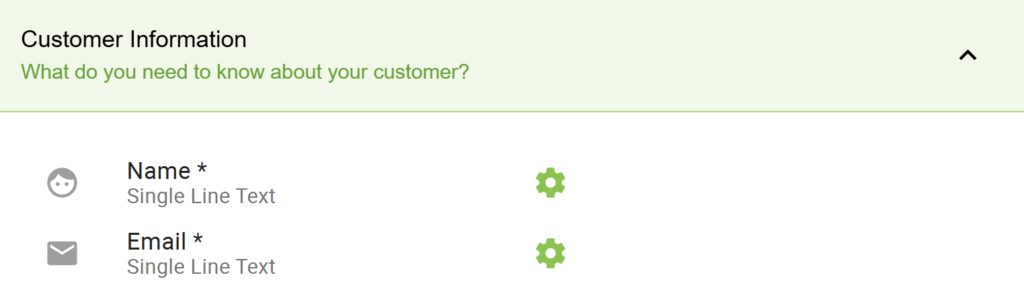
Required Name and Email Fields
The Name and Email fields are non-removable and permanently set to “Required” for the Appointment Type. The plugin was coded around having these filled in and needs them to function correctly.
When editing the custom fields for an Appointment Type, you’ll see that these two fields don’t have the option to edit or delete.
But you can clone or reorder them in the Premium Editions of the plugin!
To change their Labels, you’ll need to use one of the solutions listed in our guide to Change the Text Phrasing in the Plugin.
Adding a New Field
To add a new field, click the + Add field button. A modal will open where you can add the details for your custom field.
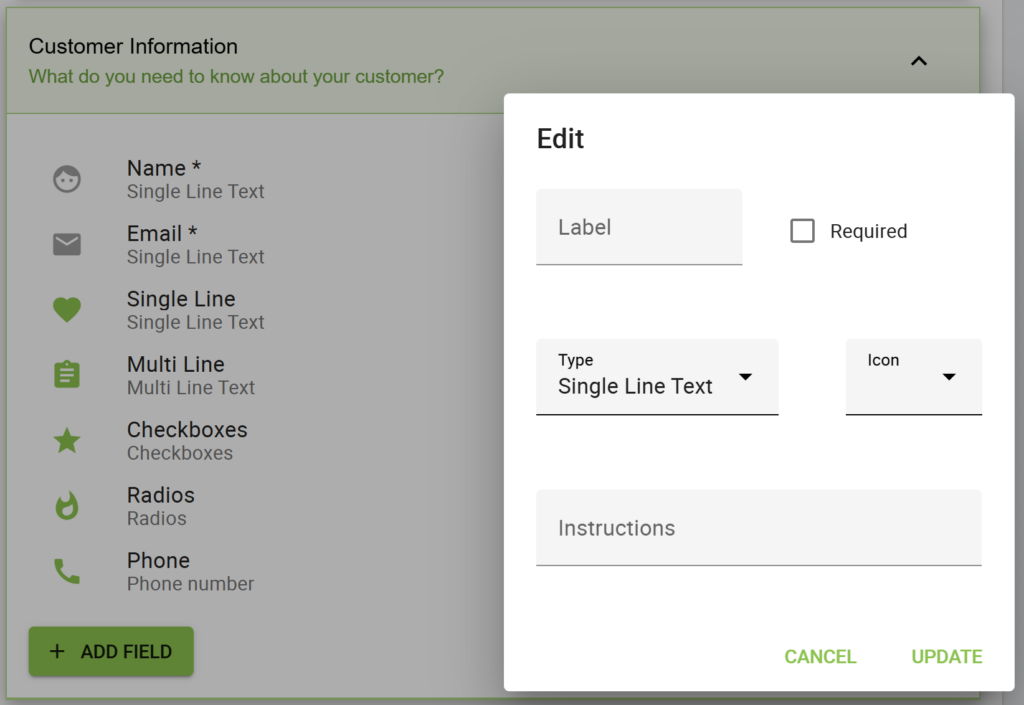
The following fields are available:
- Label: Set the name of the field. Your customers will see this in the booking form and email notifications.
- Required: Check the box to make this field a requirement for completing the booking form. If left unchecked, it becomes an optional field.
- Type: This chooses how your customer interacts with the field.
- Single-Line Text: Best for short answers
- Multi-Line Text: Best for answers longer than a simple sentence
- Checkboxes: Best for selecting multiple options in a list
- Radios: Best for selecting a single option in a list
- Phone Number
- Values: If you choose Checkboxes or Radios, this field will appear in the modal. Enter each option you want to list by entering each value on a new line.
- Icon: To display an icon next to the field name, choose one from the drop-down list.
- Instructions: This helpful text will show up below the field in the booking form.
Click the Update button to save your settings and close the modal.
Include a Link in the Field Instructions
To add a clickable link to the field instructions, you can use our <a> tag snippet.
This could be helpful for linking to another page with a consent form. Use this with a required checkbox to make your booking form GDPR compliant.
<a href="INSERT_URL_HERE" target="_blank"> INSERT_LINK_TEXT </a>Editing a Field
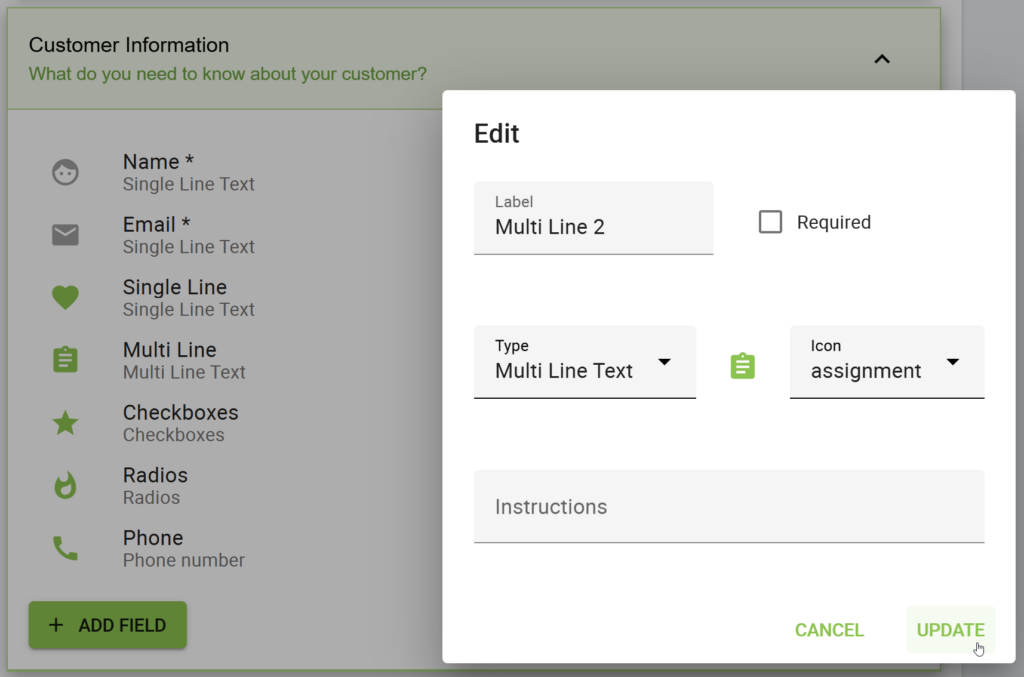
To edit a custom field, click the cog icon to the right of the field.
This opens the field menu, where you can Click the Edit option.
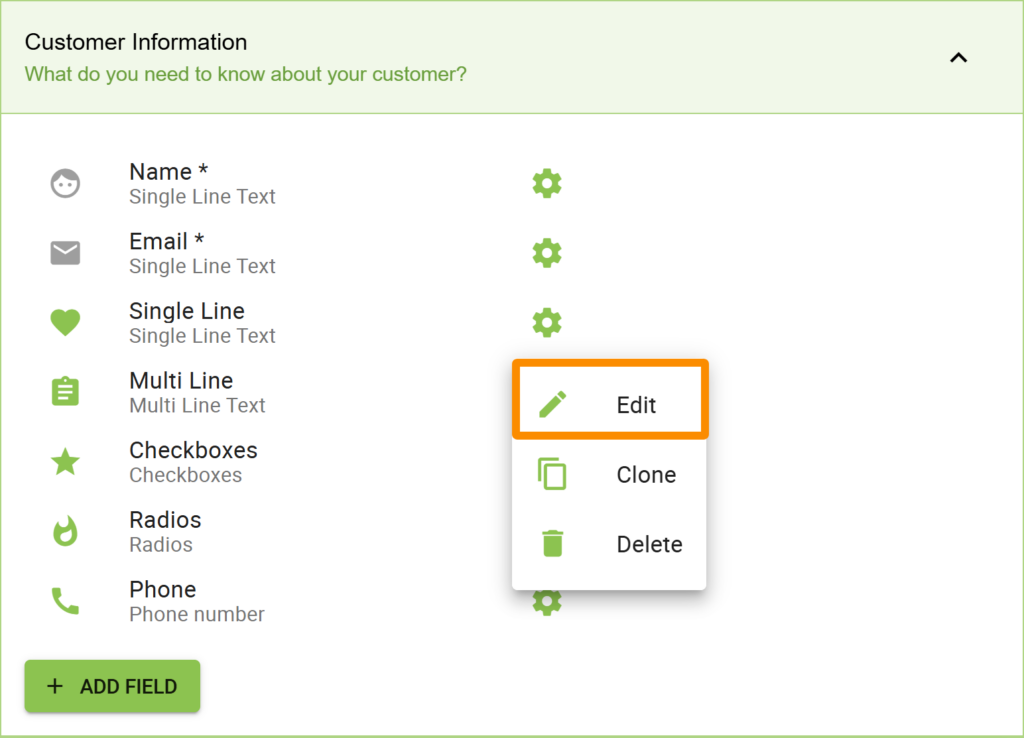
After you’re done editing, click Update.

Cloning a Custom Field
If you’re adding multiple fields with similar settings, you can save time by cloning an existing field rather than creating new ones from scratch.
To clone an existing field, click the cog icon to the right of the custom field, then select Clone from the menu.
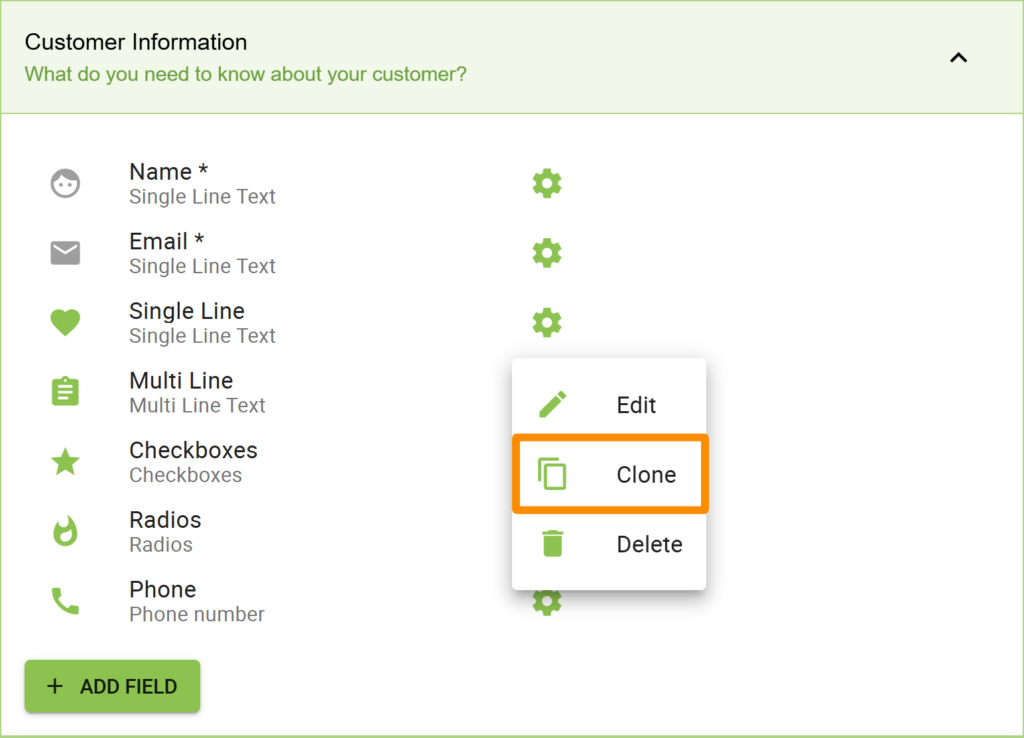
A copy of the field will open in a modal dialog where you can adjust the settings. After adjusting, click the Update button.
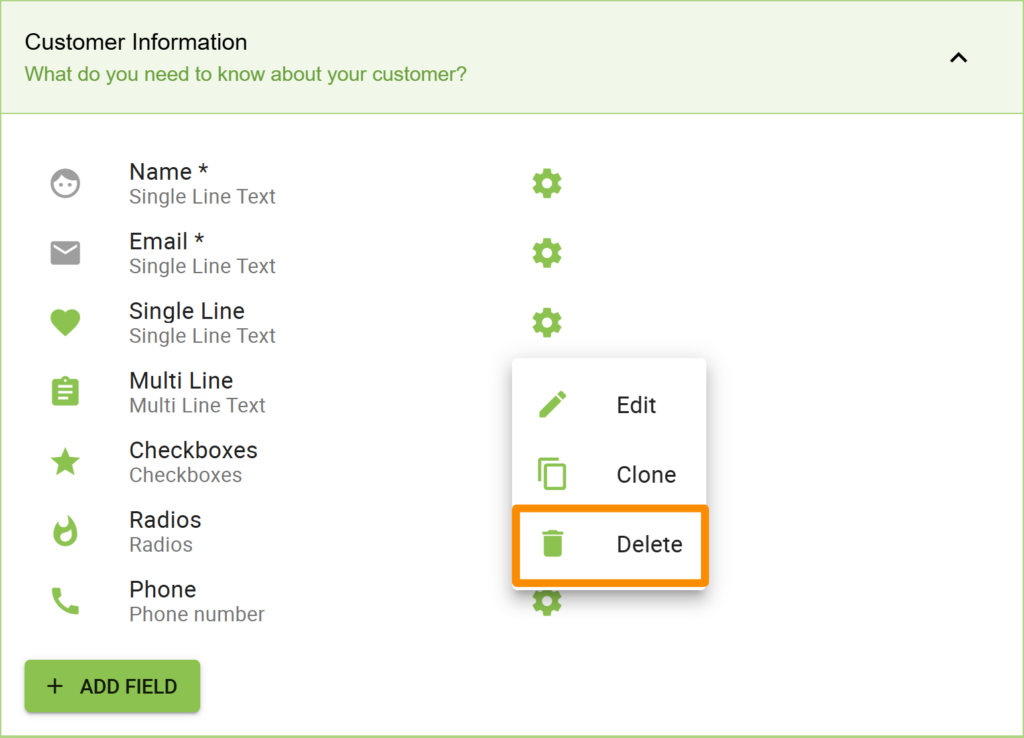
Deleting a Custom Field
To remove a field, click the cog icon to the right of an appointment type and select Delete from the menu.
Reordering Custom Fields
You can re-arrange your Custom fields into any order you like on the booking form.
To re-order the fields, place your mouse over either the name of the field or the icon in front of the field. You’ll see the cursor change to the move cursor.
Click and drag the custom field up or down to its new position in the list.
Display a Custom Field in a Notification
You can display custom fields within a notification using the Specific Customer Information Fields template. To learn how to do this, check out our Twigs guide.
Related Guides
-

Google Calendar Sync
-
Capacity for Groups or Overlapping Bookings
-
Appointment Type Settings
-
Email Notifications