In this guide, we will go over how to use our custom mini-plugin as an alternative method to adding custom CSS to the Simply Schedule Appointments plugin.
This method is convenient for making CSS changes without adding stylesheets to the theme. Additionally, if you want to switch the theme on your site, you can do that without worrying about including the same CSS changes made previously in the Simply Schedule Appointments plugin in the new theme.
Installing the Mini-plugin on your site
You can install the mini-plugin on your site like any regular plugin. To do so, take the following steps.
- Download the mini-plugin zip via the following link: https://github.com/nsquared-team/ssa-custom-styling
- Log in to your WordPress website as an administrator and head over to Plugins > Add New Plugin > Upload Plugin > Choose File.
- Upload the downloaded mini-plugin file to your WordPress site. Once the file is loaded, install and activate the plugin, after which the mini-plugin should be displayed in the list of Installed Plugins.
Adding custom CSS to the Mini-plugin
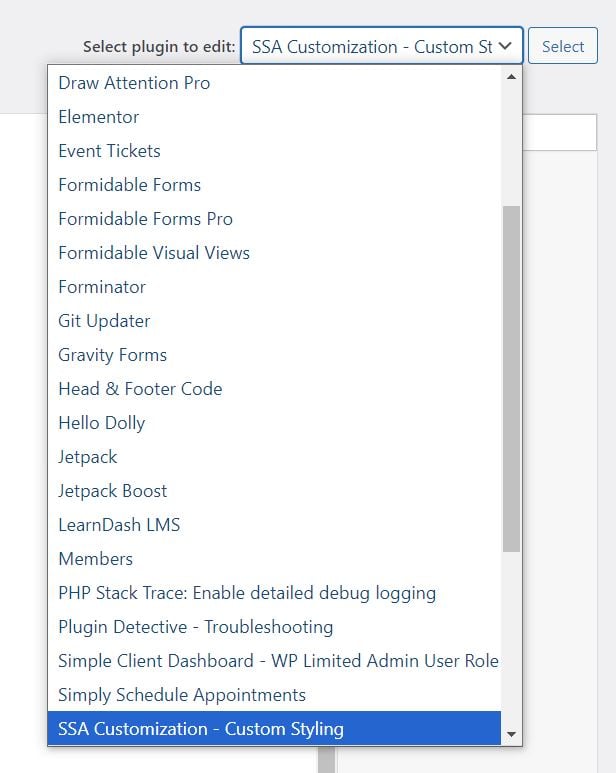
Once the plugin is activated, go to Plugins > Plugin File Editor and select SSA Customization – Custom Styling under the Select plugin to edit option.

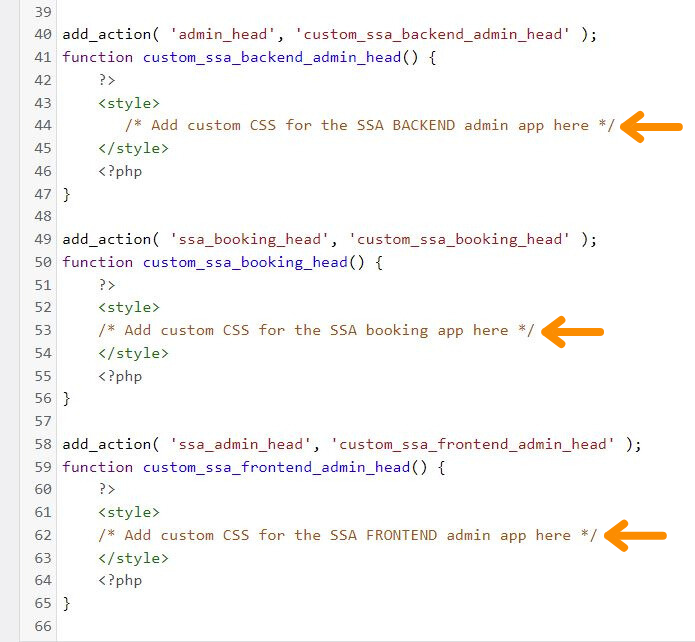
Once the customize.php file for the SSA Customization—Custom Styling is loaded, you will see three add_action functions with options to add CSS to the following:
- SSA BACKEND admin app: stylize the admin dashboard, accessible through your site’s backend via the WordPress Dashboard > Appointments.
- SSA booking app: stylize the frontend booking calendars displayed on your site.
- SSA FRONTEND admin app: stylize the admin dashboard, which is accessible via the frontend WordPress website when embedding the admin app shortcode on a page.
Add the custom CSS to the corresponding option and update the file.

With this method, some custom CSS snippets might not work as intended, as the SSA plugin style settings might overwrite the CSS you added. Adding the important tags (!important) at the end of the CSS snippets for the code section should fix the issue. However, feel free to write to our Support Team if you need further assistance.
Related Guides
-

MemberPress Appointments for Memberships
-

Appointments Tab for Member Dashboards
-

ssa/appointments/customer_information/get_defaults Filter
-

ssa/templates/get_template_vars Filter
