In this document:
Introduction
After upgrading to the Plus, Professional, or Business Edition, you’ll need to manually install the newly purchased edition. We’ll walk you through installing a premium Simply Schedule Appointments edition.
If you were using the free Basic Edition before, all your settings and appointments will be transferred over automatically.
Installing a Newly Purchased Edition
Download the zip file for the premium edition from your account or the confirmation email.
After your purchase, you’ll get a link to download the zip file via email. You can also click the link to download it at the bottom of the Purchase Confirmation screen.
If you can’t find the email with the zip file included, please feel free to log in to your SSA account here on this site. You’ll be able to download the zip file under the Downloads tab.
Mac and Safari Users
Safari on the Mac automatically expands the zip file for you (helpful in most cases, unhelpful in the case of WordPress plugins) and moves the zip file to the Trash.
So you have two options…
- Grab the zip file out of the Trash.
- Right-click the folder on your Mac, choose Compress to create a new zip file, and then upload that zip file to WordPress
2. Installing the Purchased Edition Zip File
In your WordPress admin dashboard, go to Plugins > Add New, then choose Upload Plugin (toward the top left) and upload the zip file.
Are you having trouble installing your plugin? Visit our article with common reasons why users can’t install plugins on WordPress.
3. Activate the Plugin
Once uploaded, click the button to Activate it.
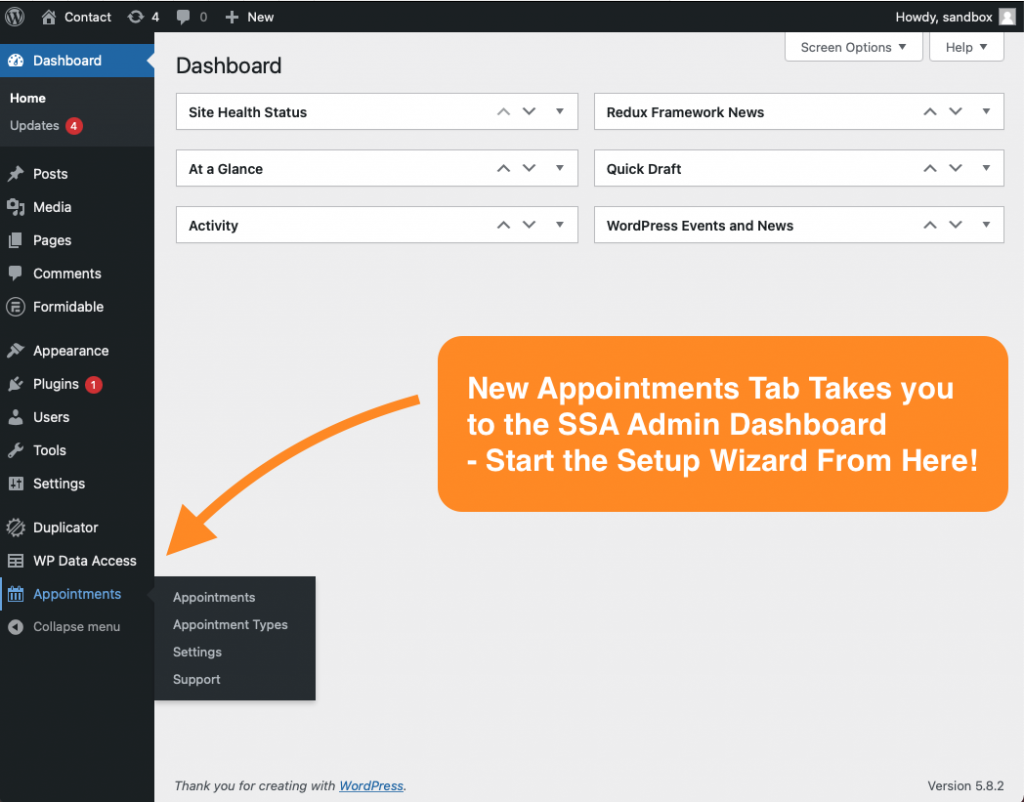
Now, you can view your appointments, appointment types, and settings by selecting Appointments from the left-hand menu in the WordPress dashboard.
4. Add Your License Key
But, you’re not done yet! To ensure you’re set up to get the newest updates and bug fixes moving forward, you’ll need to enter your License Key.
Where to get your license key:
- Collect it from the same purchase email you received with the plugin zip file.
- Log in to your account to copy your license key.
- Or, contact our support team, and we can help you find your license key.
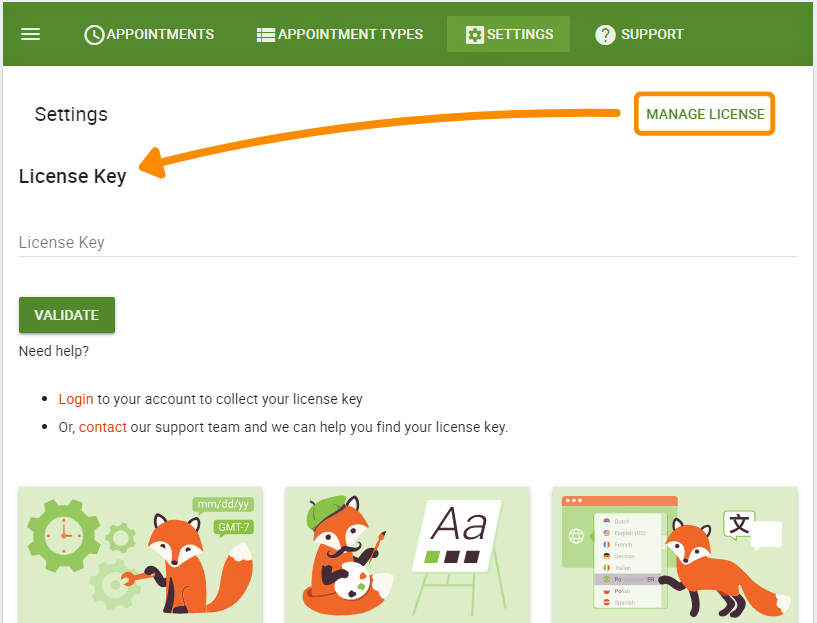
Once you’ve copied your license key, go to Appointments > Settings > Manage License and enter your license key.
5. (Optional) Uninstall the free Basic Edition
Now that you have your new premium edition installed, you can go ahead and uninstall the basic Free edition if you were using that beforehand.
And, don’t worry! Any plugin settings or appointments that you made before are preserved and will automatically transfer over to your new premium edition.
Get Started!
That’s it! You’ve successfully upgraded to your new premium edition. Use our After the Setup Wizard guide to find out more about your new features.