The COVID-19 pandemic has sparked widespread change in the way we live our lives. This is especially true in business. In business, video calling has become the norm and choosing the platform to host your company’s video calls is incredibly important. Given that Google provides its users with an internal video solution, many business are asking how to schedule a Google Meet.
The great news is that the platform is super easy to use. Of course, you’d expect this from any Google product. You can use a WordPress plugin such as Simply Schedule Appointments to integrate both platforms. What’s more, it’s just as simple to do.
In this post, we’ll show you how to schedule a Google Meet, and how Simply Simply Schedule Appointments integration with Google Meet will allow you to easily schedule video calls with customers and clients through your website.
Let’s jump in.
What Exactly Is Google Meet?
Google Meet is Google’s flagship video meeting solution.

On a part of Google Hangouts, it’s now been spun-off, revamped, and turned into its own platform. It’s an easy-to-use but robust video conferencing solution, and it’s quite popular at the moment.
Throughout Google’s ecosystem of products, like Gmail and Google Calendar, you’ll find Google Meet integrated for easily setting up quick video calls.
Next, we’ll take a quick look at the benefits over Google Hangouts, its predecessor, in more detail. We’ll also see what Google Meet has going for it over its competition, like Zoom and Microsoft Teams.
Why Use Google Meet Over Other Video Conferencing Solutions
While Google Hangouts wasn’t a bad tool, it was aging. The current global pandemic has meant video calling platforms need to offer much more functionality to users than they have past.
Given this, Google Meet has a bunch of modern features and functionality that benefit businesses:
- You’re able to scale participants better and more in line with modern needs.
- There’s better security for users and moderators.
- You can use High Definition (HD) images and video across all devices using Google Meet.
What’s more, users don’t have to be within the Google ecosystem to attend Google Meet calls. This is great for adoption, and means you’re able to bring others onboard without ever having to sell the platform to or onboard them.
While Google Meet is one of many video calling services, there are some standout reasons to go with it over solutions such as Zoom and Microsoft Teams. We’ve mentioned it a few times, but Google’s ecosystem is a big selling point. Much like Apple, if you’re using Gmail, Google Calendar, Google Drive, and other services, you’re automatically integrated with Google Meet (allowing a ton of added functionality without any setup).
Lastly, Google Meet is 100% free-to-use, as well as cross-browser and cross-device—making it ridiculously easy for all parties to attend meetings (whether they’re at their computer or using mobile while on-the-go).
Now, let’s take a look at how to schedule a Google Meet.
How to Schedule a Google Meet
To start, creating a Google Meet is a breeze. First, head to the Google Meet home page, then click the New meeting button:
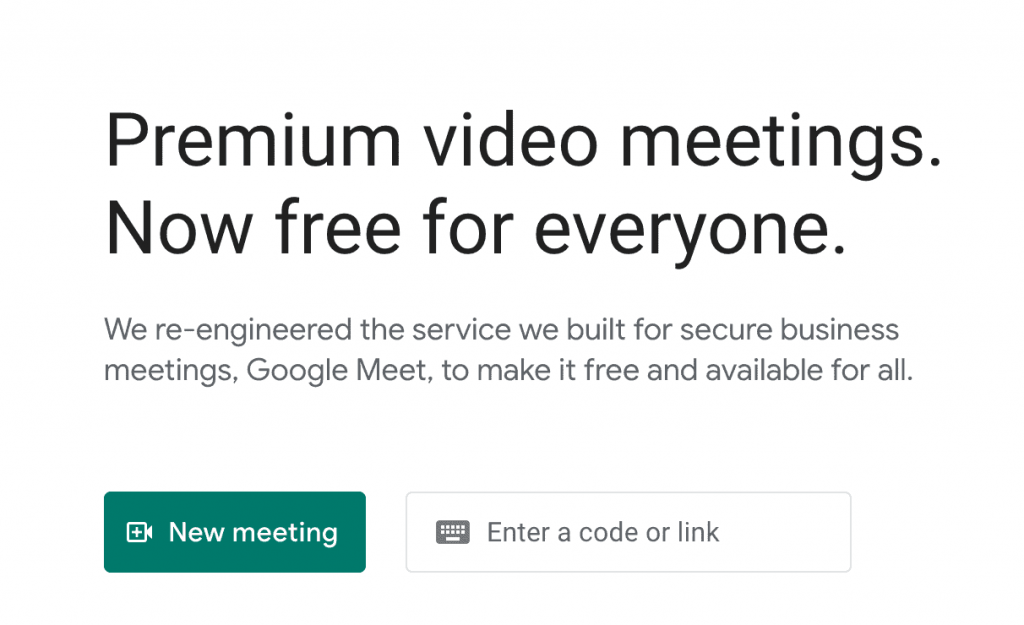
You’ll see three options here. One is to start a meeting straight away, while the other two let you put something in place for later:
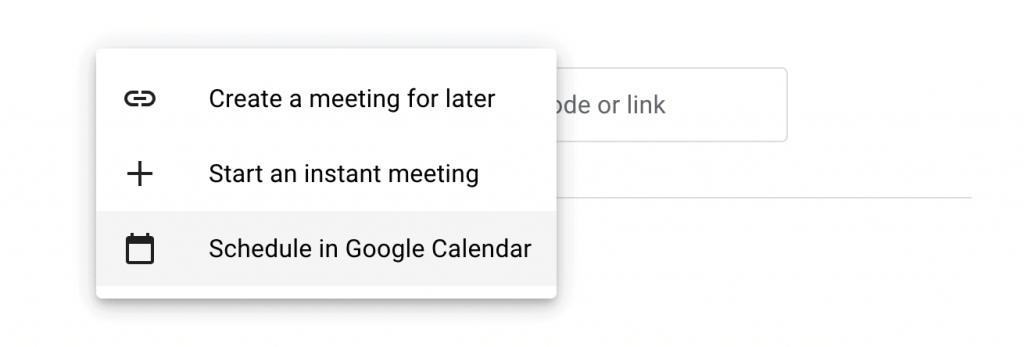
Clicking Create a meeting for later pops up a dialog box containing a URL to a meeting space:
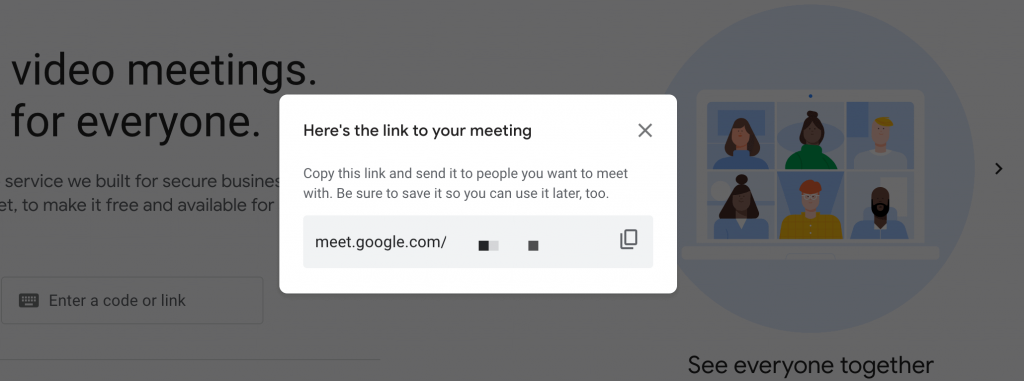
This is going to be great for quick “get-togethers” – those times where you say, “Shall we meet in about ten minutes?” Here, you browse to the URL and jump into the meeting.
That said, you may want to formalize the meeting. Think of situations such as group chats, client onboarding, and other similar scenarios. For this, you’ll want the Schedule in Google Calendar option.
Clicking this will bring you to a standard Calendar entry screen. For our purposes, you’ll want to note the Google Meet URL:
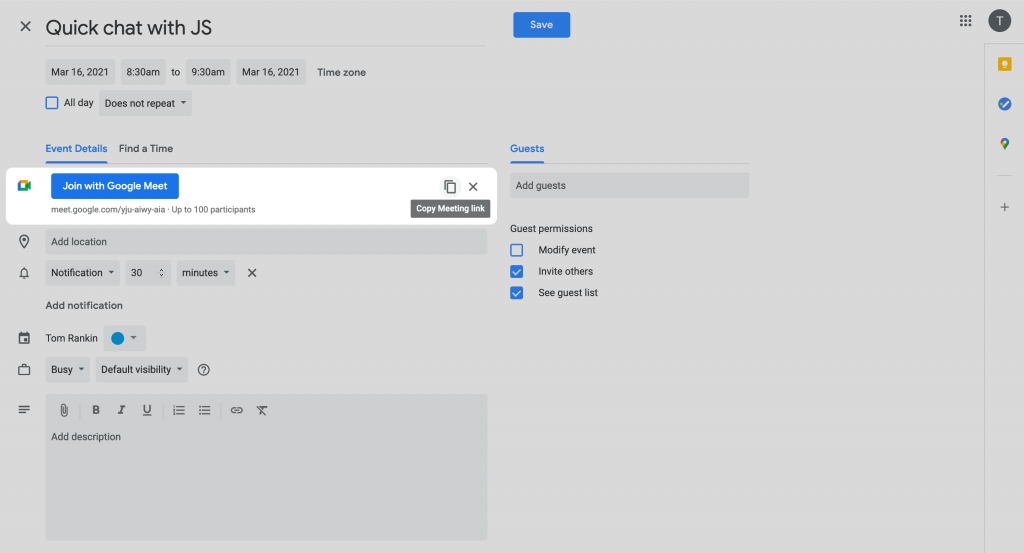
Once you invite guests, you’ll need to click the highlighted Modify event checkbox.

Once you save your changes, your guests will get invites, and you’ll be able to join the meeting on the time and date you’ve set.
How to Use Google Meet and Simply Schedule Appointments to Schedule Clients and Customers
If you’re a Simply Schedule Appointments customer, you’ll understand how much it streamlines your meeting schedules. Though, if you integrate our plugin with Google Meet, you’ll have a full-featured appointment booking system that’s automated, too.
Quick note: For this, you’ll need to have a premium Simply Schedule Appointments edition and Google Calendar sync enabled for your site. If the latter isn’t something you’ve done before, don’t fret—we’ve put together a complete guide to getting there.
Enabling Google Meet Web Meetings Integration
When you’re ready, head to Appointments > Settings > Google within WordPress:
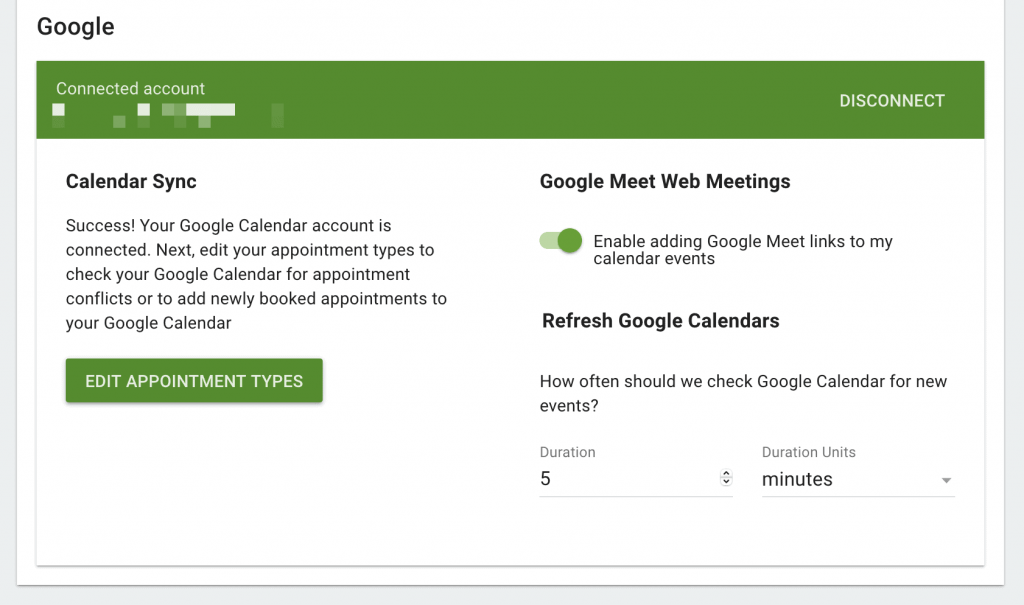
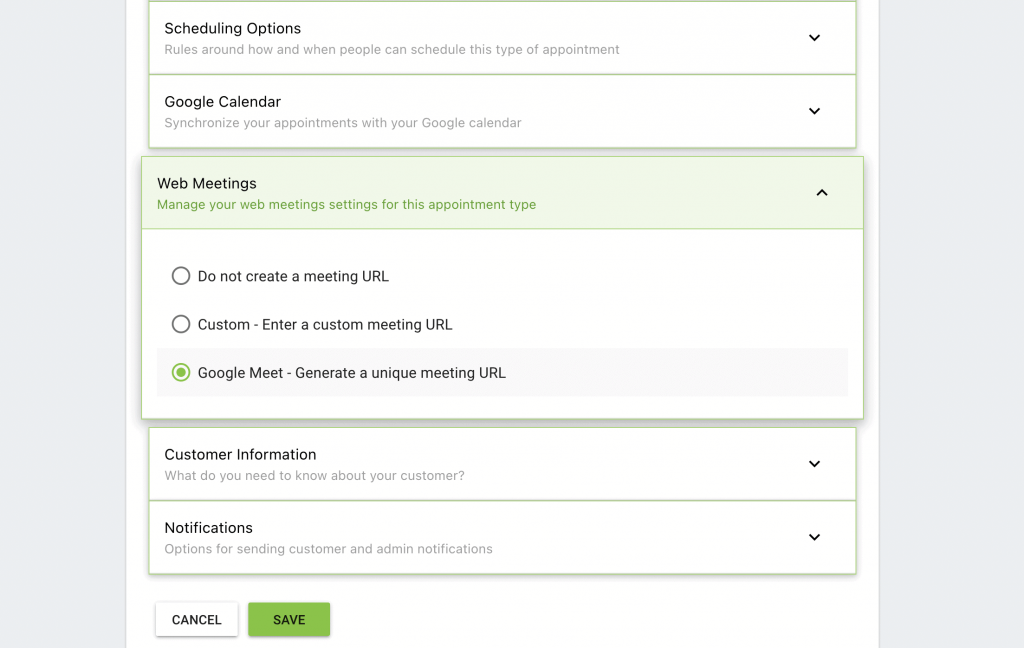
From here, make sure the Google Meet Web Meetings option is toggled on, then click the Edit Appointment Types button. If you choose an appointment type and scroll down to the Web Meetings section, you’ll be able to generate Google Meet URLs for that given appointment type’s bookings:
Finally, remember to sync the appropriate Google Calendar, whether it be yours or your team’s calendar, from the relevant menu:
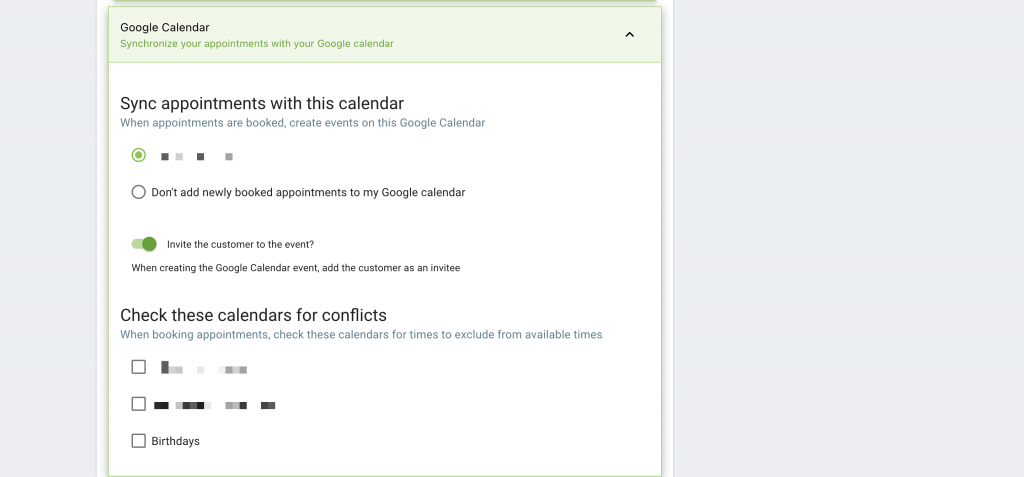
Once you save your changes, any booking through this appointment type will include an auto-generated and unique Google Meet link for the meeting to take place at.
Voila! You’ve now fully integrated Google Meet with Simply Schedule Appointments are have a fully-automated booking system for your website visitors—whether they’re prospective customers or existing clients.
The Bottom Line
It’s a great idea to give clients as many channels as possible to contact you. Adding a Simply Schedule Appointment’s booking form that’s integrated with Google Meet can generate more business for you by making it easy to for prospective customers to view your availability and get in direct contact with you at the height of their interest (not to mention, without all the back-and-forth of email).
Have questions/remarks about this integration and its value to businesses offering their services online? Let us know in the comments section below!
Featured image credit: Tima Miroshnichenko.


