The Formidable Forms Integration with Simply Schedule Appointments is truly a formidable and powerful combo. Are you ready to harness the sheer strength and majestic nature of Formidable Forms Appointment Booking? Equip your gear for learning, for this will be a fantastic quest.

Quick Overview
- Editions:
- Plus (v2.3.4.0)
- Professional (v3.3.4.0)
- Business (v4.3.4.0)
- Helpful Links:
The Impressive Formidable Forms
Formidable Forms is valued as one of the most advanced WordPress Form Builders out there. With their solution-focused forms, dreams can be turned into reality. It’s easy to simply drag and drop fields into existence while still remaining elegant and ultimately formidable.
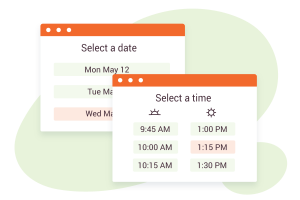
Simply Schedule Appointments and Formidable Forms integrate together to create sleek and powerful appointment scheduling forms. The possibilities are endless. Peppering in some add-ons opens the door for even more neat combinations and payment options.
With that said, let’s dive into setting up Formidable Forms for an amazing adventure with SSA.
Starting Formidable Forms Appointment Booking
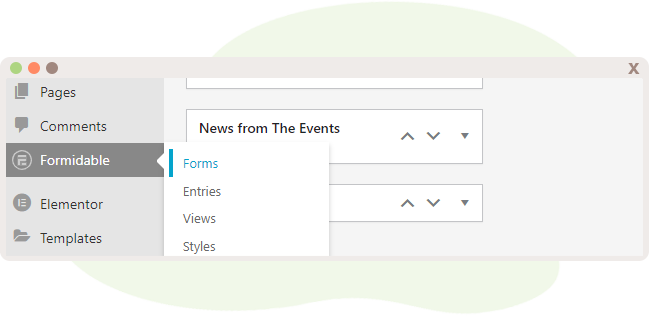
Within the WordPress Admin Dashboard, ensure that Formidable Forms is installed and activated so that the fun can begin. Establishing that it’s ready to go will allow us to click the wonderful Formidable link in the sidebar, which will open a little slide-out hover navigation. Select “Forms” because we can just dive right into making a form off the bat.
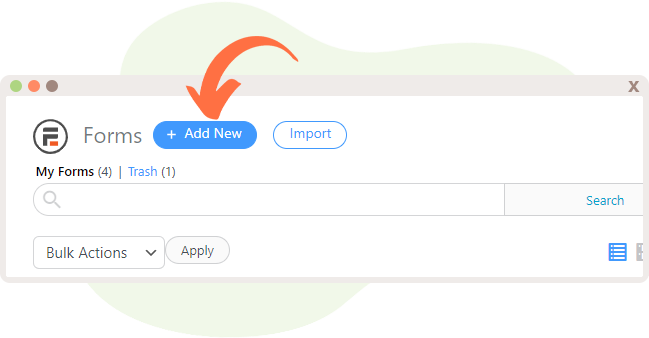
See that cool little button saying “Add New”? Click that to kick-start the form-making process.
The really neat thing about this is that a variety of templates and options are offered before the creation of a form to help save time and show what awesome things can be done. Perhaps it could inspire new ideas.
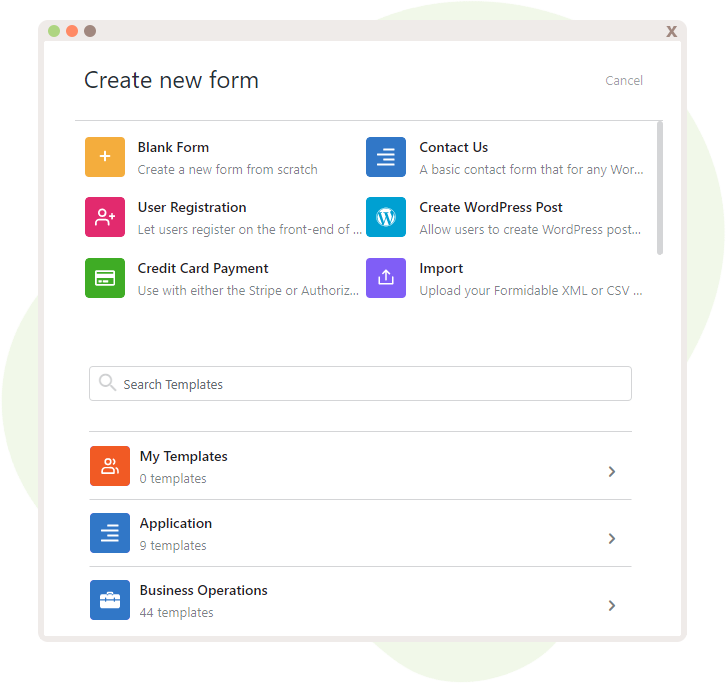
But, for now, creating a Blank Form is a great way to understand the form builder better. Name your newest creation and give it a description if you desire.
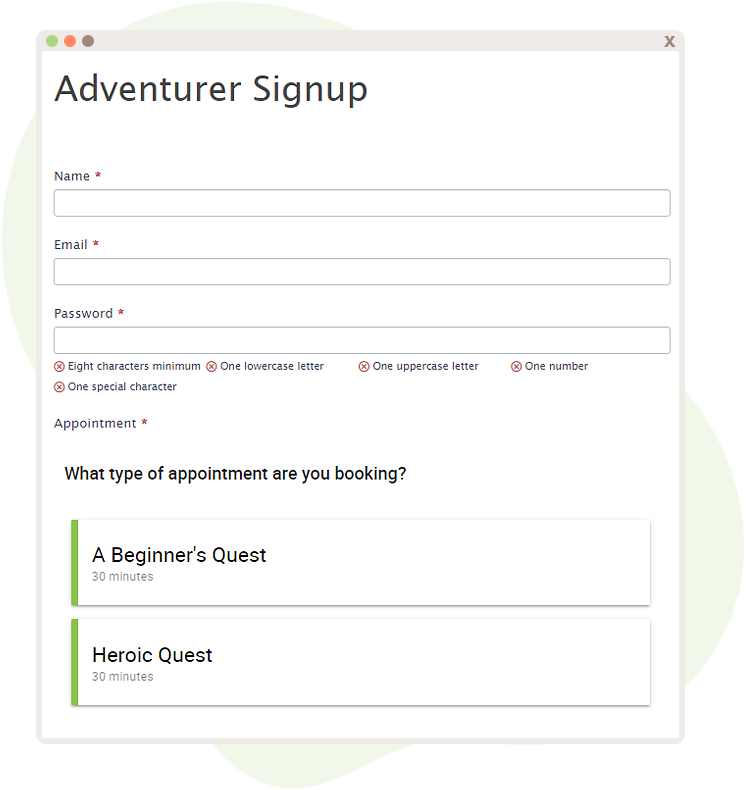
In order for Simply Schedule Appointments to function properly, the Name and Email fields are a must. Slide those into the form along with the Appointment field.
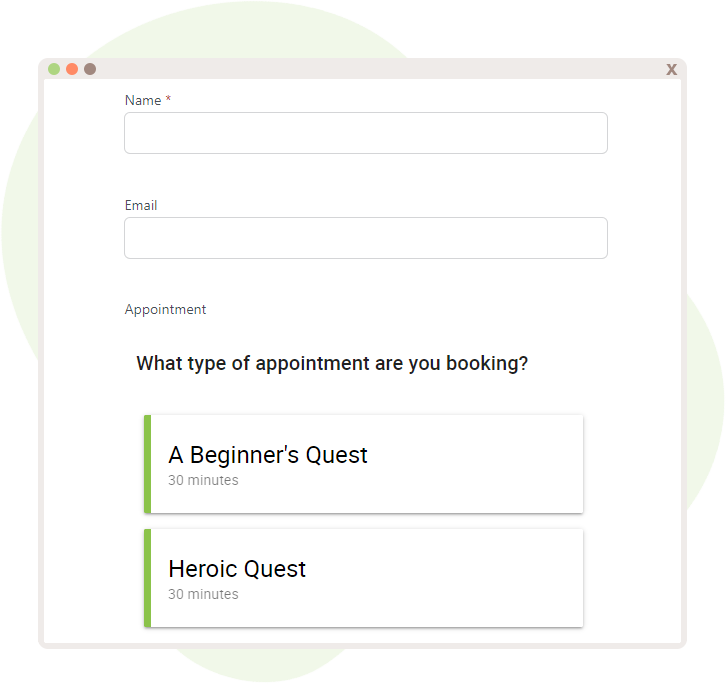
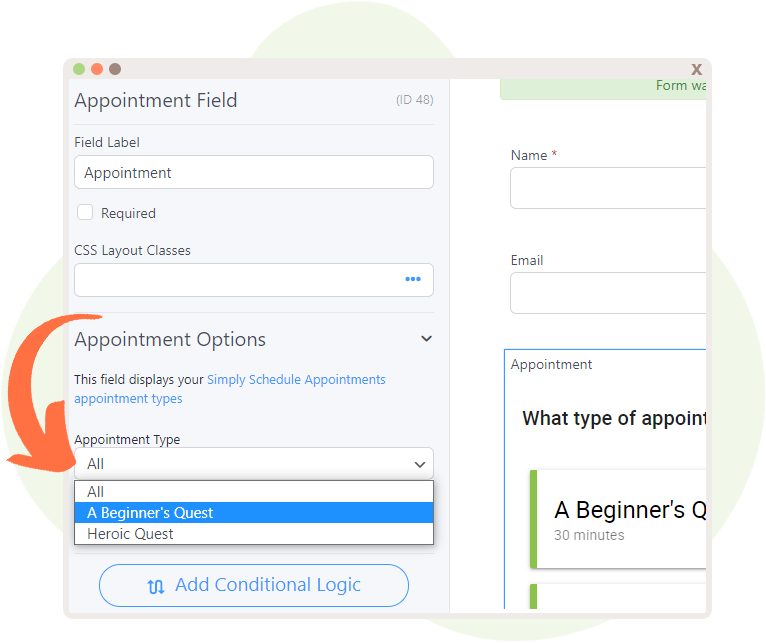
And, that’s that! If you want to display only a certain Appointment Type instead of all of them at once, editing that Field’s Options will allow you the chance to do so.
Update it and the form is complete. Now you can slap the Formidable Form into a post, page, or widget and people can get bookin’.
Leveling Up
Of course, there’s nothing better than leveling up and applying new things to your awesome form to make it even more versatile. Let’s glance over some options and add-ons that would thoroughly improve the Formidable Form Appointment Booking experience by miles.
Conditional Logic
Conditional Logic allows the ability to show certain fields based on a specified choice or input. Basically, if someone were to select Choice A, it would spawn one outcome, and if someone chose B, it would spawn a different outcome.
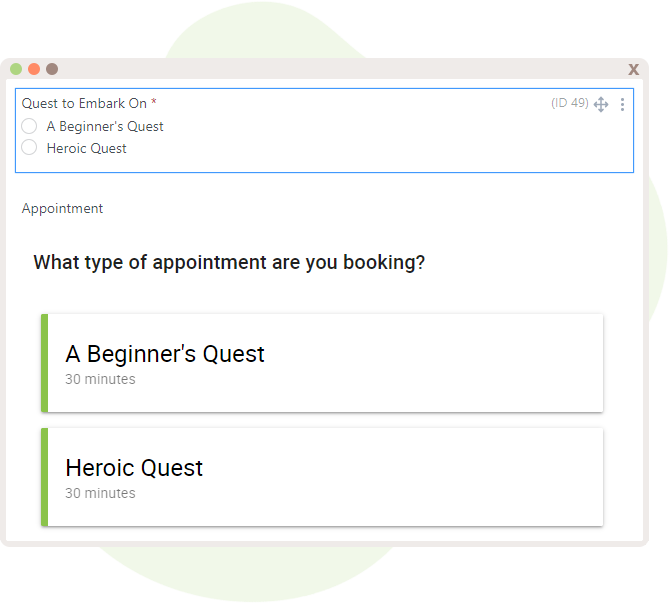
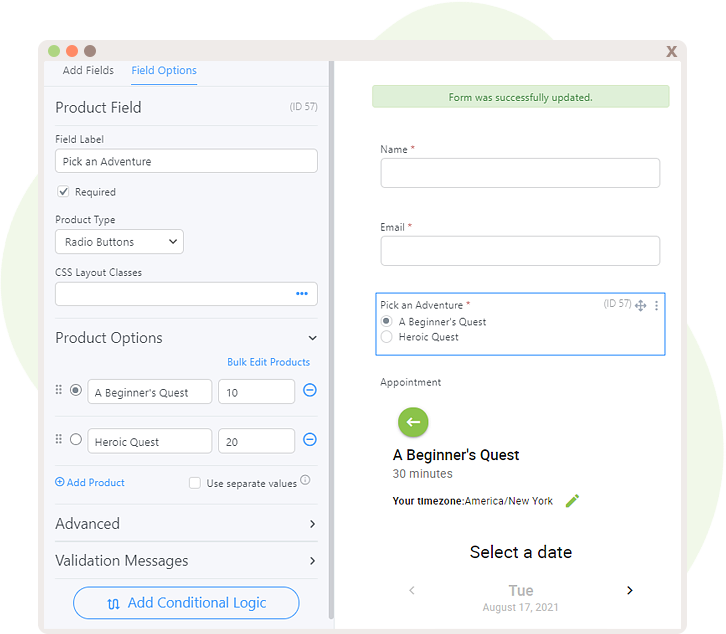
Taking our previously created form, let’s drop in some radio buttons for funsies. The Radio Buttons field should preferably be before the Appointment field.
Click back on the Appointment Field and change it to display a specific Appointment Type. Within the Advanced Options, that lovely “Add Conditional Logic” button should be singing to you now. Tap it and it will fade away to reveal a set of options. Certain fields can be hidden or shown if any or all match certain statements.
In this case, we want to show certain Appointment Types based on the input the user chooses. With that said, let’s set it up like so…
It will now show this Appointment field once [option 1] is selected. Duplicate this field to save time and change the Appointment Type to the other one, and edit the Conditional Logic so that it will display for [option 2].
Ta-da! Now the form is looking extra spicy and turns others green with envy.
Setting Up User Registration
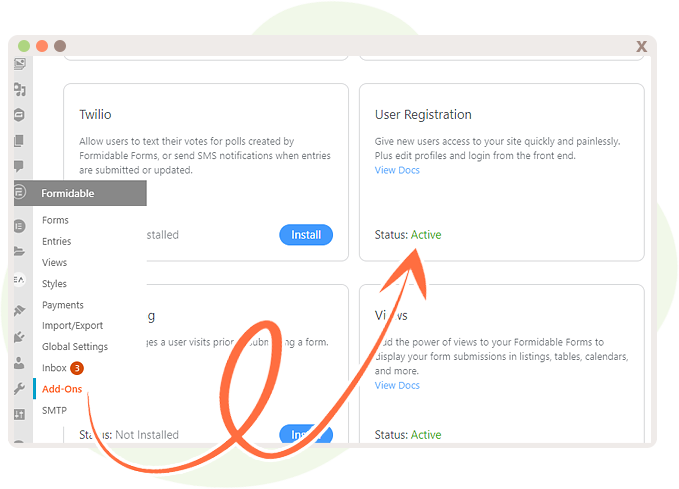
Of course, we simply must dive into some very useful Formidable Forms add-ons that would blend swimmingly with this integration.
Within the sidebar for Formidable Forms, select “Add-Ons” and install “User Registration”.
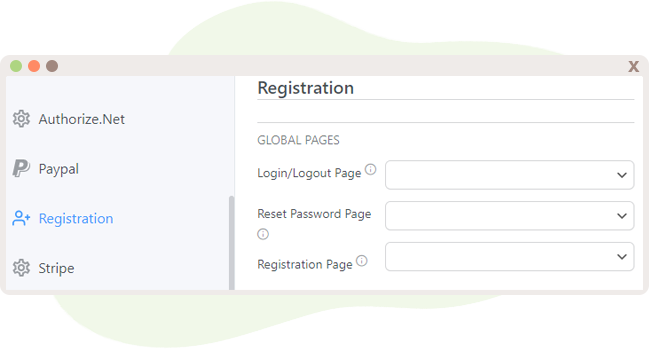
With that said, it’s time to configure it. Choosing “Global Settings” will allow us to access the Registration settings.
There’s a variety of options laid out here to customize to the heart’s content, and they’re all completely optional. A login/logout page can be set, where users will be redirected when they try to access the admin dashboard.
It’s almost super important to note that if you use the login/logout page option, please insert the login form within that page first. If you don’t, you’ll be locked out of your site, and that’s not fun. There’s a guide that addresses this here.
A Reset Password page can also be set within this form, but again, there must be a reset password form on that selected page.
On top of that, a Registration Page can be set as well, and it will require a registration form to be on that page already.
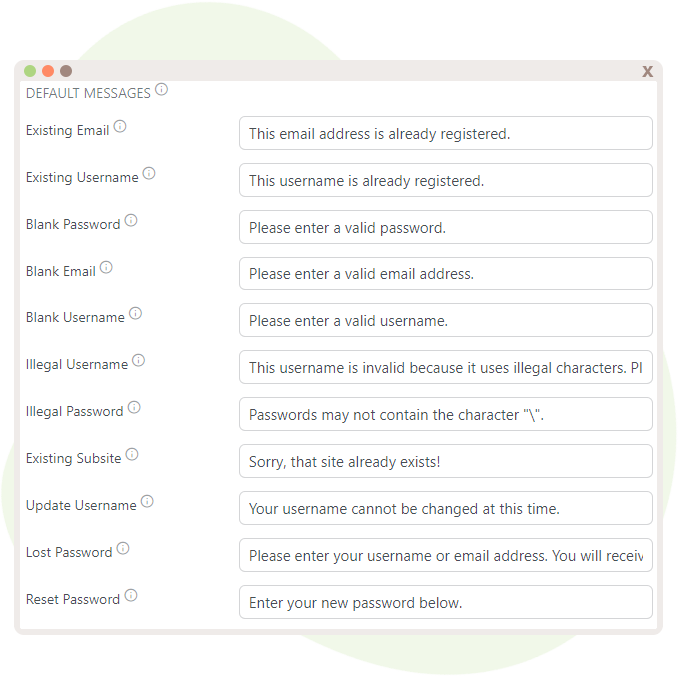
Default Messages can also be configured! As it is, Formidable Forms already has some premade for you so you can hit the ground running worry-free. But, it can be customized to what you desire still.
Missing something? We’re not done yet–we need to implement Simply Schedule Appointments into the mix!
Advancing the User Registration Quest
Creating a Registration Form of your own is truly liberating. Utilizing the ultimate weapon that is Formidable Forms to create it works perfectly for your registration needs. So, let’s get to it!
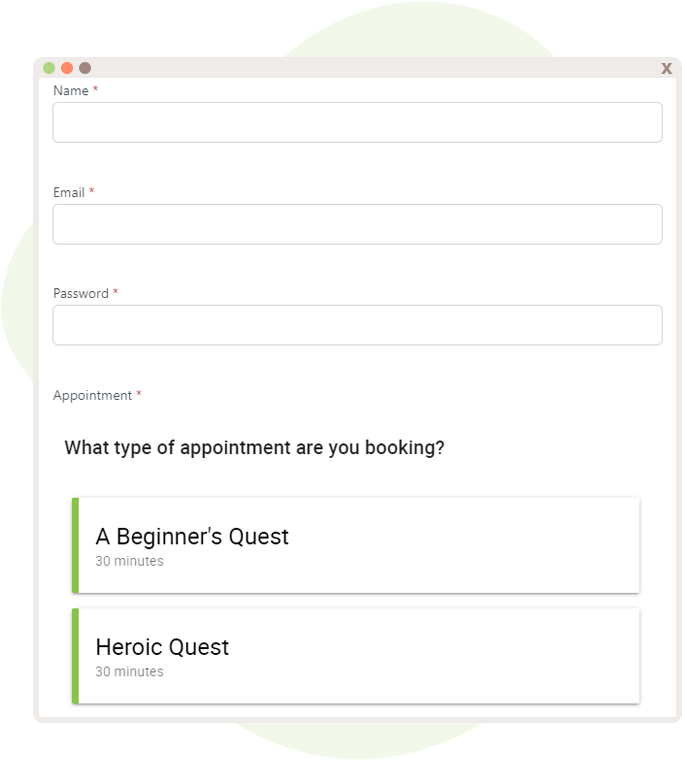
Create a brand new shiny form. Within this form, the Name and Email Address fields must be tossed into the mix for this to work. You could also add in a Password field–that is definitely quite helpful. A little creativity can go a long way, so more fields can be utilized if necessary to truly customize the user experience and capture more data. But, for the sake of this form, we’ll keep it simple. Throw in that Appointment field early on too so you don’t forget.
Then, head on over to your form’s Settings, and click the Actions & Notifications tab. There will be a neat array of form actions that materialize, but for now, we want that lovely “Register User” action to be used.
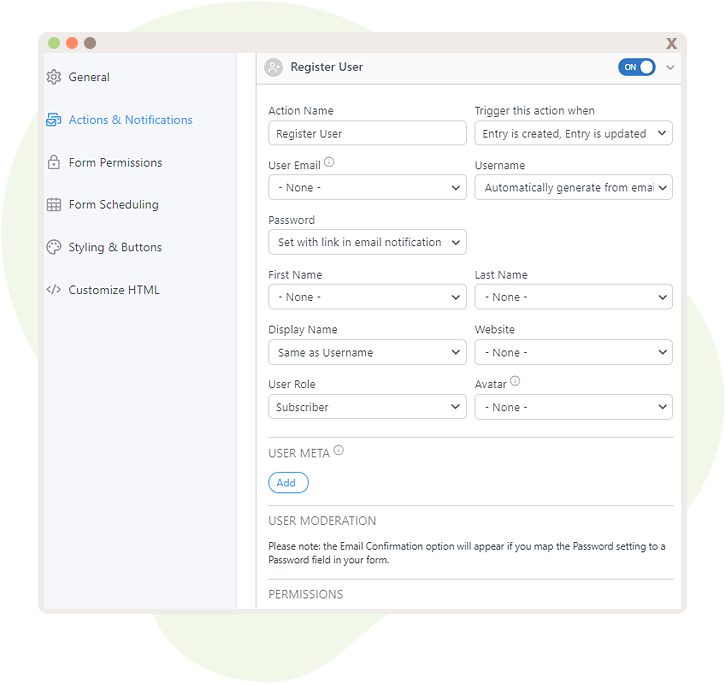
A name can be granted to the action just to keep track and for easy reference. Nobody but the admin will be able to see this, so label away.
You’ll also spot a variety of options now. The neat thing is that a trigger can be set. Since this is a user registration form, we want this action to be performed when an Entry is created, Entry is updated.
Continue this process by mapping fields from your form with the registration options.
And, that’s it! Users can book an appointment and have their information stored with ease. If you integrate this concept with the Members plugin and plop in an Upcoming Appointments module on a page for registered users, they’ll be able to access this information anytime. Formidable Forms also has a nifty guide on how their User Registration that dives into more details.
Payments
As with any Form Integration with SSA, we love to discuss how versatile the Payments add-ons are. At this time, there are currently several Payment add-ons that can be installed, such as Authorize.net, PayPal, and Stripe. In the end, it is all a matter of preference and convenience. Before getting started with the fun, it’s best to install the add-on beforehand.
Let’s use a good ol’ fashioned basic form. Add in the usual suspects–the Name, Email, and Appointment fields.
In order for this to work seamlessly, the Product field needs to be dropped into the fray. This determines the price of the appointment or service. Ideally, the Radio Button product type would be great for this situation. The prices for each Appointment Type’s corresponding choice can also be tossed into the mix here.
Again, we can use Conditional Logic to show certain Appointment Types according to the choice selected and rearrange the field so it’s before the Appointments fields.
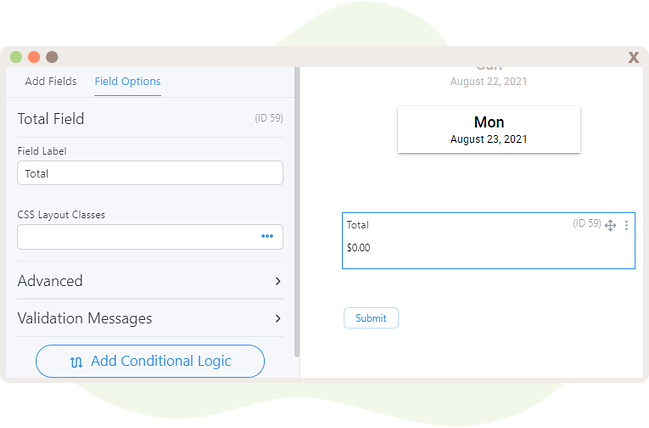
Now plop the “Total” field into the form and nudge it after everything! Or, well, nudge it wherever you want, that’s all up to you.
Just when you think we’re finished… there’s more! There’s no way this payment will actually go through without some kind of gateway to bridge users and payments. With that said, click “Settings” and “Actions & Notifications” for that form.
Authorize.net & Stripe
Since we have a payment field in this form, we need to Collect a Payment.

A name can be given to spiffy it up, along with an awesome description. The Amount is basically asking for the total, so be sure to use that cool little Total field here. As a side note, conditionals can be utilized as well!
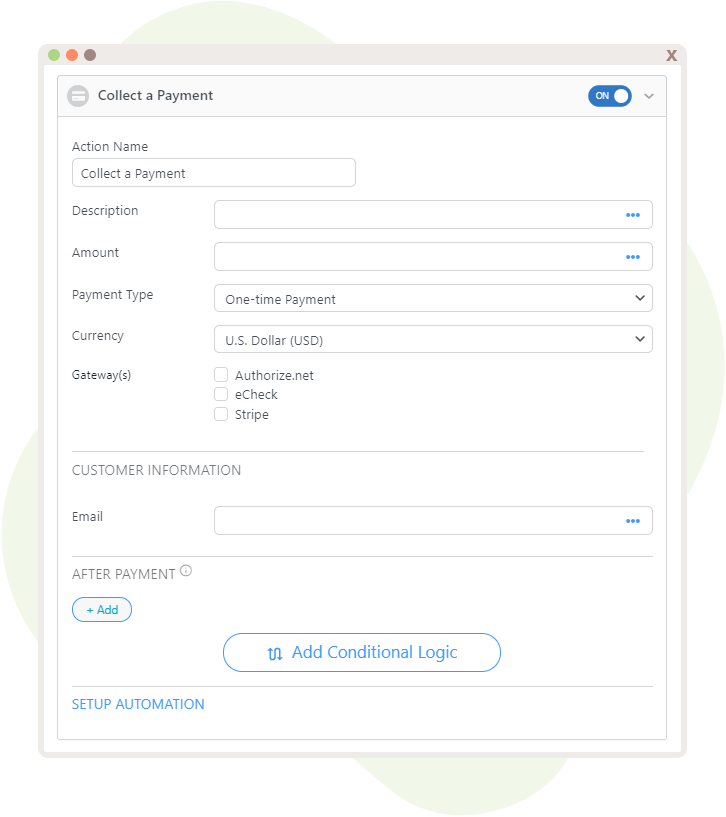
The Payment Type can be set to a One-time payment or a Recurring payment. Since this is a payment for an appointment, it’s best to use the One-time Payment option. The currency can be chosen as well to your preference. The available method for this Payment strategy can vary between Authorize.Net, Stripe, or an eCheck.
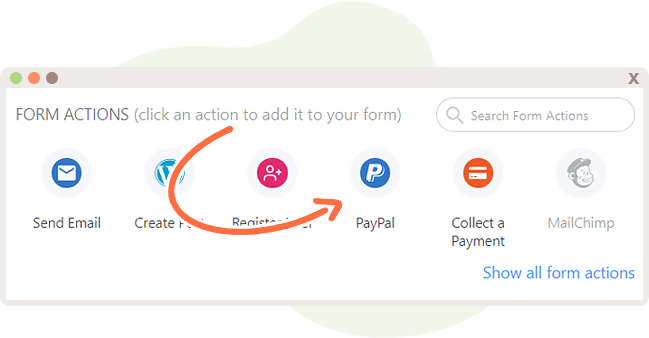
PayPal
Another way to set up the payment is to utilize the PayPal action.
This follows a similar setup as the previous method. The Item Name can be determined here by the field that’s selected, along with configuring the PayPal email, Amount field, Payment type, and Currency. Interestingly enough, the Payment Types featured through this add-on can be One-Time payments, Donations, and Subscriptions.
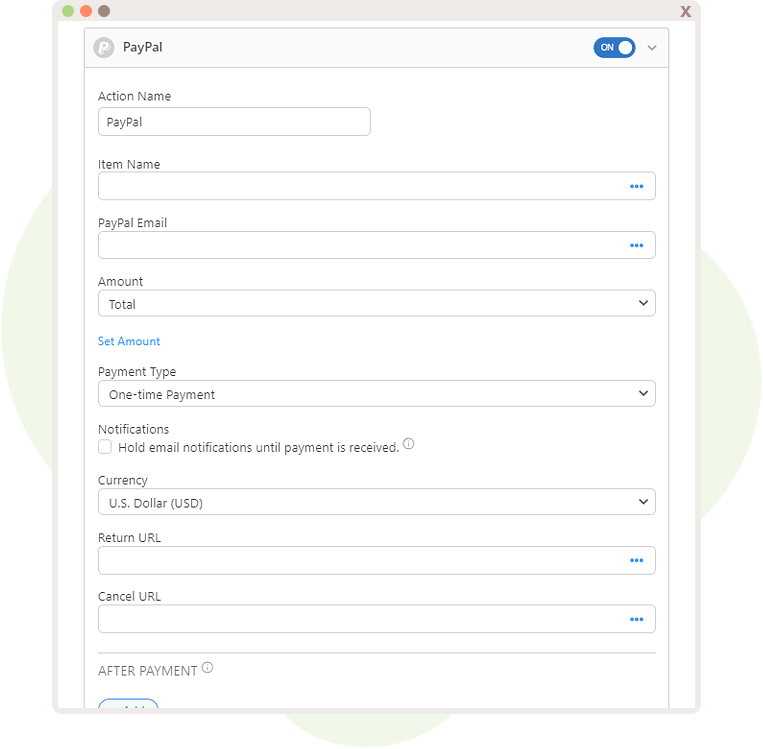
That ultimately concludes the PayPal setup for the Formidable Forms Appointment Booking process!
Endless Possibilities
There’s a wide variety of ways that Formidable Forms and SSA can be put to use together. We discussed several options in the previous walkthroughs, but there’s no harm in indulging in even more juicy possibilities.
Utilizing Formidable Forms Appointment Booking, appointment forms can be created for Touring special places. Implementing the User Registration Add-On will assist users with being able to log back in and check up on when their tour appointment will be. And, for added peace of mind, the reCAPTCHA field can be enabled to prevent any sort of malicious activity from invading your forms. Normally, you shouldn’t run into these unfriendly characters though.
Zapier is another fantastic add-on that could be implemented with Formidable Forms and SSA to create the ultimate concoction of joy and convenience. This nifty add-on would allow users to connect with hundreds of applications. A great way to utilize this in a work setting would be if there were multiple Dog Trainers taking Training appointments for canine buddies. The Evernote application, for example, would come in handy for allowing the transmission of information from Formidable Forms to Zapier to Evernote in order to keep track of clients and add their own personal notes.
A Formidable Journey
This adventure draws to a close with the quest completed, resulting in a wonderful reward within your grasp. Cherish it, for the Formidable Forms Appointment Booking be a powerful ally that will aid in conquering a variety of form setups. We hope that you’ll enjoy this seamless integration and benefit from all of the wonderful options and customizations available.