In this document:
Introduction
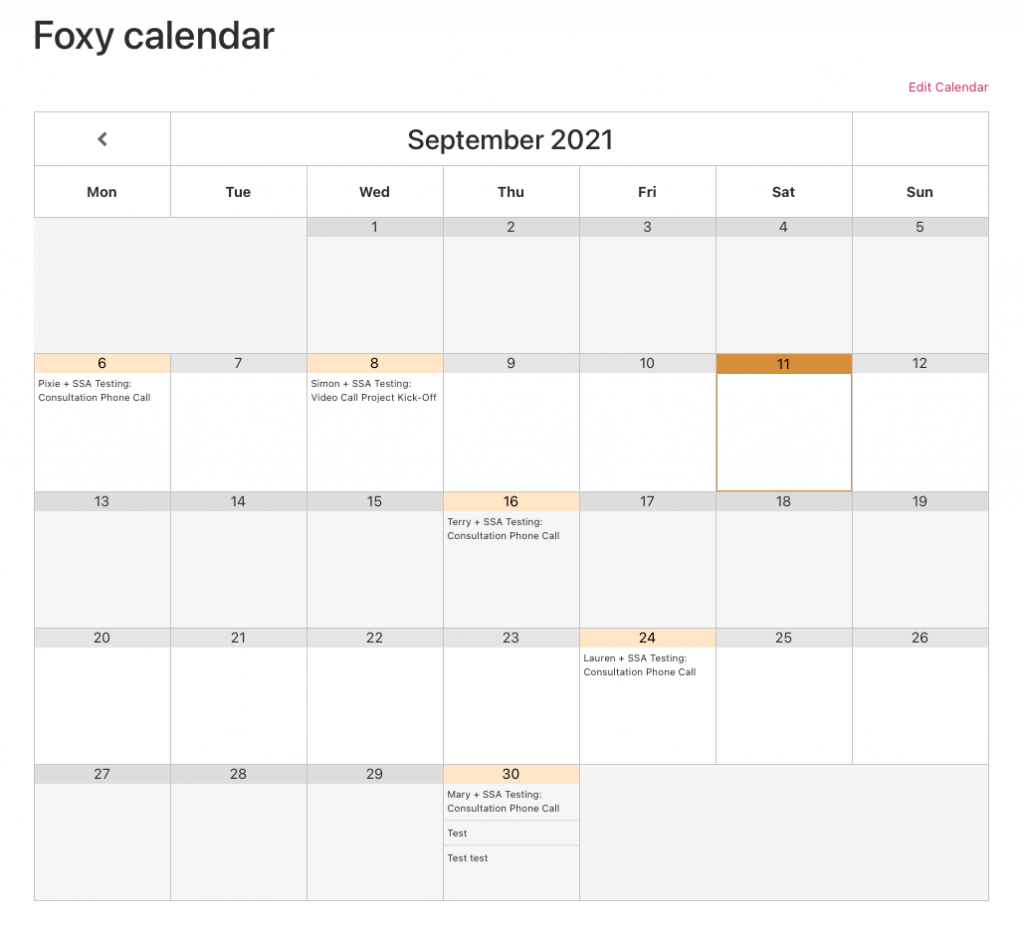
Using the Simple Calendar plugin, you can display your Google Calendar events that will include bookings via the SSA plugin on your site. Make sure to first set up Google Calendar sync for your plugin in order to sync the SSA appointments onto your Google Calendar. This will only work if you use Google Calendar sync along with the Simple Calendar plugin.
Use this to:
- Give customers a quick overview of your booked schedule.
- Place it on a password-protected page for employees to see bookings.
This guide is written for users already using Google Calendar Sync in SSA. This is not a comprehensive guide to this plugin.
Resources
Plugin Support
If you need help setting this plugin up or getting more customization tips, please reach out to the Simple Calendar team.
As much as we’d like to help you, we are not experts on this plugin’s code, errors, and usage rules.
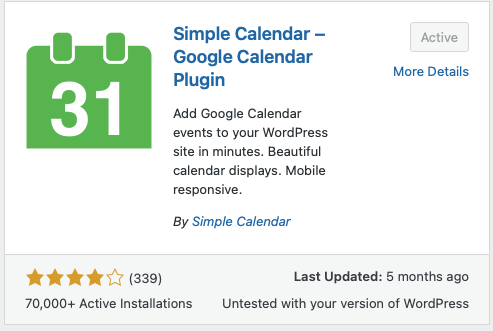
Activate and Open the Simple Calendar Plugin
Install and activate the Simple Calendar (SC) plugin to your site.
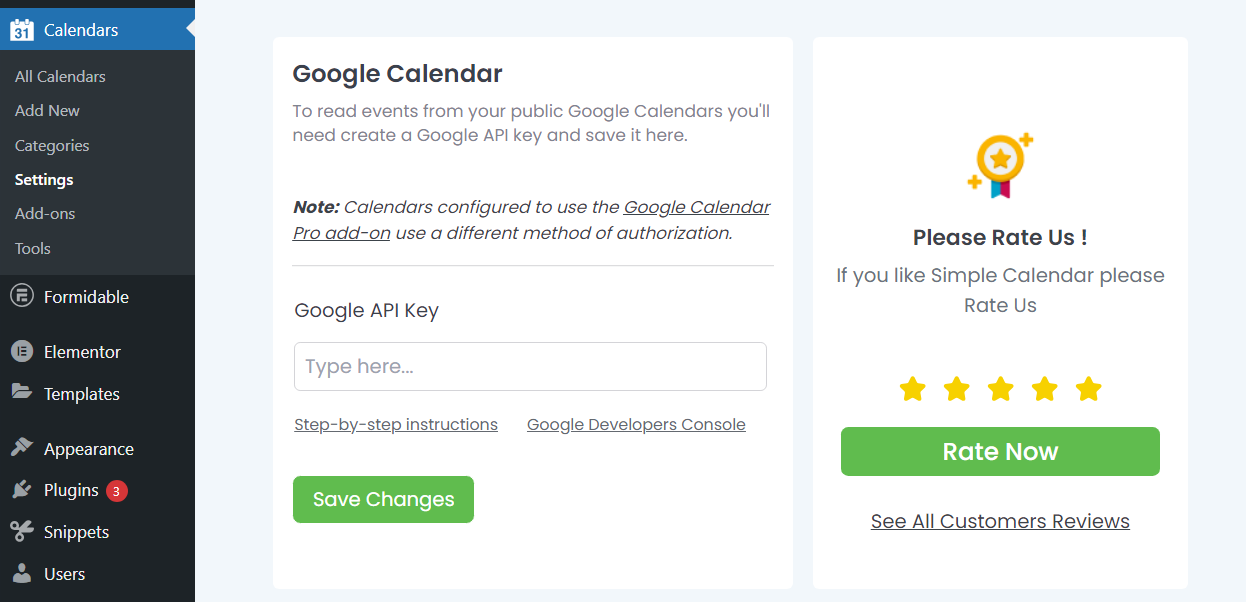
Now you should see a new tab added to the WordPress Dashboard called Calendars. From here we want to go to Settings.
This is where we’ll need to enter the Google API Key we create in the next step.
Create an API Key
This will be a lot like setting up the Google Calendar Client ID and Secret. We will start by opening up the project we have set up from our existing Client ID/Secret guide.
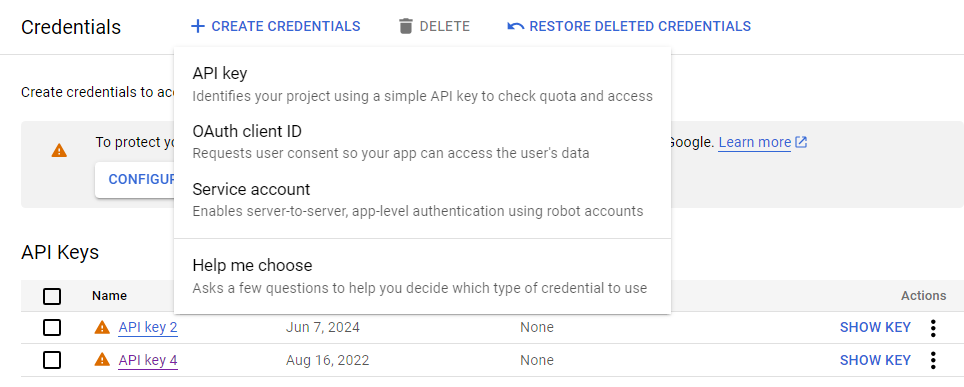
Quick link to Google Developer Console
We’re going to go to APIs & Services > Credentials. From there, click on + Create Credentials > API Key. This will automatically create a new key that you can copy and paste right back into the SC settings.
Create a SC Google Calendar
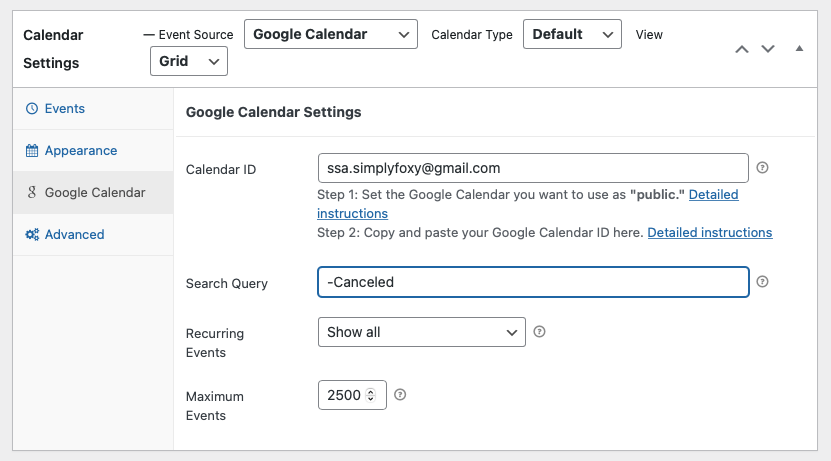
Now that you have the API key saved, go to All Calendars > Add New. And from here, we’re going to focus on a couple of settings.
Google Calendar Tab:
- Calendar ID
- Search Query
Collecting the Calendar ID
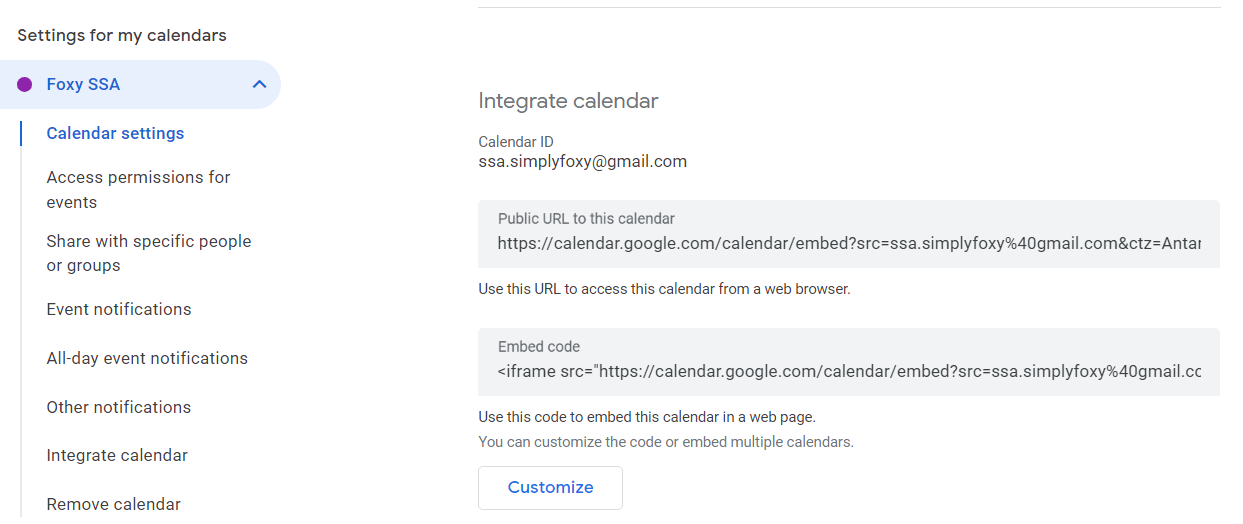
Go to your Google Calendar and head to Settings (cog in the upper right-hand corner). From here, click into the Calendar that you’d like to incorporate into your site.
You’ll need to grant this calendar public access permissions and copy the Calendar ID at the bottom of the settings page.
(Optional) Adding Search Query
If you’d like SC to not show Canceled appointments, you can add the following to the Search Query field:
-Canceled
If you’re interested in learning more about Search Queries, check out this guide.
Display the SC Google Calendar on Your Site
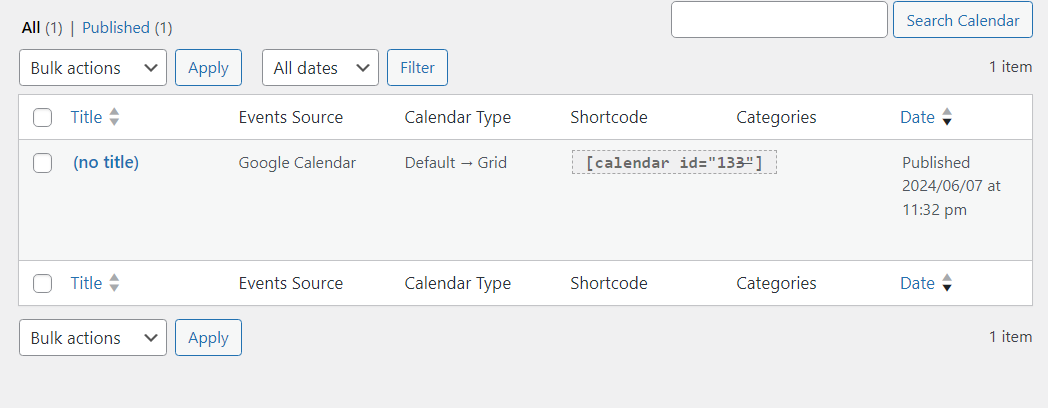
After filling in the required Google Calendar fields, publish the new calendar. Now to embed the calendar onto your site, you’ll need to copy the calendar shortcode and paste it into your page or post.
Related Guides
-

MemberPress Appointments for Memberships
-
Appointments Tab for Member Dashboards
-
MemberPress FAQ
-
Google Calendar Not Syncing or Checking for Conflicts