Introduction
You can reach the Simply Schedule Appointments Admin Dashboard Page by going to the WordPress Dashboard > Appointments.
This is where you can manage all your Appointments, make changes to the Booking Calendars or Settings and contact support with one click.
Appointments Tab
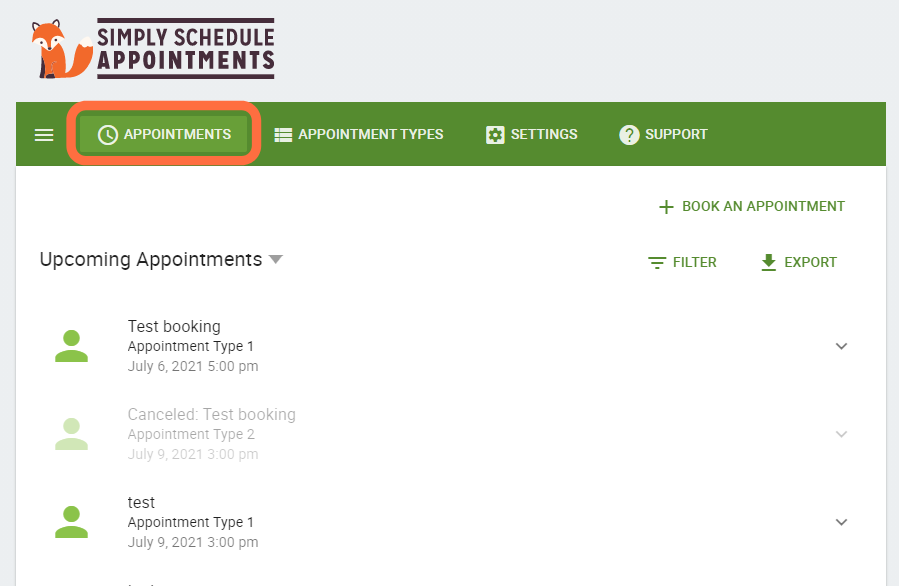
Inside the Appointments tab, you can do all of the following:
- View all your upcoming,past, or a date range of appointments.
- View more details for a single booked appointment.
- Search all of your appointments
- Filter through appointments to view a specific set of bookings.
- + Book An Appointment button to quickly help you book an appointment for a customer.
- Export all appointments currently loaded on the page.
Viewing Your Appointments
You can easily view all of your upcoming and past appointments and your appointments within a specific date range, Appointment Types, and status you want to view.
You can also easily view more details about a specific Appointment to cancel, reschedule, edit, or delete that appointment.
Searching Appointments
Search your appointments using keywords from the booking information such as the user’s name, email, or anything else collected via custom fields.
Filtering Appointments
You can also filter your appointments by just the Appointment Type and the status.
Booking An Appointment as Admin
By clicking on the + Book An Appointment button, you can easily schedule an appointment for a customer yourself.
Exporting Appointments
You can easily export all visible appointments on the screen by clicking on the Export button. This will download a .CSV file that you can then analyze or import into your CRM.
Appointment Types Tab
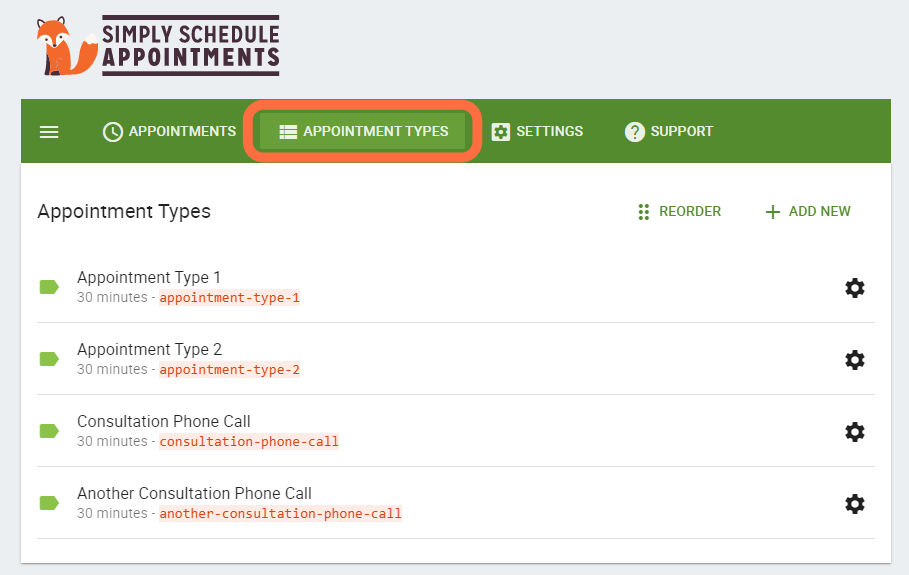
The Appointment Types tab helps you manage your Booking Calendar, Availability, and Booking Form all in one place.
Inside the Appointment Types tab, you can do the following:
- Use the + Add New button to create a new Appointment Type.
- Edit existing Appointment Type to update their settings by clicking on it or clicking on the cog to help you edit, clone, or delete that Appointment Type.
- Reorder your Appointment types to organize them.
- Use the dropdown to view Deleted Appointment Types and Recover them.
Creating New Appointment Types
Click on the + Add New button to create a new Appointment Type. To see all the different settings you can change, look at our Appointment Type settings overview.
Edit Existing Appointment Types
You can easily edit, clone, or delete an Appointment Type by clicking on the cog.
You can also bulk edit your Appointment Types to edit them all at once.
Reordering Appointment Types
Use the Reorder button to organize by dragging and dropping elements in your Appointment Type list. How they’re ordered is displayed to your visitors with the [ssa_booking] shortcode.
Viewing Deleted Appointment Types and Recovering
You can use the Appointment Types dropdown to switch to the Deleted Appointment Types view. This will list all the Appointment Types that were deleted but remain in your database.
From here, you can click on them to view their settings or use the cog to Recover them.
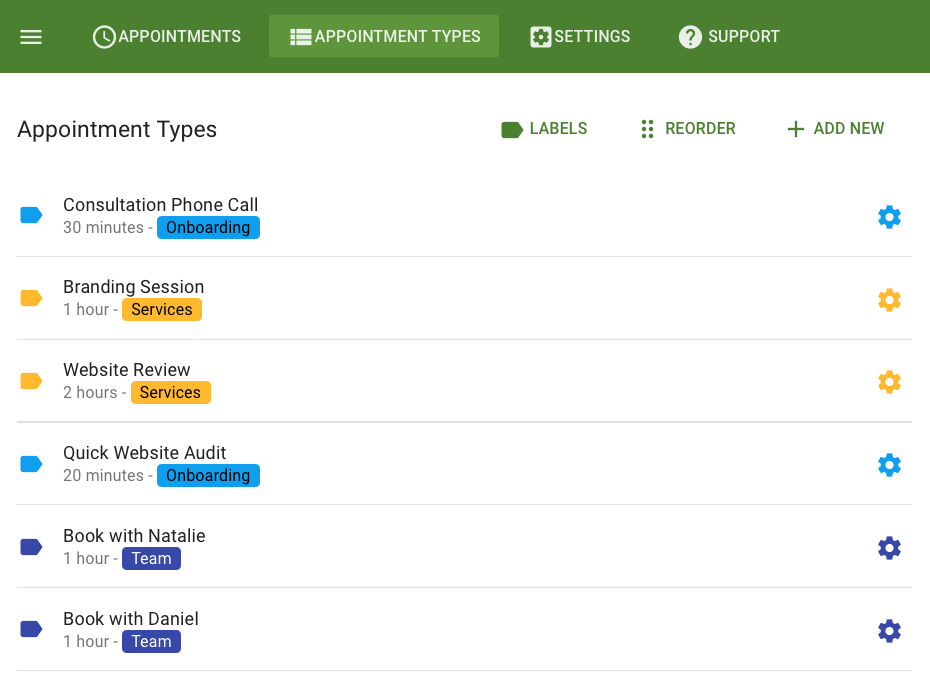
Filter Using Labels
Each Appointment Type is assigned a label with a color and name. Use the Labels button to help you filter using the labels.
Learn more about using Appointment Type Labels.
Settings Tab
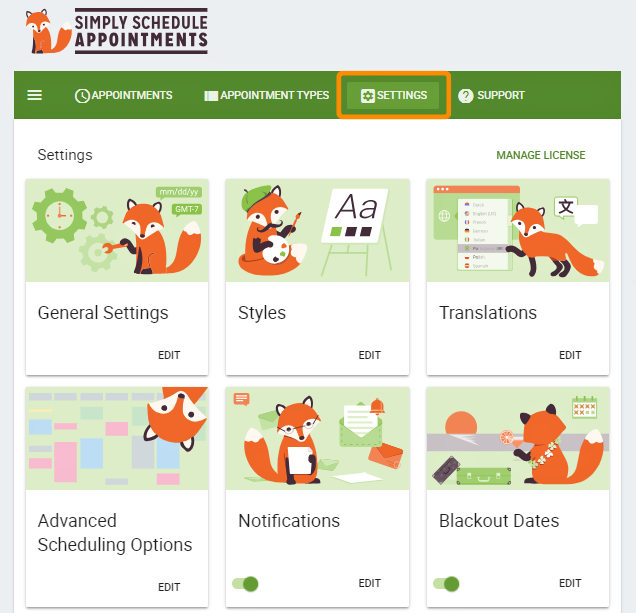
The Settings tab helps you manage the following settings:
General Settings
You can manage your Timezone, date and time formats, default admin email, and other settings. More information can be found in our General Settings guide.
Styles
Style the booking calendars by changing the colors, font, and padding. You can also add custom CSS to personalize your Booking Calendar more.
Translations
Download translation packs here to change the language of your Booking Calendar.
Blackout Dates
Easily create blackout dates to prevent customers from booking certain days.
Advanced Scheduling Options
Fine-tune your availability. You can allow users to book only within a specific time period or allow them to access the Booking Calendar within specific dates.
Or, give your Appointment Types independent availability.
Sync your Google Calendar to view all your bookings or automatically block off dates and time slots with events.
MailChimp
You can add customers to your MailChimp marketing lists directly from the booking form.
Zoom
Easily add and generate a unique Zoom link to each Appointment Type.
Webhooks
Use Appointment actions to trigger other apps or services in Zapier using the Webhooks integration.
Payments
Set up Stripe or PayPal to accept payments for each Appointment Type
Tracking
Utilize Conversion Tracking to analyze data, such as when a user books an appointment on your page.
Team
Set up Team Members and assign them to certain Appointment Types.
Miscellaneous Settings
- Manage Your License to ensure you’re using the most updated plugin version!
- Import or export your settings to transfer your settings to a different WordPress site
Developer Settings
Use Developer settings to configure Developer settings and Developer jobs.
Support Tab

Inside the support tab, you can use the Contact Support Team button to send our support team a message. Feel free to reach out anytime you need help or have a question.
And, also get a quick overview of the plugin and site diagnostics. As well as review your license status and plugin version.
Related Guides
-

Booking Appointments
-
Cancel, Reschedule, Edit or Delete Bookings
-
Searching, Filtering, and Viewing Bookings
-
Let Employees Manage Admin Page